Facebook allows you to share your beautiful moments through photos and videos but have you ever experienced a blurred image while uploading? It is frustrating to experience this, and you don’t have to worry now. Understanding the reasons behind this issue and using the appropriate method can help you fix blurry pictures on Facebook, and you will have better-quality images.
It decreases the clarity of the photos and won’t provide you with the quality you want. You might also have a blurry image if you upload a low-resolution picture. The quality compression factor also places a crucial role during the upload process.
In this article, we will learn different reasons that are causing blurry images in detail, and you will also learn how to fix it while uploading on Facebook.
This way, you will be able to upload sharp and clear images and have the attention of your viewers. If interested, you can also learn to fix blurry Instagram stories.
Table of Contents
Why is my Facebook Pictures Blurry?
There are many reasons why your pictures look blurry when uploaded on Facebook. The reasons are:
Low-Quality Picture
A low-quality image doesn’t have the necessary resolution and sharpness when uploading on Facebook. It appears blurry and distorted when displayed.
Due to the use of low-resolution pictures with insufficient pixel density, your image will appear blurry.
Poor Internet Connection
If you upload or open an image on Facebook during an unstable connection on your devices, you have to face blurry pictures. Due to intervention in your network connection, uploading and display of photos become difficult, and it will lead to blurriness.
Screenshot Image
One of the reasons for blurry pictures is taking a screenshot and uploading it on Facebook. It results in a lower quality compared to the original. The image quality of a screenshot is low compared to the original one.
When you upload such a screenshot, Facebook further compresses it, and the picture gets distorted. So, to avoid blurry pictures, never upload by taking screenshots.
Do you want to record your screen? But do not know how to do it. Don’t worry! Here we have an article that will teach you to effectively record screens on your Android device.
Non-Supported Image
Facebook supports many image formats like JPG, PNG, and HEIC. It is best to use JPG or PNG files for better image quality.
The PNG file size should be below 1 MB to avoid pixelated images. Photo size greater than 15 MB is also not recommended to upload.
Using uncommon image formats is also a reason for the blurriness in photos when viewed on FB.
Photo Compression
Facebook optimizes photos for storage and loading speed because they use compression and resizing algorithms. It can have benefits in efficient data management, but excessive use of this can result in image quality loss and blurriness.
Uploading Large Pixels Images
If you try to upload images with high pixels, Facebook will automatically compress the file, and the pixels will reduce. Due to this, Facebook will make the pictures blurry. So it is best to use the standard pixel size of 1200 x 630 px.
Facebook App or Browser Issues
Sometimes the problem occurs due to a non-updated Facebook app, and you may face some compatibility issues. There might be some technical glitch due to which you can’t fix blurry pictures. So, it is necessary to update both things.
Viewing Device and Screen Resolution
Your device and its screen resolution affect the quality of pictures on Facebook. You have uploaded a high-resolution image, and due to different device and screen settings, the viewing experience may vary.
By understanding the reasons behind blurry pictures on Facebook and following the recommended solutions, you can overcome this issue and showcase your images with clarity and impact.
In the next section, we will learn practical steps to fix blurry pictures on Facebook.
How to Fix Blurry Pictures on Facebook?
Blurry pictures don’t have clarity and sharpness, so it gives an unpleasing experience to viewers. To remove blurriness, you can follow the below-mentioned ideas.
Turn Off Your Data Saving Mode
Turning on your Data Saving Mode saves your data a lot and eventually saves your money. But due to this, you have to face low-speed internet and low-quality image upload on different platforms.
Here are a few steps you can follow if you want to turn it off. If you are using FB Messenger with mobile data instead of WiFi, there is an option in the app to run it in low data by enabling data-saving mode on Messenger.
Using iPhone
1. First of all, locate and open the settings app on your iOS (iPhone or iPad).
2. Tap on the Wi-Fi or Cellular button for which you want to turn off your Data saving mode.
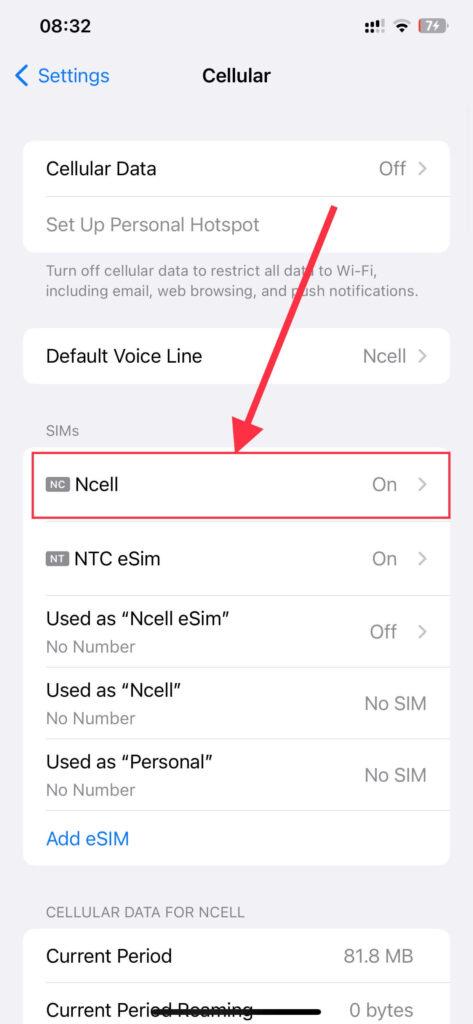

3. After that, choose Wi-Fi networks or your available SIM cards on your phone for which you want to turn off your low data mode and click on their name.
Using Android Phone
For Android users, almost all mobile phones have different steps to turn off the data-saving mode. So for stock Android users, Open the settings app on your phone, and tap on Network and Internet.
After that, click on the Data Saver button and turn it off. So basically, go to network settings and find the Data usage or Data access section to turn it off. You can also search for this at the top of the setting app.
Update the Facebook App
If you haven’t updated your Facebook app for a long time, try updating your app first. For that, open your Google PlayStore for Android devices or the AppStore for iOS devices to update the FB application.
A device running an old software version may also have an old version of the Facebook application. So it is recommended to update the latest versions to your devices to improve the quality of images.
Avoid Downloading and Re-uploading
Refrain from downloading and re-uploading any photos to Facebook. These actions can result in additional compression and diminished quality. Instead, directly upload the original photo files from your device.
Upload High-Resolution Images
High-Resolution images contain more detail and clarity, and Facebook compression also doesn’t affect too much if it has high resolution.
Capturing this kind of image needs a high-quality camera. But remember the recommended file size because high-resolution images have larger file sizes. This way, you can make your picture not blurry.
Have a Strong Internet Connection
A stable internet connection is crucial while uploading images without any blurriness. Ensure you are connected to a reliable Wi-Fi network or have a fast mobile data signal before uploading your pictures.
Avoid uploading pictures when you have a weak or unstable connection, as it may lead to data loss and result in blurry visuals.
Setting Up Your Phone Camera to Improve Quality
You can set up camera settings on your phone and improve image quality. You can change some settings like, the resolution and aspect ratio. It will enhance the image quality. Make sure to capture images on the best devices as well.
Clearing Cache and Refresh
Sometimes clearing the cache would not help directly to fix the quality of the blurry image. But it will help to load the page faster while uploading. Refreshing your browser may sometimes work when there is some technical glitch.
Too much cache can sometimes cause storage problems which will affect the performance of your device. You can only clear the cache on your Android devices. However, you are not allowed to do the same on iOS devices.
You can also clear the cache of your Facebook app through your iPhone. Follow these steps to remove your phone’s cookies and cache from websites you have visited using the Facebook mobile browser on your iPhone.
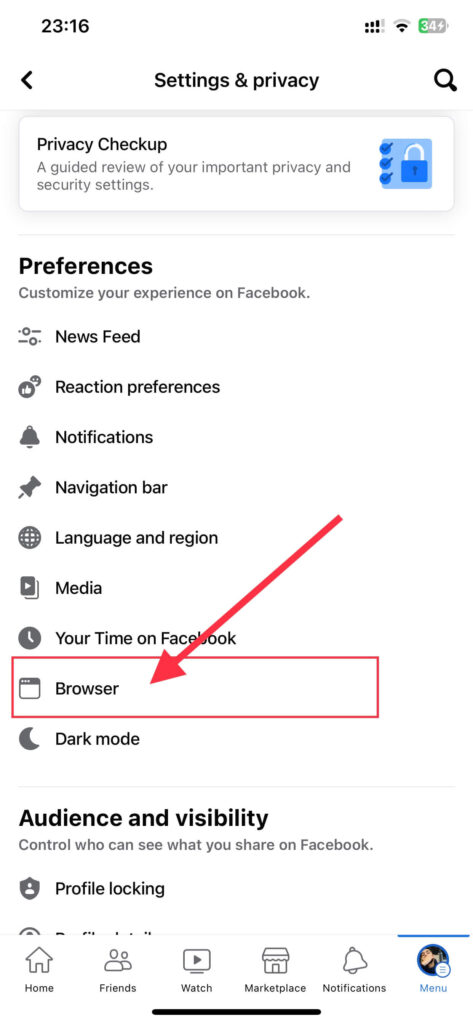
1. Open your Facebook account and click three horizontal lines at the bottom-right corner.
2. Now, scroll a little down and tap on “Settings & Privacy,” and then click on “Settings.”
3. Again, scroll down and click on “Browser” under the Preferences section.
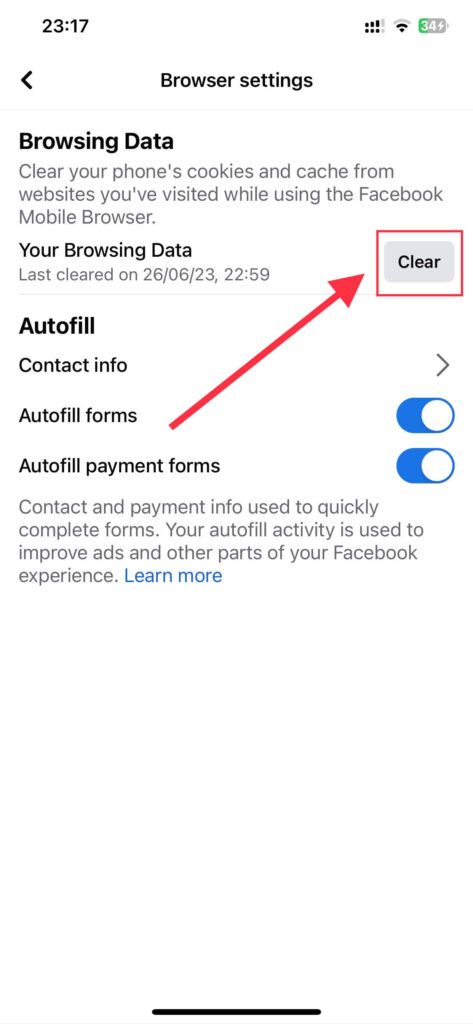
4. Finally, click the clear button under the browsing data section.
How to Fix Blurry Profile Pictures on Facebook?
The profile picture is the identity of your Facebook account. A blurriness picture will make it hard to find out someone. So, it is necessary to fix blurry profile pictures on Facebook.
Make sure to use a high-resolution image for your profile picture. At least 320 pixels wide and 320 pixels tall image is necessary for better quality. Make sure to resize the image if it is too large to maintain clarity.
Also, remember to check the internet connection before uploading your profile picture. We recommend you upload a profile photo using WiFi instead of mobile data.
This way, you can get rid of the blurriness on your profile photo. Previewing the profile picture before saving it is also necessary. You can also follow the same methods for a cover photo if it has blurriness.
You realized that all the photos you captured were blurry. But you don’t know how to fix it. You can enhance quality and fix blurry pictures before uploading to Facebook and solve the problem.
FAQs – Fix Blurry Pictures On Facebook
There might be several reasons for blurriness in your picture. Facebook compression, low-resolution images, and slow internet connection are the main reasons for the above problem.
Your iPhone pictures may look blurry when uploaded due to low-quality image transfer from iPhone to Facebook, internet issues, and app setting on iPhone. Make sure to check your application setting before uploading any picture.
Yes, your internet connection can affect the image quality on Facebook. A stable and fast internet connection is necessary during the image-uploading process for better image quality. You will have pixelated images if the internet is slow.
Yes, you can use third-party photo editing tools to enhance the image quality before uploading them to Facebook. You can reduce the likelihood of blurry images using features on those editing tools before posting. However, be careful while editing because overdoing may degrade the quality.
Conclusion
In conclusion, blurry pictures on Facebook can be a frustrating experience, but you can fix this by implementing the right solutions. You should upload high-quality images, optimize your device and Facebook settings, and maintain a strong internet connection.
Follow the step-by-step solutions outlined in this article, like enabling HD Uploads and using high-resolution images. By following these recommendations, you can have clarity, sharpness, and quality in your photos.
Now you can share your memorable moments with friends and family, knowing your pictures have better quality when uploaded on Facebook.


