Everyone on Facebook needs to frequently change their profile picture to keep their friends updated about them. Changing your profile image is a simple process. You can use either the Facebook app or the website to update your profile image.
A user’s account’s main image on the Facebook platform is their profile photo. It is often a picture of the Facebook user and is used to identify the person, which makes it easier for other users to locate and engage with them on the website.
In addition to changing your profile, you can also add avatars to your profile.
Reasons to Change Facebook Profile Picture
Let’s first learn why individuals change their display pictures before learning how to do it. Some of the explanations for why people add profile images to their Facebook include:
- Personal Branding: People add a display photo on their Facebook to represent themselves and let their friends and family know who they are.
- Reflecting on new relationship status: Some people change their Facebook display pictures to let their friends know they are starting a new relationship.
- Keeping the profile fresh: Some people frequently update their Facebook profiles. They might wish to keep their Facebook profile as new as possible.
- To show support: Sometimes people might change their display photo and keep the photos of their favorite celebrities or any other things to show support towards them.
- To reflect happiness or achievements: Sometimes, people want to show their happiness on social media and share their achievements through their profile pictures.
How do you Change your Facebook Profile Picture?
Are you one of those who wonder “how to change your Facebook profile picture?” If you are, then you have landed on the correct blog post.
There are many ways to upload a new profile picture. You can change your display photo using a FB application, web browser, or desktop app.
This blog will walk you through all the steps required to change your profile pic using a smartphone app or web browser.
Change your Profile Picture Using a Smartphone
Changing a profile picture using a mobile phone is as easy as liking someone’s post. You need to have an FB application on your Android or iOS devices.
The default Facebook profile picture is the image of a gray boy or girl. However, you can update your display photo after signing in.
Here is how you can change your Facebook profile on a smartphone, whether it is an Android or iPhone. Furthermore, this section also helps with changing profile pictures on iPad.
1. Log into your account by using the Facebook app on your smartphone.
2. Now click on the menu icon in the top left corner of the screen or tap on your profile photo.
3. Click on the camera icon and select “profile picture” to change your Facebook display photo. Also, you can add frames or create an avatar for your profile.
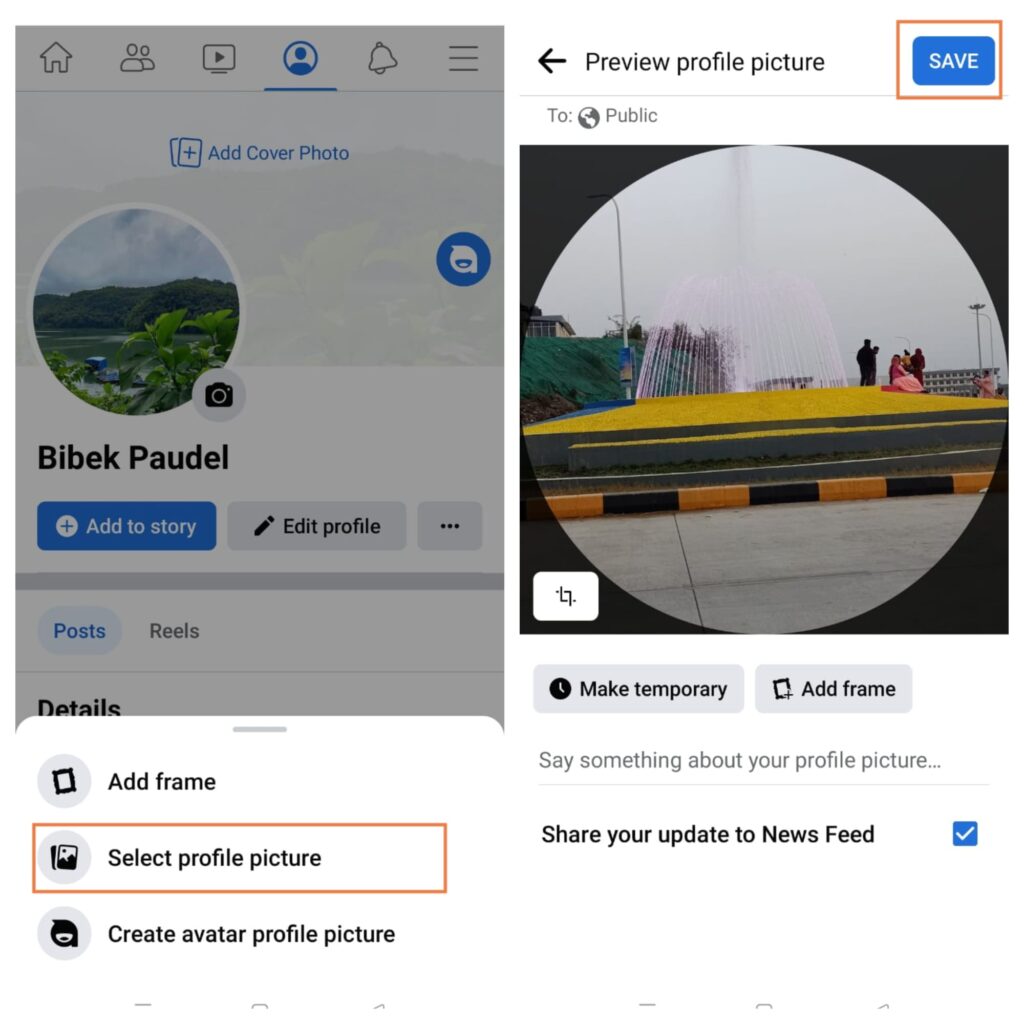
4. The next option is to select a photo from the camera roll or snap a new image. After selecting, if you want to change the privacy settings, click the globe icon. You will get many options. Select the one that you want.
5. Additionally, You can crop the image by repositioning or utilizing the available sliders to zoom. You can also update the profile picture without cropping.
6. When finished, click “Save” to apply your new display photo.
You can also make the new profile picture appear for a while by selecting the temporary option. Be sure to choose the time you desire.
Additionally, If you do not wish to share your profile picture updates, you can untick the “share your update to News Feed” option. Ticking will allow you to show the updates to your feed.
Change your Profile Picture Using a Web Browser
If you are accessing Facebook through your PC, you need to use the web browser version of the application. Whether you use windows or mac laptops, the steps to set new pictures for your profile will remain the same.
Similar to a smartphone, you can upload display photos using your computer. Here are the steps that help you put a picture on your Facebook profile using any web browser:
1. Log in to the Facebook account using your desktop.
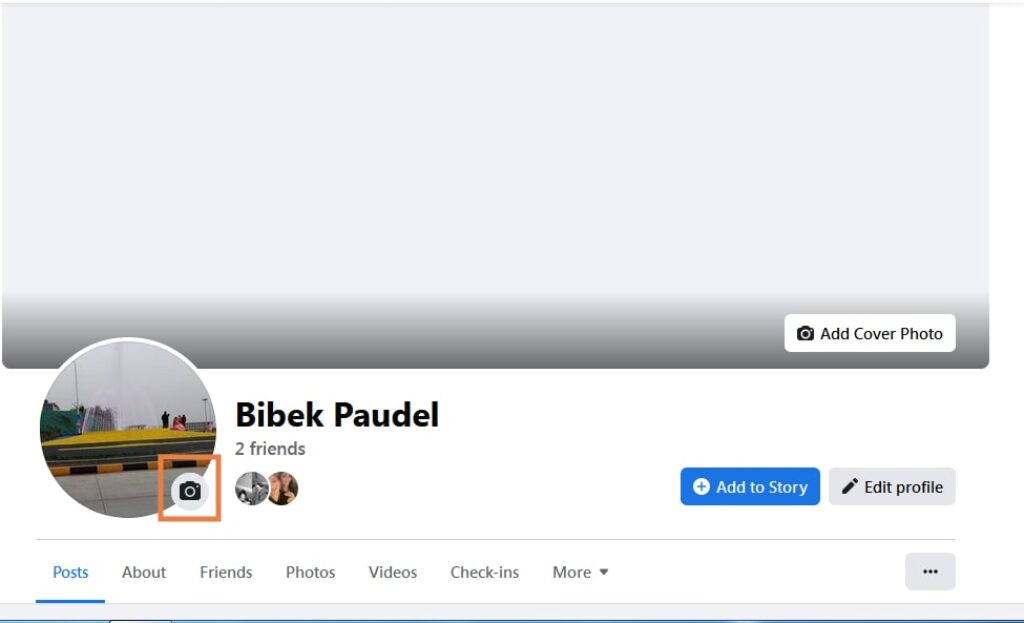
2. Select your name at the top right corner of the page to view your profile. You can see a small version of your display photo at the top right of the homepage. Clicking on that will lead you to the profile page as well.
3. Click the “camera” icon that appears below the profile picture.
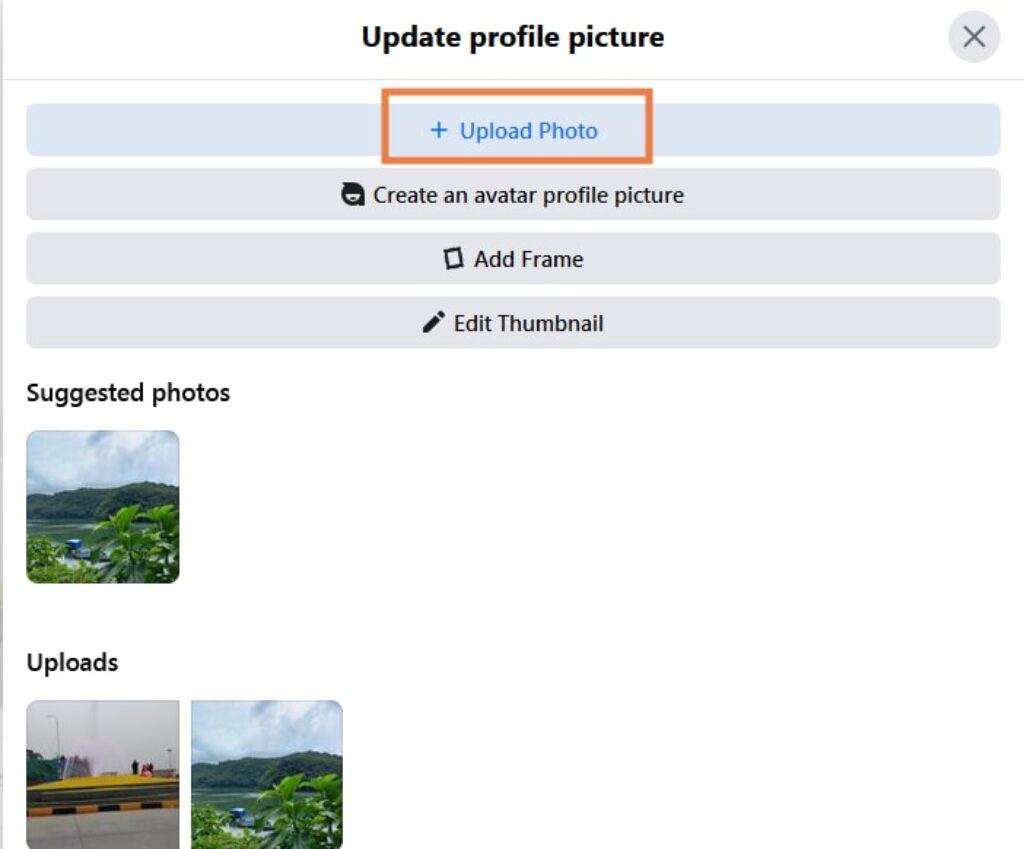
4. After clicking on the camera icon, a box will appear with three options: upload a photo, create an avatar profile picture, and add a frame. Select the first option to upload a new display picture.
Additionally, you can create your customized avatar or add frames to your profile picture, similar to the smartphone method.
5. By clicking and dragging the image or using the available sliders, change the crop settings after choosing the photo you wish to use.

6. When you are satisfied with the picture and finalize the photo, click the “Save” button.
You can choose to write a description about your new profile picture or wish to make it temporarily available.
Dimensions For Profile Picture
After reading the previous topic, you might be curious about the dimension of a Facebook profile picture. Don’t worry; this topic will cover your curiosity. The recommended dimension for a display picture is 180*180 on desktops and 128*128 on smartphones.
However, even if you try to add photos of higher dimensions, Facebook will automatically resize and crop the photo to reduce the dimensions.
As a result, you won’t have to worry about cropping your image before posting it as a profile photo.
Set Privacy Settings on your Profile Picture
Just uploading a profile picture is not enough. People also want their display pictures to be safe and private.
Here, We will discuss how to set privacy settings on a Facebook profile picture the other way. To set your Facebook profile picture’s privacy settings:
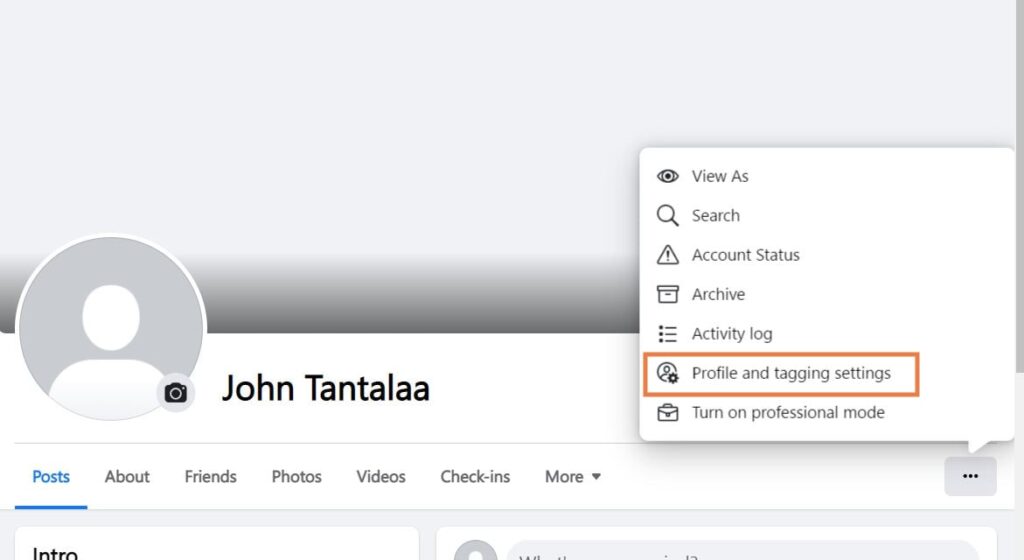
1. After accessing your profile, click the three dots in the top right corner.
2. From the drop-down menu, select “Profile and tagging settings.”
3. Click the audience selection below “Profile and Tagging” inside the pop-up window that appears. After that, select the profile privacy as per your needs.
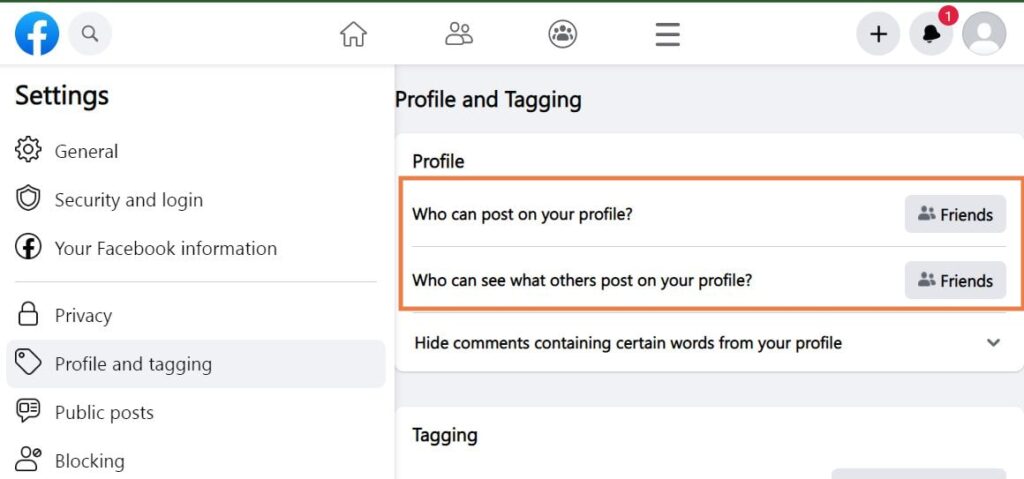
4. Select “Friends” or “Only Me” as the audience you wish to share your profile image with.
5. To modify the privacy settings for your profile image, click “Save.”
How to Revert to the Previous Profile Picture?
Reverting to the previous profile picture is possible on Facebook and is advantageous. It is an easy process to do.
You can do that right from the “edit profile picture” option. It will help to replace the profile picture you previously uploaded without losing any likes or comments.
Additionally, You can archive profile photos you no longer want to use. Later, you can directly access the older ones in the future.
FAQs
A: If you’re having difficulties changing your profile image, make sure you’re using the most recent Facebook app version and restart the application. Check to ensure you’re linked to a steady data or Wi-Fi network.
A: No, it is not possible to track the number of times people looked at your profile.
A: No, it is not possible for the users to change their profile photo only on messenger.
A: There is no limit to changing profile pictures on Facebook. You can change it as frequently as you want.
Conclusion
In essence, using a Facebook profile picture enables you to express your unique self, let friends and family know who you are, show your support for a cause or event, and commemorate special occasions.
It’s simple to change your profile photo, you may add your modifications by editing the image with third-party programs, and you can also decide to keep it private. In summary, you can make your Facebook profile photo stand out with little work.


