One of the easiest ways to protect your Facebook account from unwanted access is to keep it private. While Facebook allows you to set privacy settings for each post, it is better to hide your profile from non-friends entirely.
Facebook lets you share pictures and connect with friends, family, and even your favorite celebrity. However, it can also allow fraudsters, hackers, and sometimes even strangers to get important information about you.
While some of the information on your Facebook profile should be public—name, basic details, and interests—there are some things that you should consider protecting.
See our step-by-step guide below to better understand how you can keep your Facebook account private and secure. You can also read our other article to unfollow someone on Facebook.
Before We Begin
Before starting, you first need to determine how private you want your Facebook account. And you can also completely Lock Your FB Profile for those who are not friend with you.
All the privacy settings for a new Facebook account are set to “Public.” However, you can manually change the privacy on Facebook to any of the options below.
Friends: This option lets only your friends see your posts or information on Facebook.
Friends except: This option lets you exclude some friends with whom you don’t want to share your posts.
Specific Friends: With this option, you can specify some friends from your friend list to share your content on Facebook.
Only Me: With this option, you won’t share your content or info on Facebook except yourself.
Keep in mind that there isn’t a single button on Facebook that instantly lets you make your account private.
You need to customize settings for each component, like your posts, your profile info (email, phone number, location, etc.), your friend list, and so on, to make your account private.
Since you want to make your FB account private from public searches and only make it available to your friends and family, we suggest you change privacy to “Friends” or “Friends of Friends.”
Note: If you want to make your Facebook account as inaccessible as possible, we recommend to hide your Facebook Profile instead.
How to Make your Facebook Account Private
As we know, you can’t tap one button and make your account private. That’s why you need to customize the settings for each aspect.
For example, if you want your Facebook account to be visible only to your friends, you must change the privacy settings for your Posts, friend list, Bio, and so on to only “Friends.”
It is also possible to change the privacy settings for each post to Public or Private. In conclusion, you have complete control over the privacy settings of your Facebook account.
Anyway, this article will show you how to make your Facebook Account Private from a Smartphone and a PC.
We will also walk you through the various aspects of your Facebook account that you can control. So, make your decision based on your requirements.
Make your Facebook Account Private from a Smartphone
If you have an Android or iOS device (iPhone or iPad), then there are two ways that you can use to make your Facebook account private.
You can use the Privacy Checkup feature to limit the ways people can find you on Facebook and increase the privacy of your Profile information.
Additionally, you can also choose to customize individual settings on your FB account. You can check out both ways to make your account as private as possible.
Note: You can use these methods to make your account private on Facebook lite as well.
1. Make your Facebook Account Private with Privacy Checkup Feature
The Privacy Checkup feature is a tool introduced by Facebook to control your privacy, account security, ad preferences, and so on with a few clicks.
Here, we will show you how to use the Privacy Checkup feature to set your Facebook account to private quickly.
1. First, open Facebook app on your mobile phone and log in to your account using your info, like username and password.
2. After that, you can tap the hamburger icon from the top right corner (Android) or bottom right corner (iOS).
In the next screen, select the “Settings & Privacy” and “Settings” options. You can also tap the Settings icon from the upper right corner next to the Search icon.
3. On the Settings page, you can now hit the “Privacy Checkup” option under the heading “Account.”
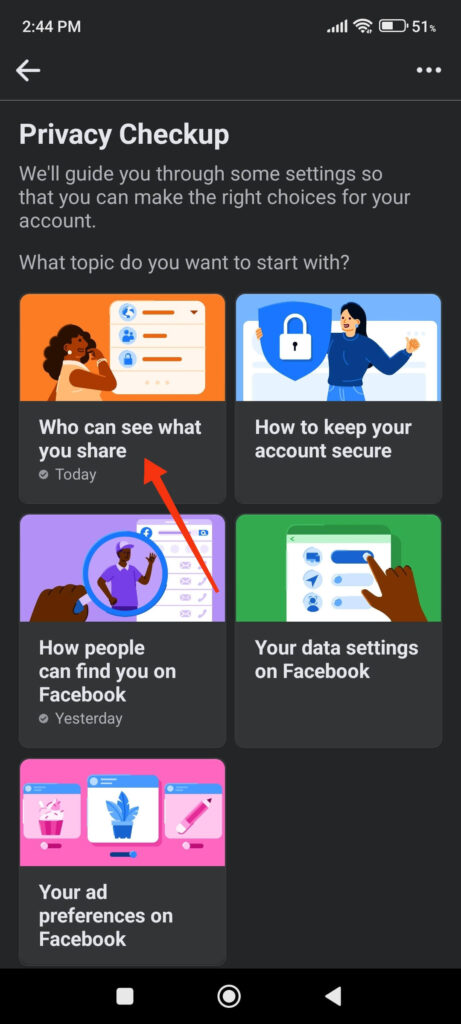
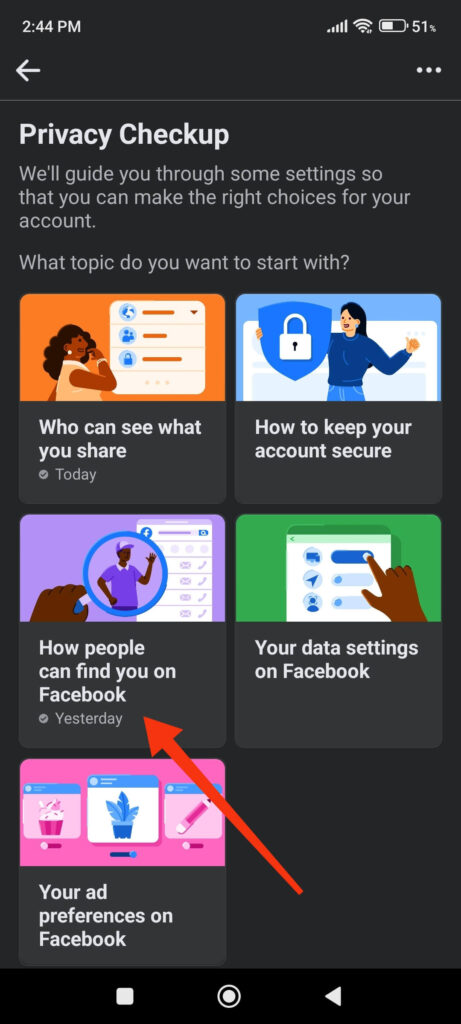
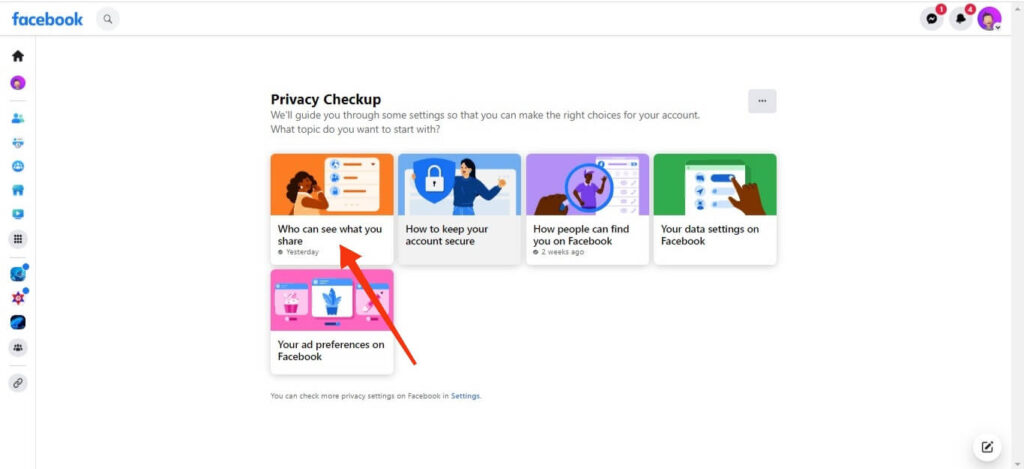
Following that, you will see five options for customizing your Facebook account. We will use the first and third options to create a Private account.
Control who can see what you share:
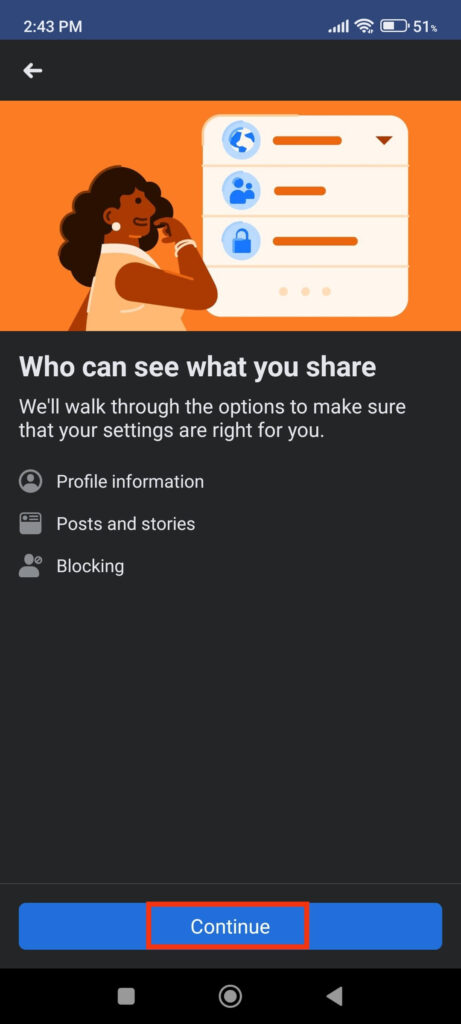
You can select the first option, “Who can see what you share,” to customize the privacy of your Profile information, posts, stories, and so on.
Tap “Continue,” and you’ll land on the first page where you can change the privacy settings for your Profile information.
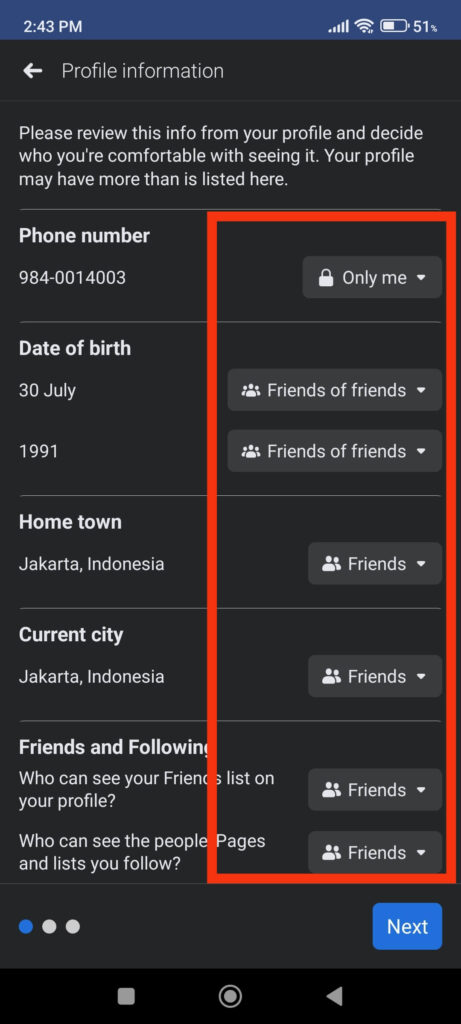
Change the Privacy to “Friends” or “Only Me” for each component.
For example, you can set privacy to “Only Me” for sensitive information such as your phone number, e-mail address, etc.
However, for less critical info such as date of birth, current city, hometown, and so on, you can keep privacy to “Friends.”
Disclaimer: If you want to make your account inaccessible via your phone number and email address, changing the privacy settings in this section will not help.
You can tap “Next” after editing to access the next page.
On the following page, you will be able to customize the privacy of your posts and stories.
Change the setting from “Public” to “Friends” or “Only Me” to limit the audience of your future posts. This will make your Facebook posts inaccessible to anyone other than your friends.
With the “Friends except” settings, you can also deny certain friends from accessing your posts. Additionally, you can use “Limit past posts” to change the privacy of all your previous posts.
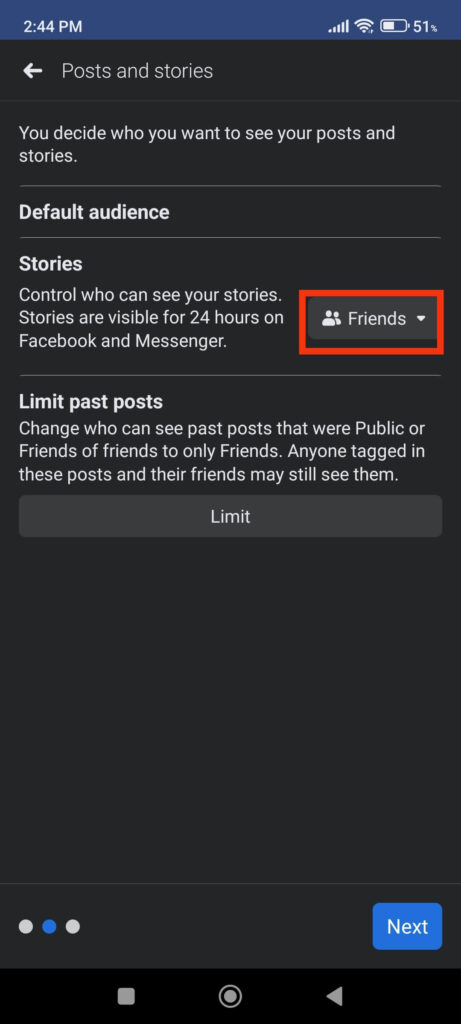
Note: To make your Facebook account private, you must change the privacy settings from “Public.” Hence, we recommend that you change the privacy setting for each option in this section to “Friends.”
You can tap the “Next” button from the lower right after changing the privacy of your posts and stories.
On the next page, Facebook allows you to block users. You can block someone on Facebook if you do not want that person to have any access to your account.
Just select “Add to blocked list” and search and choose the person you want to block on your FB account.
Control how Facebook users can find you:
To control how people can find you on Facebook, tap the third option on the Privacy Checkup feature.
This section allows you to customize your privacy on three different pages. To proceed to the first page, press the “Continue” button.
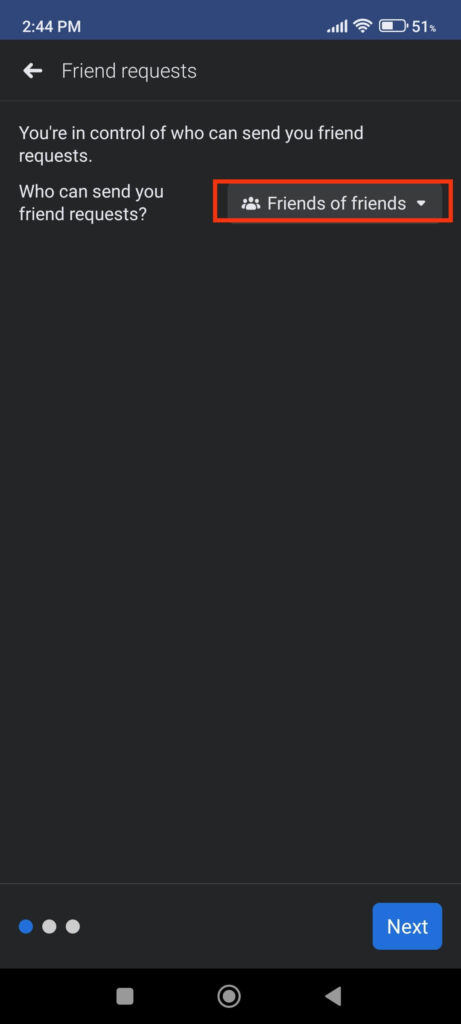
You can control who can send you friend requests on the first page. Change the privacy setting from “Everyone” to “Friends of friends.”
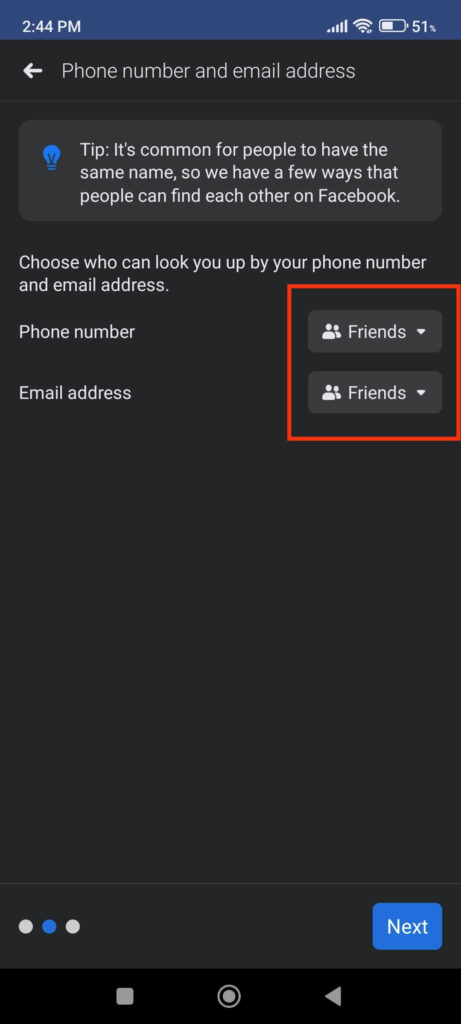
After that, tap “Next” to access the next page. On the following page, you can restrict who can use your phone number and email address to find you.
Change privacy settings from “Everyone” to “Friends” for both a Phone number and Email Address to make your account private.
You can also change them to “Only Me” if you don’t want anyone using your phone number or mailing address to access your Profile.
Now, tap the “Next” button from the lower right to go to the last page. Here, you can prevent your account from being discovered by other search engines such as Google.
Just toggle off the button on this section, and your account will no longer be visible when people search for it on the internet.
This is how you can make your Facebook account private by using the Privacy Checkup feature. In most cases, changing your privacy from these two sections will suffice.
However, if you prefer to customize Facebook settings on a more in-depth level, you can use our next method.
2. Make your Facebook Account Private using Privacy Settings
If you want more control over your Facebook account and want to customize each section, then you can use Privacy Settings.
Follow the steps below to use the Privacy Settings on Facebook to make your account private.
1. First, go to your Settings page on the FB application. To do this, you can tap the hamburger menu and select the “Settings” icon from the top right corner.
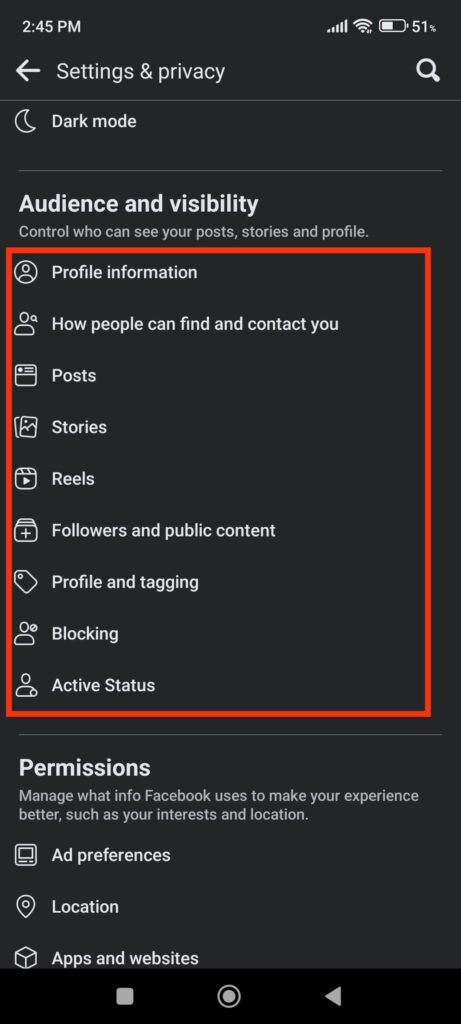
2. Once on the Settings page, scroll down and locate the “Audience and Visibility” section.
This is where you can manage each component of your Facebook account. You can adjust the privacy for each option, including Profile Information, posts, stories, reels, and others.
3. To make your account private on Facebook, you need to change the privacy from “Public” to “Friends” or “Only Me.”
That’s why you now need to tap every option in this section and change the privacy settings.
For example, to limit who can find and contact you on Facebook, select the second option under “Audience and visibility.”
Now, change the privacy for each question from “Public” or “Everyone” to “Friend” or “Friends of friends.” This will make your account less visible to the Public.

Like the above example, change the privacy for each component in the “Audience and visibility” section. We will not review each section individually because it would make this article too long.
Overall, after making the privacy adjustments in this section, your account will become private, and only your Friends or Friends of Friends will be able to find and contact you.
Make your Facebook Account Private from a PC
If you are browsing Facebook from your computer or laptop, then the navigation for making your account private differs slightly from that of a Smartphone.
That’s why you can follow the methods below to make the FB account private using a PC (Windows or Mac). You can use the Privacy Checkup feature or Settings to make it happen.
1. Make FB Private from the Privacy Checkup Feature
You can follow the step-by-step process below to use the Privacy Checkup feature to make your FB account private.
1. Frist, go to Facebook.com on your desktop web browser and open your account.
2. After that, click the “Profile” icon from the top right corner of the home screen.
3. Next, select “Settings & Privacy” and then the “Privacy Checkup” option.
4. You will now see five different options to customize and secure your Facebook account. To put your Facebook account in private mode, we will use the first and third options.
Limit who can see what you post:
To manage the privacy of your profile information, posts, and stories, select the first option, “Who can see what you share.”
This section lets you customize the privacy on three pages: Profile information, Posts and Stories, and Blocking.
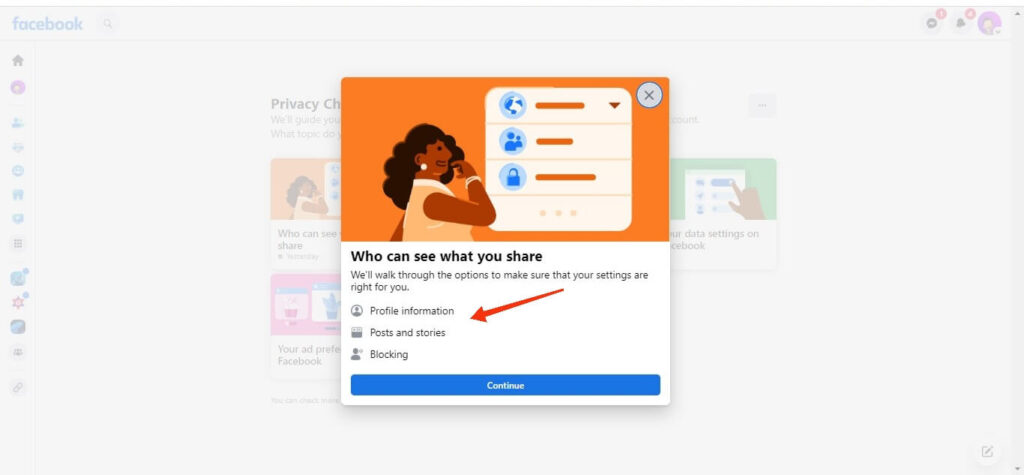
You can access these pages by clicking the “Continue” and “Next” buttons below.
On the first page, change your privacy for profile info such as phone number, and email to “Only Me.” Also, for options like Current city, Home town, etc., you can set privacy as “Friends.”
Now, click the “Next” button to proceed to the Posts and Stories section. Here, set the privacy for “Default audience” and “Stories” to “Friends.”
Also, click “Limit” to change the privacy of your old Facebook posts. After that, tap “Next” to proceed to the last page.
You can block a person from accessing your Facebook account on the final page. Simply skip it if you do not want to ban anyone.
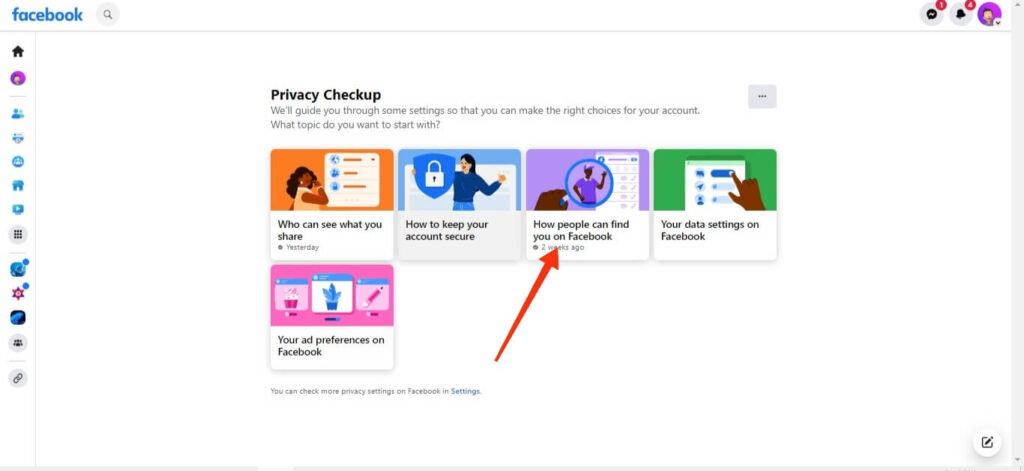
Limit how people can search and locate you on Facebook:
After editing privacy from the first option, go to the third option, “How people can find you on Facebook,” on the Privacy Checkup feature.
Just like before, this section lets you customize privacy in three pages.
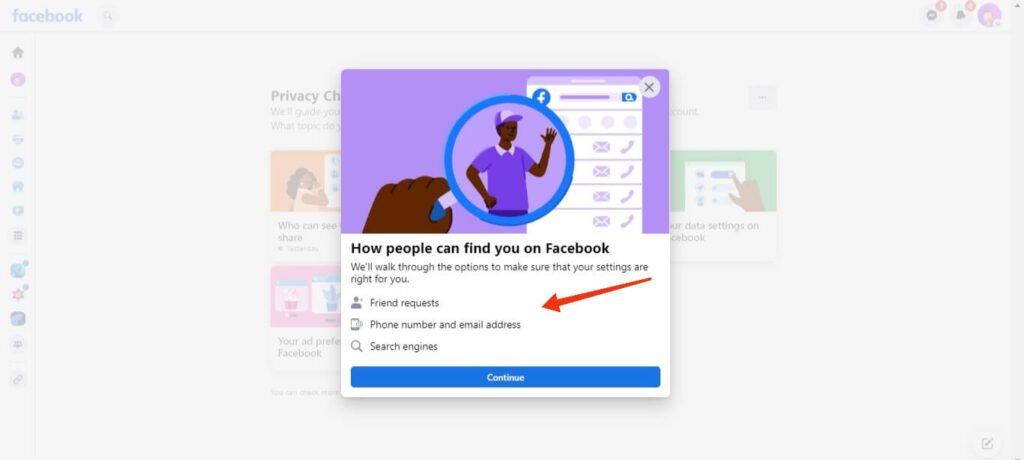
On the first page, you can control who can send you a friend request on Facebook. For this, change privacy from “Everyone” to “Friends of friends.”
The second page allows you to hide your account from the general public when searching with your phone number and email address.
Change the privacy settings for your phone number and email address from “Everyone” to “Friends” or “Only Me” to make your account private.
The final page allows you to hide your profile from search engines other than Facebook. You can disable search engines on this page to make your account more private.
2. Make FB Private from Privacy Settings
If you want more control over your Facebook account, then you can edit every component from Privacy Settings.
So, follow the steps below to make your account private using the Privacy Settings.
1. To begin, click your Profile icon in the upper right corner, select “Settings and Privacy,” and then “Settings” from the drop-down menu.
2. On the Settings page, you can select “Privacy” from the left side.
Now, scroll down on the right panel and go to the “How people can find and contact you” section. You will see five options here.
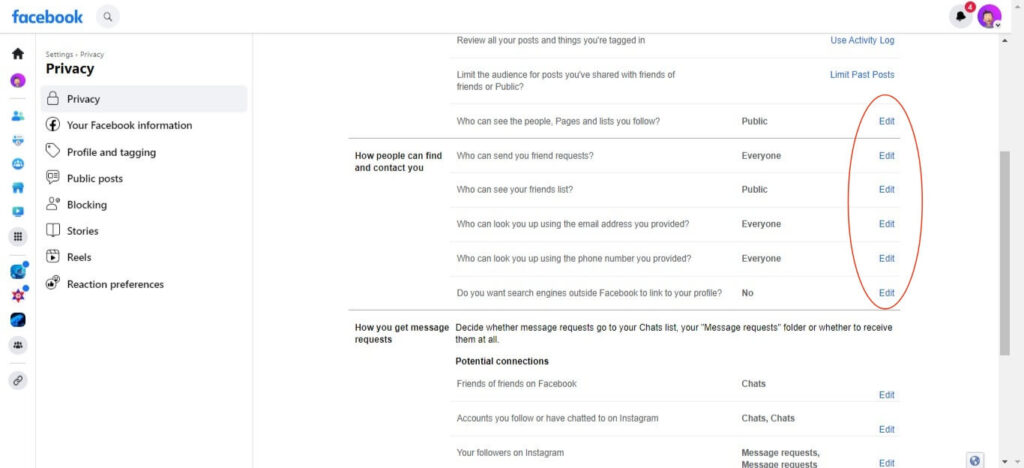
3. Next, change the privacy for the first four options from “Public” or “Everyone” to “Friends” or “Friends of friends.” You can also select “Only Me” to keep your details private.
To change the privacy settings, click the “Edit” button next to each option and choose from the drop-down menu.
For the last option, change the searchability of your Profile from other search engines to “No.” After this, your Facebook will remain private from public searches.
Note: You can also further customize your account’s privacy settings from your Facebook profile. To do this, go to your Profile and change the privacy settings for each data under the “About” section.
FAQs
Yes, you can easily control the privacy of your Facebook posts. To do this, whenever you post something on Facebook, select the drop-down menu just below your username at the top of the Create post page. You can now change the privacy of that post from “Public” to whatever you want.
To change the privacy settings for all future posts, go to Settings and then select “Posts” under “Audience and visibility.” Now, select the “Who can see your future posts?” option to customize privacy to your liking.
You will no longer be visible on public searches when you make your account private. Only your friends will be able to see your posts and stories. Also, your sensitive information, like phone numbers and e-mail, remains secure from everyone.
Yes, you can easily control who comments on your public Facebook posts. To begin, go to your account’s Settings and select “Followers and public content” under the “Audience and visibility” section. Now, scroll down to the “Public post comments section” and edit the privacy settings as per your need.
Final Thoughts
So there you have it. A basic understanding of Facebook privacy settings and how to make your Facebook account private.
You can test with all the above methods to see how you feel. You can always change the privacy of posts, profiles, and so on to meet your needs.
We hope this will help people feel more comfortable with their profiles, so they don’t feel like they have to hide away from everyone else on the web anymore. You can also read our other article on how to clean up your Facebook timeline if you’re interested.


