Although you have the ideal Profile Picture that reflects you in the best light, there may come a time when you feel the need to change things up a bit. In such cases, you can add a Frame to your Facebook Profile Picture to give it a whole new look for a special event, a cause you support, or for fun.
Adding a Frame to your Profile Photo is a quick and easy way to inject creativity and personality into your online presence. Many different types of frames are available on Facebook, such as holiday-themed, sports teams, and special occasions.
A Frame can help you support a cause or event that is important to you and make your Profile Picture more eye-catching. You can even design your own to advertise your company, brand, or message.
Don’t worry if you’re new to Facebook or have never added a Frame to your display image. It’s an easy task that only takes some taps to complete.
This guide will show you the steps to add a Frame to your Facebook Profile Picture to display your uniqueness and creativity quickly. Meanwhile, let’s also learn to update a Facebook Profile Picture without losing likes.
Table of Contents
Why add Frame on Facebook Profile Picture?
The Frame is a great way to improve your online presence and creatively express your personality. It allows you to express your thoughts uniquely and simply.
So, here are some of the main reasons you should put a Frame in your account Picture.
1. Express Yourself
When someone visits your Facebook page, the initial thing they see is your DP, and adding a Frame can help you express yourself uniquely and creatively. It can express support for an idea, mark a special occasion, or add personality to your account.
2. Show Support
For various causes and occasions, such as Breast Cancer Awareness Month, the COVID Vaccine campaign, or the Olympics, Facebook provides a wide range of frames. Your friends and followers will become more aware of these causes and events if you add them to your account Picture.
3. Promote Your Business
Your Profile Photo can be a great way to advertise your brand or business by adding a unique skeleton. To increase your visibility and attract more clients, you can design a Frame that features your brand’s logo or key message.
4. Celebrate an Occasion
Whether it’s your birthday, graduation, or wedding day, including a Frame in your Profile image can be a playful way to mark the occasion and spread happiness to your friends and followers.
Overall, including a border in your Profile can be a wonderful way to express yourself, show your support for a cause, advertise your company, or commemorate a special occasion. With the many different frames available, you can easily customize and make it stand out from the crowd.
How do you Add a Frame to Facebook Profile Picture?
You can easily add a Frame to a Profile Photo using Facebook’s application or website. There are also methods for custom creation, but they have some limitations.
So, whether it’s a special occasion, a specific day, or a country’s flag, Facebook has plenty of frames to choose from. There are also customization options, which we will go over shortly.
For your convenience, we’ll go over the steps to create a Profile Picture with a Frame from a Smartphone and a PC (Windows or Mac). We will teach you to design such a frame, so stick with us.
Method 1: Add a Frame using Facebook App
If you have an Android or iOS (iPhone or iPad) device, you can quickly add a Frame to your Profile image from Facebook or FB Lite application.
So, follow the steps below on a Mobile Phone to make your Picture stand out with a unique design.
1. First, open your FB account on a Smartphone and go to your Profile page. For this, tap the menu icon and then your username.
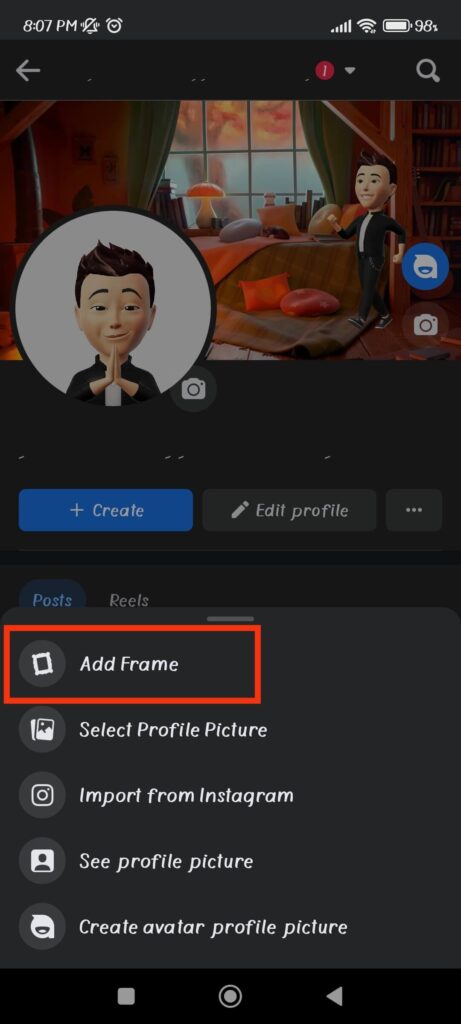
2. Once you are on your Profile page, tap your Profile Photo and select the “Add Frame” option.
3. You will now see many frames divided into three sections: Suggested, Facebook, and Flags.
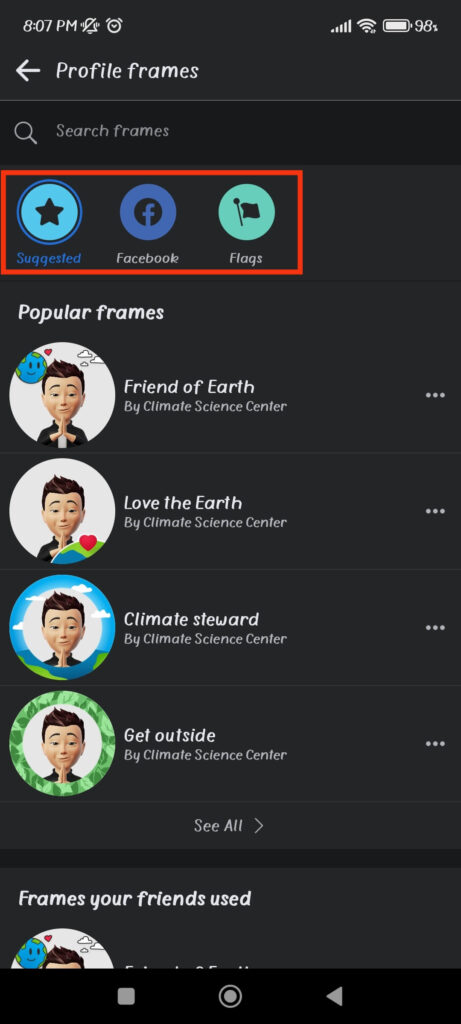
Suggested: As the name implies, this section contains the most commonly used frames. You can scroll through them by pressing “See all” to find one to use on your Profile Picture.
Facebook: This section includes all the designs that are developed by Facebook. Since they update frequently, you can check this section occasionally for a new one.
Flags: This section contains flags from every country in the world. Use your country’s flag in your Profile Picture to show your support at a sports event, such as the Olympics, World Cup, etc.
4. Now you know all the frames on Facebook, browse them, take your time, and select one by tapping it.
When you tap the Frame, your DP will immediately appear with it. So, all that is left is to customize it before publishing.
5. To adjust the Frame in your Profile Pic, tap the crop icon from the bottom left and edit it accordingly.
You can also change your FB Profile Picture by pressing the camera icon from the bottom right side.
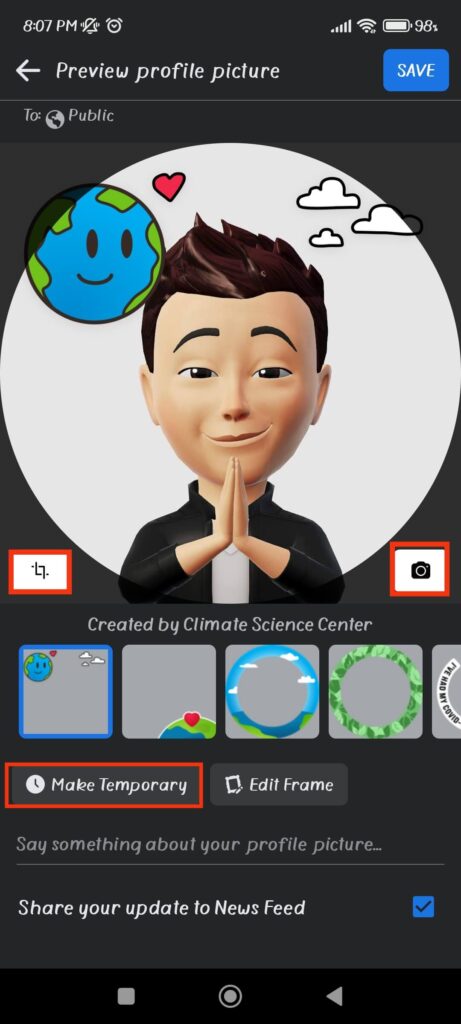
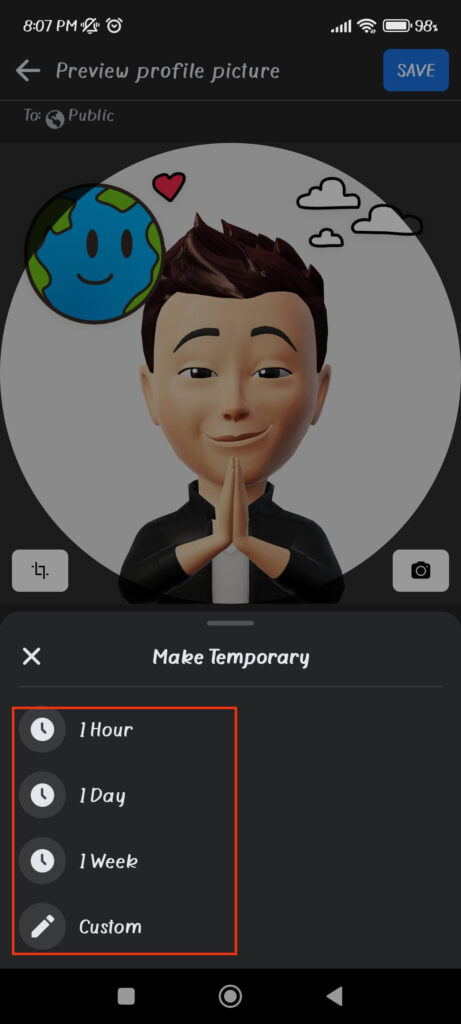
6. Since having a Frame in a Profile Photo all the time does not look good, tap the “Make Temporary” button and select the duration for which you want to have it.
You can choose between 1 hour, 1 day, and 1 week. You can also choose a custom duration, but its expiry must be less than 80 days.
Furthermore, in the section just below this option, explain the reason or idea about your Profile Photo.
7. Finally, check or uncheck the box for the “Share your update to News Feed” option depending on your choice and tap “Save” from the upper right corner.
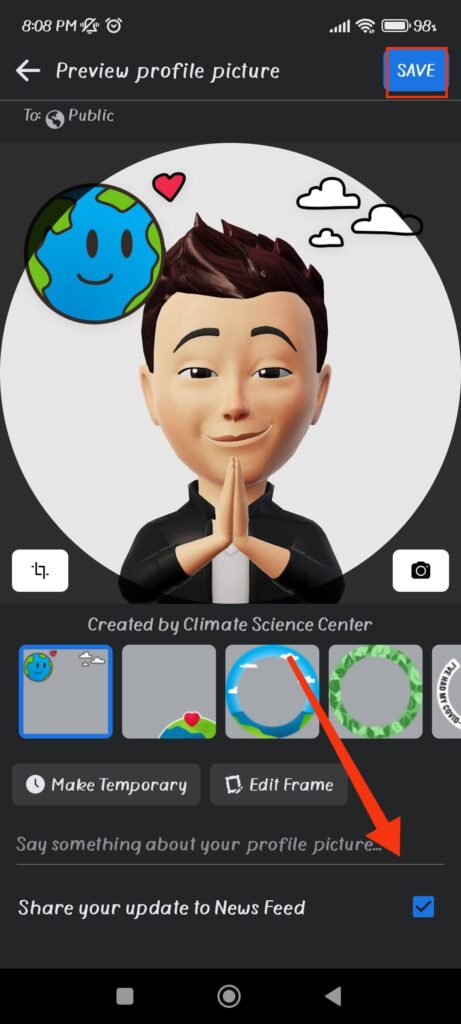
Your account Picture will now be immediately updated. Go to your Profile to see if the Frame is properly visible.
Note: If you have linked your Facebook and Instagram accounts, you will see an option to sync the name and Profile Picture across both platforms. So, enable this option to add a Frame on Facebook and Instagram.
Method 2: Add a Frame using Facebook Website
Adding a Frame using the Facebook web is quite different than an application. Hence, follow the steps below to put a Frame on your Profile image using a computer or laptop.
Note: We recommend using the Facebook app to add it rather than the web version because it is easier to customize and has more options.
1. First, type Facebook.com on the address bar of your desktop web browser and press Enter.
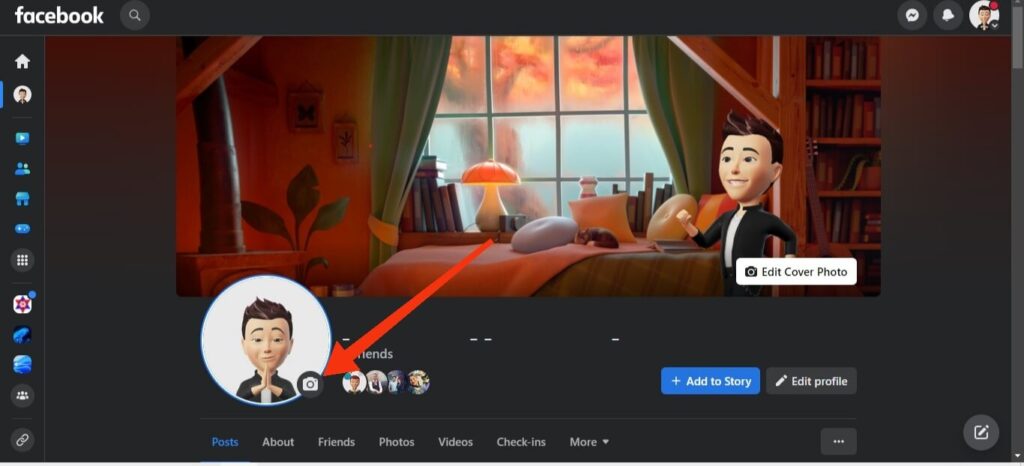
2. Once you sign into your Facebook account, go to your Profile by clicking your username from the left panel.
3. Next, click the camera icon at the bottom right corner of your Profile Picture and select the “Add frame” option.
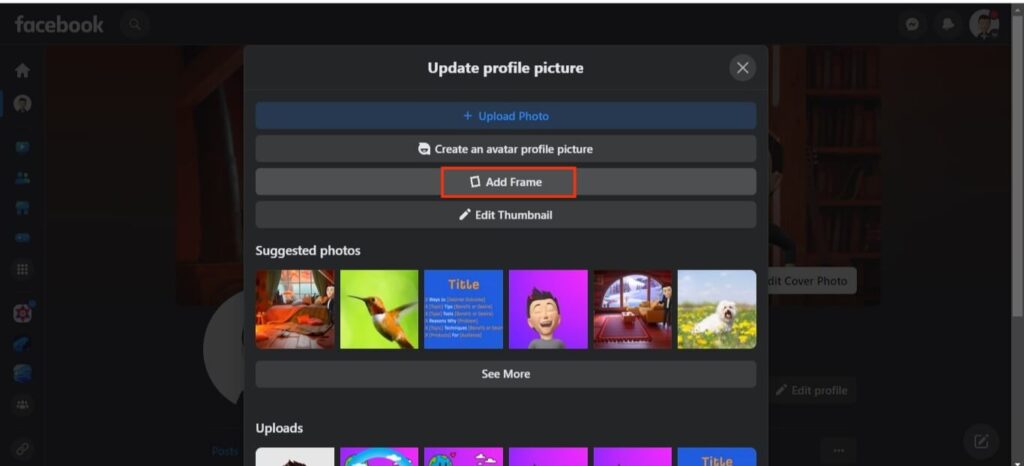
4. You can now choose a Frame from the left panel. So, scroll down and choose one that you like in your Profile image.
5. Next, customize your Frame, adjust it on your Profile Pic, and select the duration for the “Switch back to previous Profile Picture in…” option.

After doing all this, press the “Use as Profile Picture” button from the bottom right corner to publish it.
Method 3: Create Using Frame Studio
Facebook allows users to create frames if they do not want to use the default or want to customize their own.
Go to Frame Studio and click the “Create Frame” button to do this. Now, follow the on-screen instructions to make a custom for your Profile Picture.
Disclaimer: This feature may not be available in all countries. Furthermore, creating frames may be restricted to organizations that are part of one of Facebook’s information centers, such as the COVID information center, the Voter information center, and so on.
How to Remove a Frame From Facebook Profile Picture?
After the set time, Facebook will automatically remove the Frame from your Profile Photo. However, you may sometimes want to remove such a design for various reasons.
It is quite easy to remove; both the Facebook app and the web version allow it.
For this, go to your Profile Photo, click on it, and select the “Switch to Previous Picture” option.
If you do not see this option, you can change your Profile image to an older one or upload a new one. For this, press the camera icon next to your account Photo and choose the “Select Profile Picture” option.
Remember to take down the Frame once the event or occasion is over. Otherwise, it may appear outdated, which does not reflect your online image well.
FAQs
Yes, you can set the duration of a Frame by clicking the “Make Temporary” button on the editing page. Facebook allows you to have an expiry of less than 80 days.
You can change the Frame on your Facebook Profile image as often as you would like.
Both personal Facebook accounts and Facebook Business Pages can add them to their respective Profile Photos.
Final Thought
To summarize, adding a Frame to your Facebook Profile Photo is an excellent way to personalize your account while also demonstrating support for a cause, event, or organization.
Whether you use a ready-made one or create your own, they are an easy way to keep up with the times and express yourself on Facebook.
So, why not give it a shot and make your account stand out? You can always remove your Facebook Profile Picture later if you don’t like it.


