Android phones have come a long way, from an operating system for digital cameras to the highest-selling system for smartphones. With each update, android brings forward its ideas and innovation on new features. One of the features is to enable the transfer of photos from an Android smartphone to a computer using wired and wireless methods.
Photos we take helps us to capture our feeling, which we feel is crucial to remember on a digital file. The android camera nowadays is powerful enough to get high-quality images on our command, but the problem is when we have photos stored only on our phone.
Sometimes we want to get a better look at the images on our phones. Wouldn’t it be nice if we could watch it on a big display or share it with friends & family? Android has solved this issue by transferring photos from android to PC. Also, this tutorial teaches you how to turn on safe mode on Android.
In this tutorial, we will discuss and show, step by step, how we can transfer pictures from android to PC.
How To Transfer Pictures From Android Phone To Computer
In the early days, people used to get an SD card reader to transfer files from an android mobile phone to a PC. You can still use an SD card reader, but there are more efficient ways to send documents.
Physical wire and wireless alternatives are available to transfer photos from a phone to a computer.
Before we start this tutorial, there are some points users need to know; In this tutorial, we are using:
- Laptop running on Windows 10
- Android-supported Redmi Note 7 Pro running Android 10
Let’s see the available methods to transfer pictures from android to a computer, starting with the easiest way.
Method 1: Transfer Photos By Connecting Phone And Computer Using USB Cable
The most efficient and fastest way is to transfer pictures from phone to computer with USB. All users need a USB cable. Manufacturers recommend using their USB cable from their original charger for the best result.
Since we aren’t using any foreign agent, it is more secure from getting interrupted by a stranger or unwanted connection.
This method applies to all android supported smartphones. Hence, we can transfer images using brands such as Realme, Xiaomi, OPPO, and Samsung to PC.
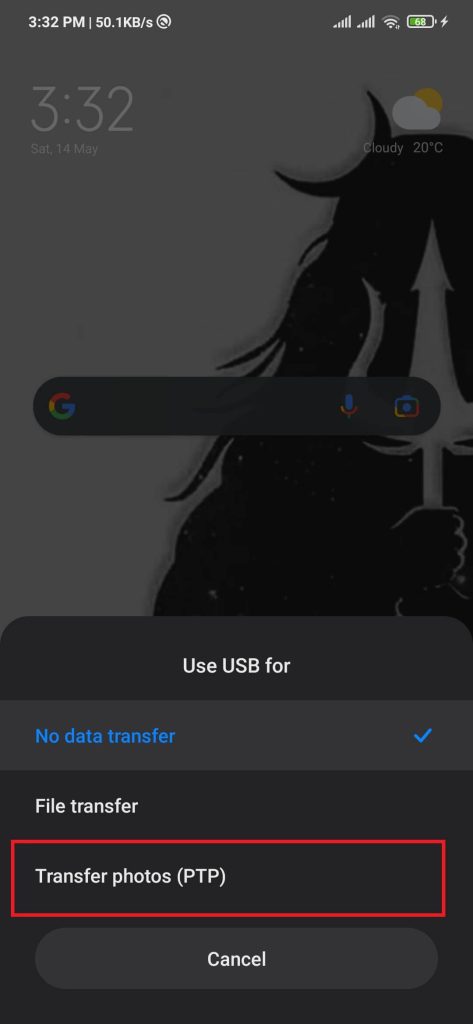
1. Connect your Laptop/desktop with the USB cable, then a pop message will appear. Select Transfer photos(PTP) to enable photo sharing with both devices.
2. Open My PC on your computer. You can see the connection made with your Android Device.
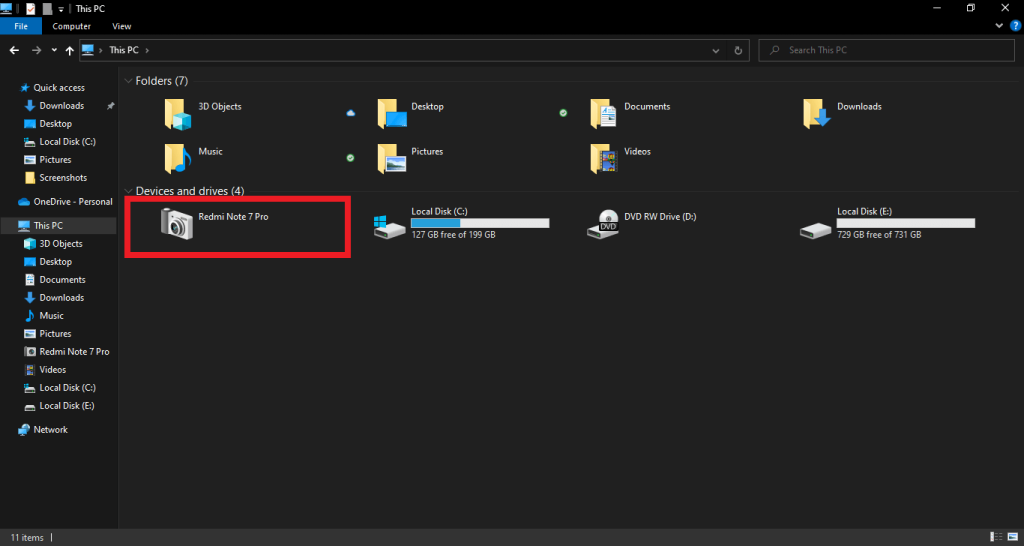
3. Double-click on the Android smartphone name, then choose either Internal or External shared storage. Usually, the Android store capture pictures or screenshots on Internal storage.
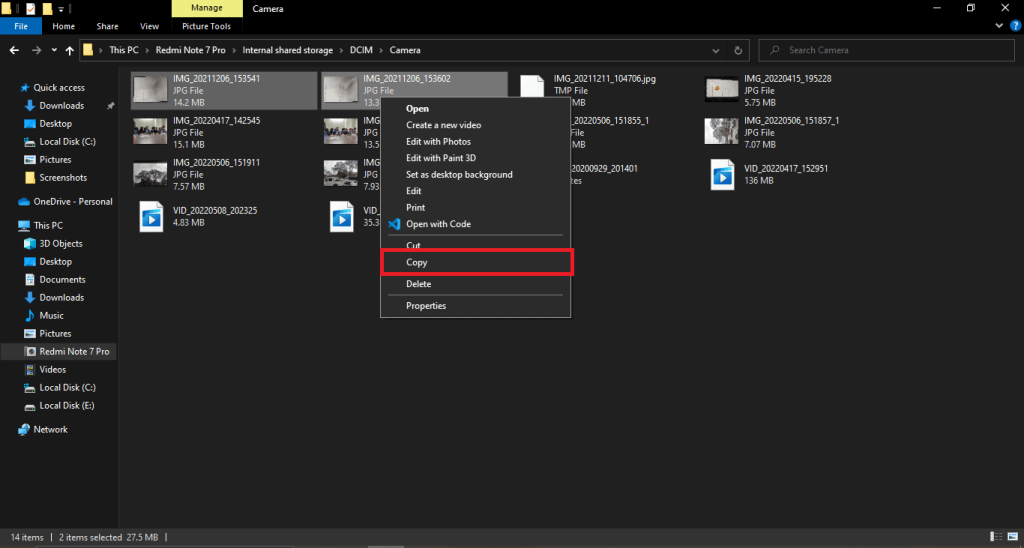
4. Open the DCIM folder. Then open the Camera folder and select all the photos you want to transfer to the computer.
5. After selecting your desired images, Press right-click and Select copy.
6. Navigate to where you can save the images, then press right-click and Select Paste.
Following the above steps, users can effortlessly import photos from Android to PC. However, if you want to transfer phone videos to a desktop/laptop, select File transfer in step 1.
Method 2: Transfer Photos From Android Phone To Computer Using Google Photos
Google Photos is similar to the USB method as it doesn’t require any external software.
By default, Google Photos is available on all android supported mobile phones having a Google account. But, users need to have their Google account on the device to enable it.
Google photos automatically sync all photos from your android phone to the Google cloud server using your Google account.
However, according to their free tier plan, Google limits individual users to 15GB of space. So, users need to check whether they have enough space before using this method and whether the internet connection is connected.
1. Capture or download any images and ensure you have the photo on your Android device.
2. Opening Google Photos will automatically sync any new images/videos onto the cloud server, which might take some time, depending upon the quality and quantity of the videos.
3. On your computer, open your desired web browser and log in to Google photos using the same Google account from the android phone.
4. You can select by tapping on the circled checkmark from the left top side of an image.
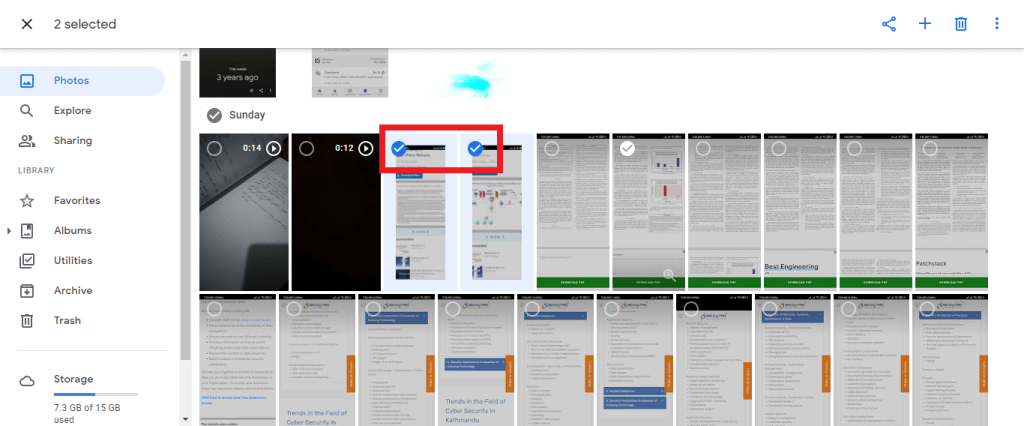
5. After selecting the images, tap on the hamburger option and select Download.
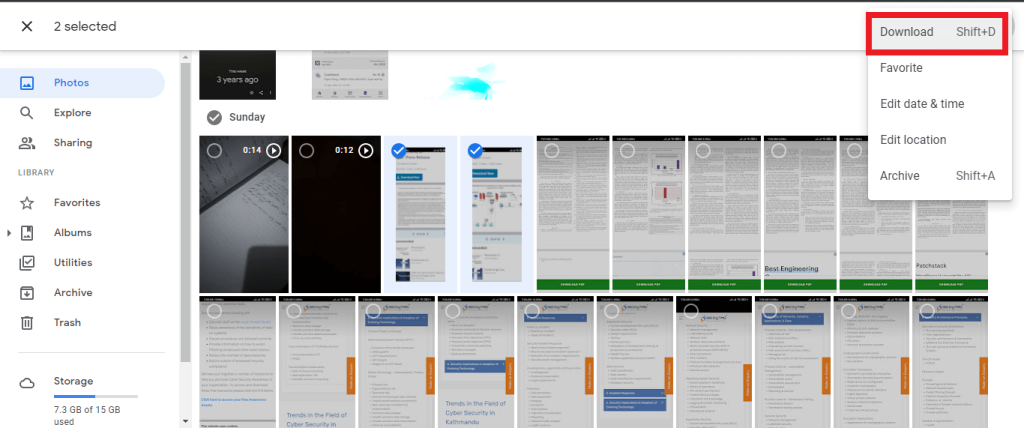
6. If you select more than one photo, Google Photos will download a zip file, which users can extract to get pictures from phone to computer.
Following the described steps, the user can download photos from an android phone to a computer using Photos from Google.
Method 3: Transfer Photos From Android Phone To Computer Using Google Takeout
Alternatively, you can download all your photos from Google Photos with Google Takeout bulk download feature. Selecting images one by one can be too exhausting. To solve this issue, users can use Google Takeout to download all images in one swoop.
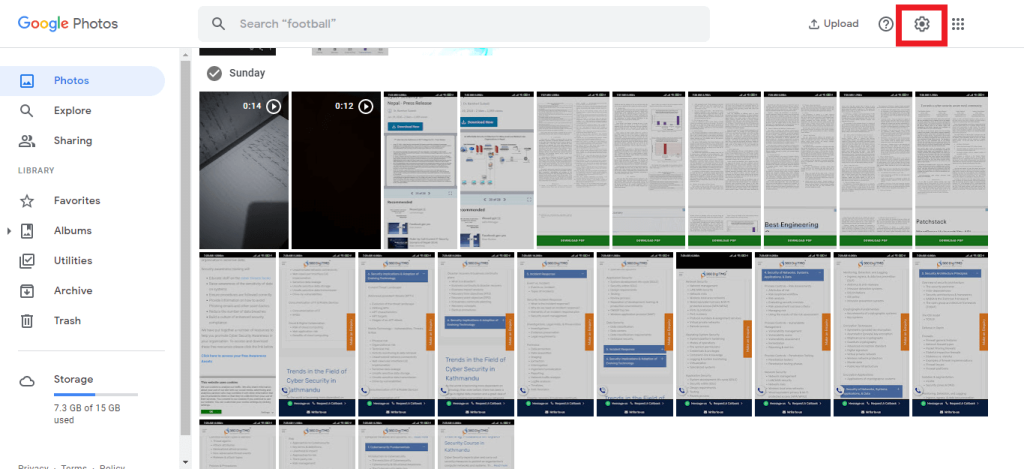
1. Open your Web browser and go to Google Photos website.
2. After the site loads up, press the settings icon from the top right next to the upload button.
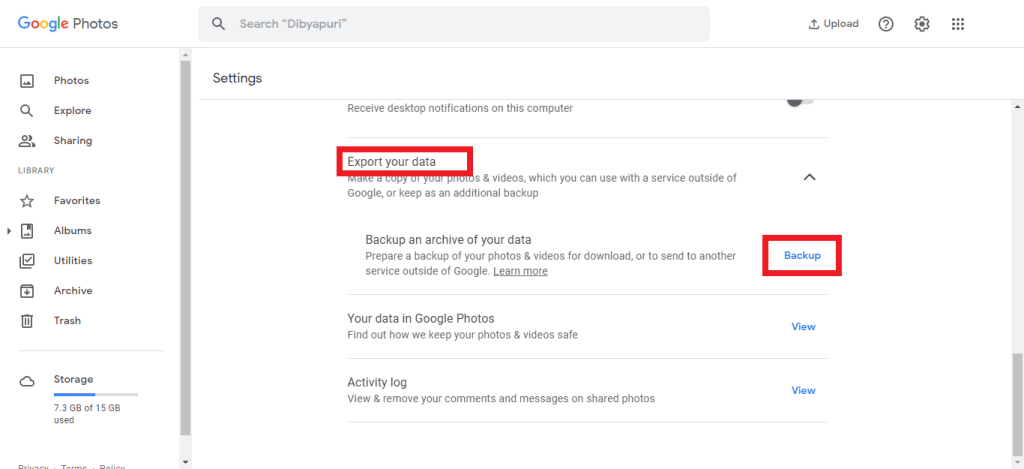
3. Scroll down until you find the Export your data section, then Press Backup.
4. Press on the All photo albums included option, then filter the folder you want to download. Afterward, press Next step.
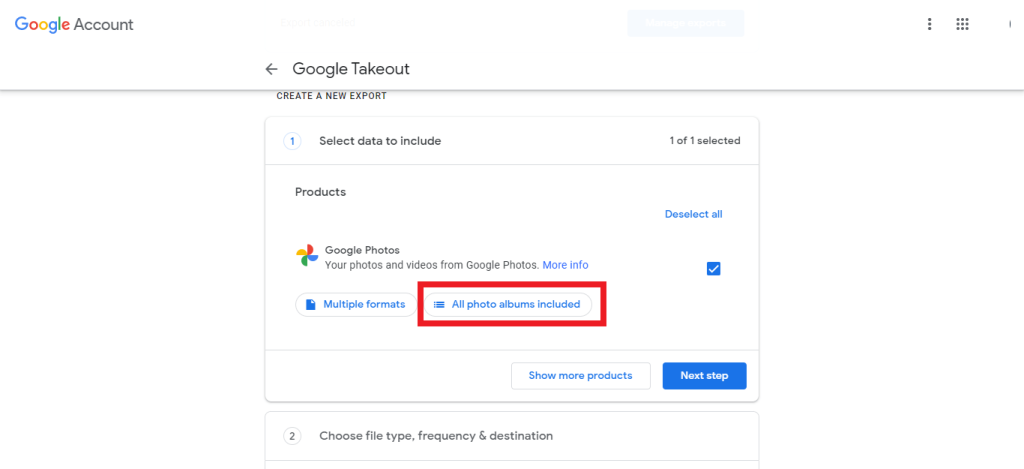
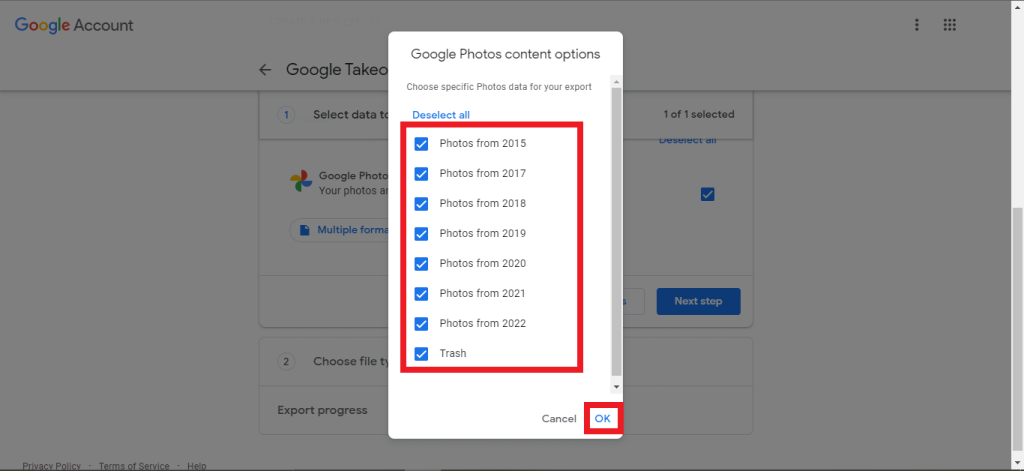
5. From the Frequency section, select Export once, then press Create Export button to start the process.
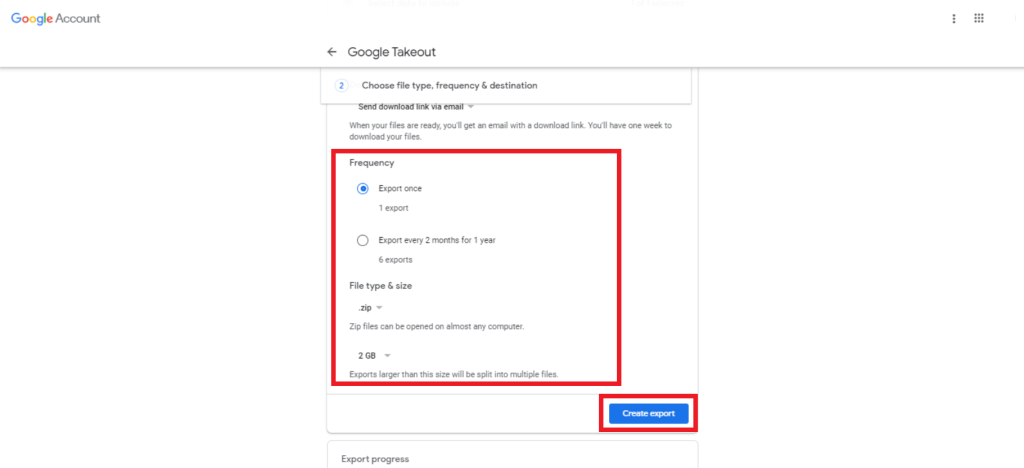
6. It will take some time to zip all those images. Users can see the process in the Export progress section.
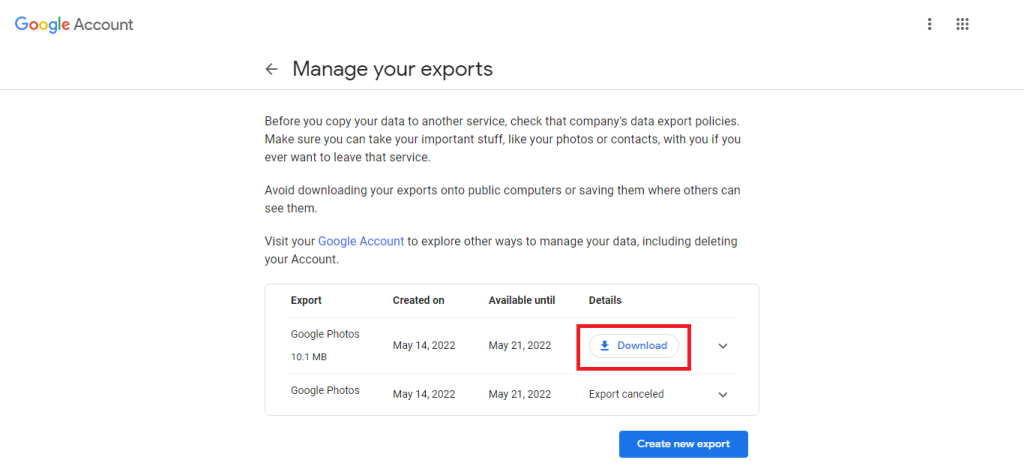
7. After the zipping completes, the user can download the zip from the Manage your exports section.
After completing the above steps, users can upload images/videos from android to Google Photos and download them to their PC wirelessly.
Method 4: Send Photo From Phone To Computer Using Email
Users can also attach images and send them to the email. However, this is not the optimal way and requires an internet connection.
Also, there is a limit on how many files you can attach to your mail. Usually, this method applies to a small number of images.
1. Open any Email you desire and log in to your account.
2. User needs to compose an email and send it to the same email. Attach the images you want to send. Users can leave the subject blank, then send the email.

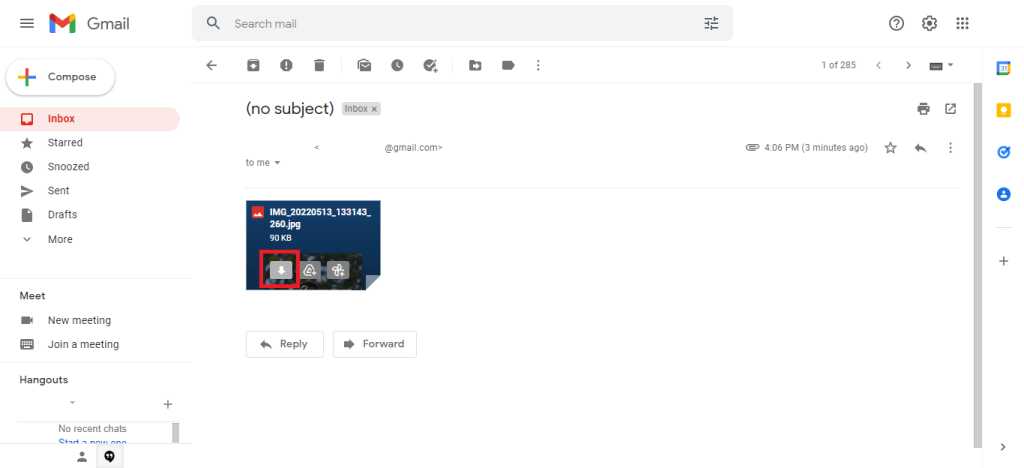
3. Check your inbox for a mail with a username as “me.”
4. Open the email and hover the mouse cursor over the photo. You will see many options. Click on the download icon to download the images.
After following the above methods, users can use email to share images from android to a computer.
Method 5: Transfer Photos From Android To Computer Using Your Phone App
Your Phone App is a cross-platform software built-in into most Windows-supported devices. The user must have the same Google account settings on their computer/laptop and android phone.
After all the requirements are satisfied, we can start the process. We will be working on Windows computers and android phones simultaneously.
So, this might get a little technical, but you don’t need to worry. By following the steps below, we can comfortably achieve our goal.
1. Press the windows’ start bar, search for a phone link on your computer/laptop, then open the application.
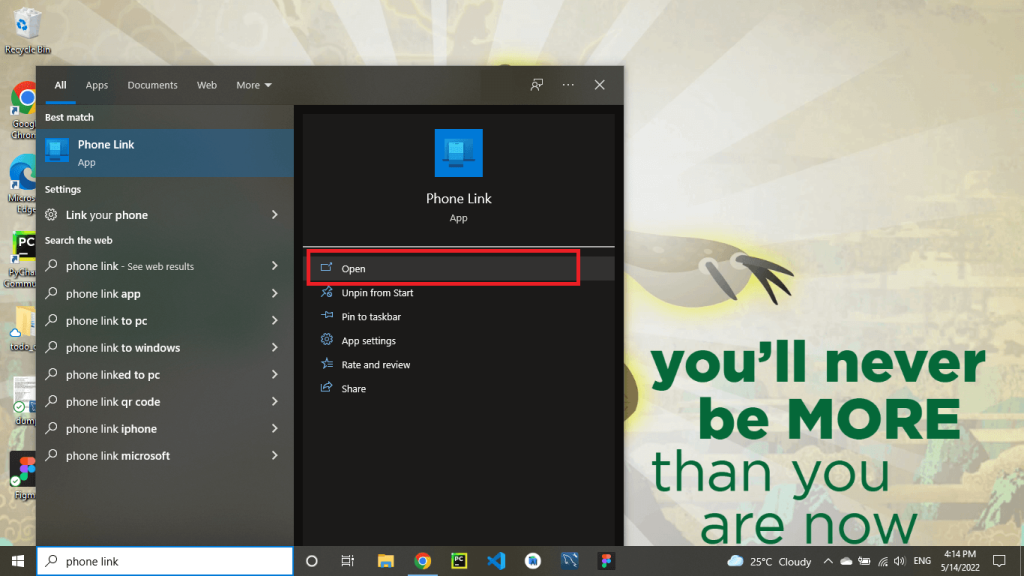
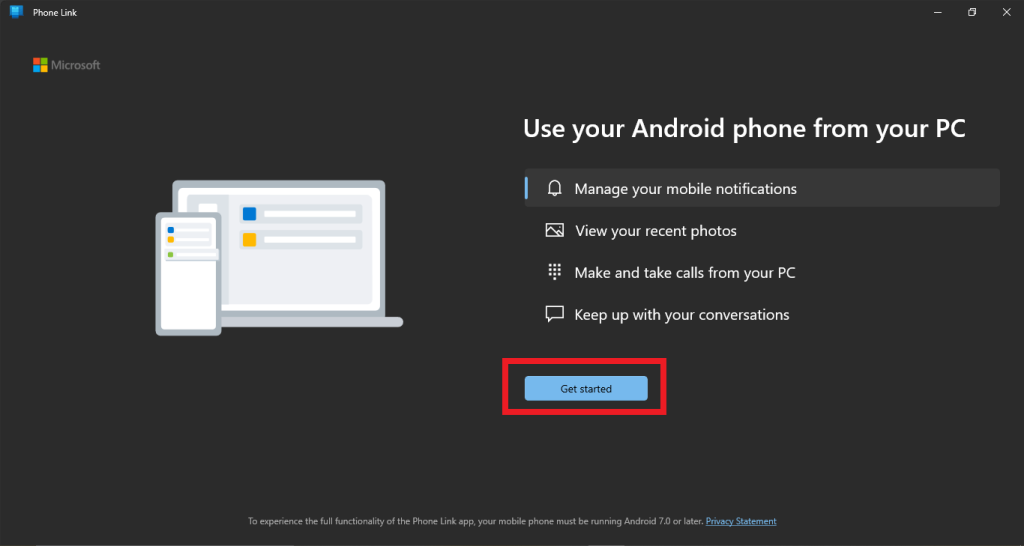
2. After opening the application, press the Get Started button.
3. Users must download the Link to Windows from the Google Play Store or the Official Windows Link “www.aka.ms/yourpc.”
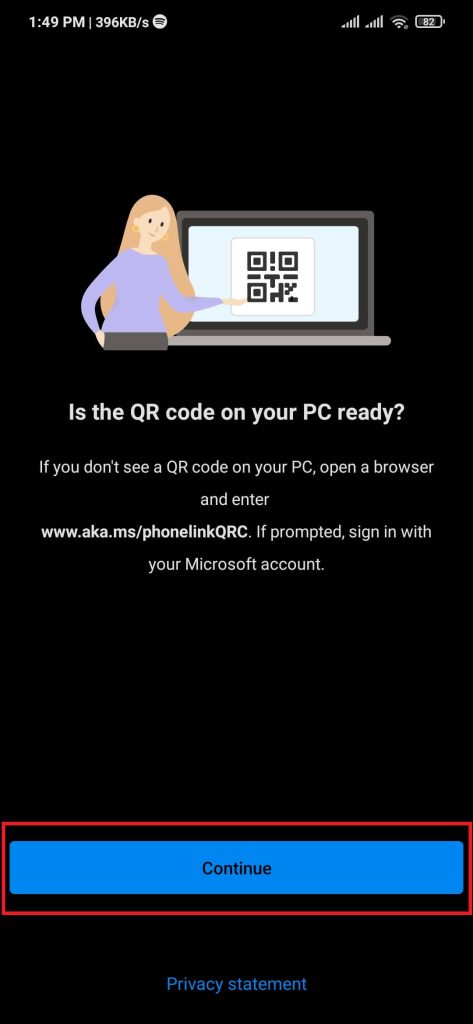
4. After downloading the app on your android phone, open it. Then, press the continue button to link with the QR code.
5. Back to windows, Select the option “I have the link to Windows app ready” and press the Pair with QR code button.
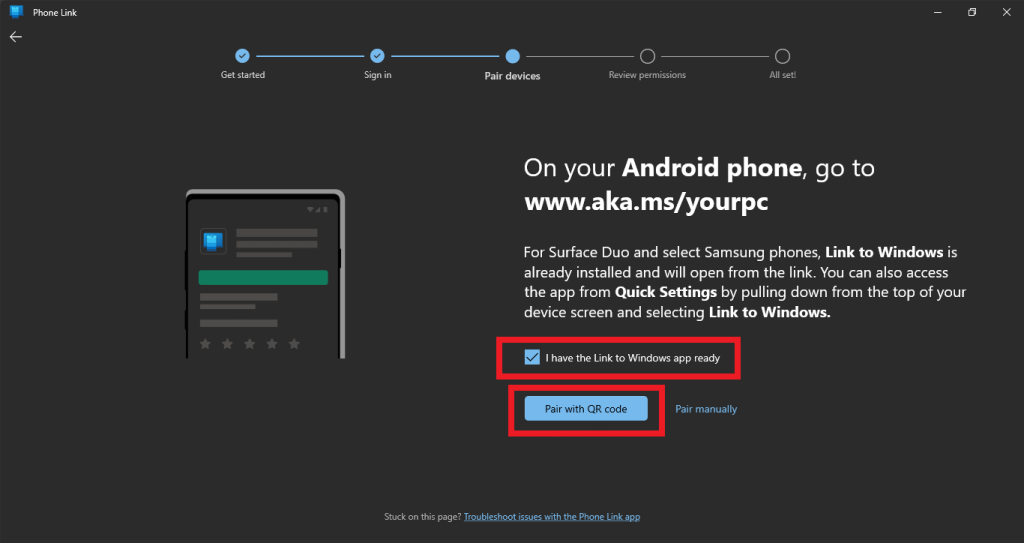
6. Microsoft will display a unique QR code on the screen, then scan it with the Link to Windows app.
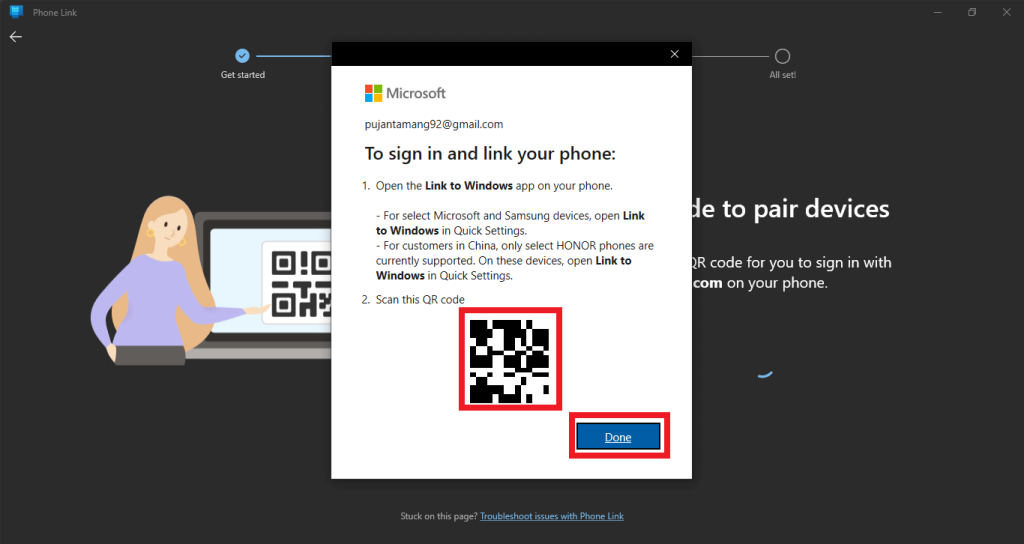
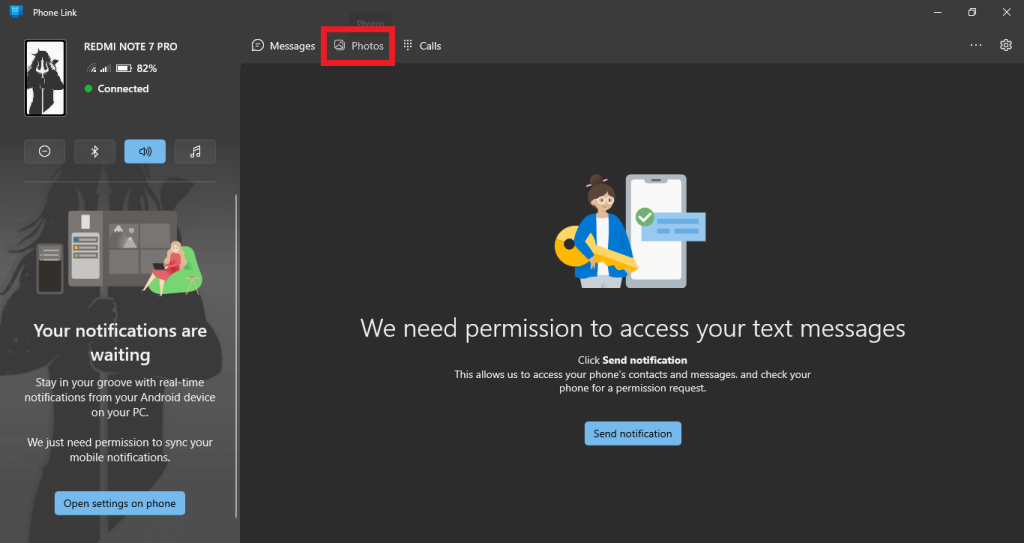
7. After a successful scan, the user will redirect to the home page. Press the Photos option from the top bar.
8. To download any images, right-click on the image and select Save as an option.
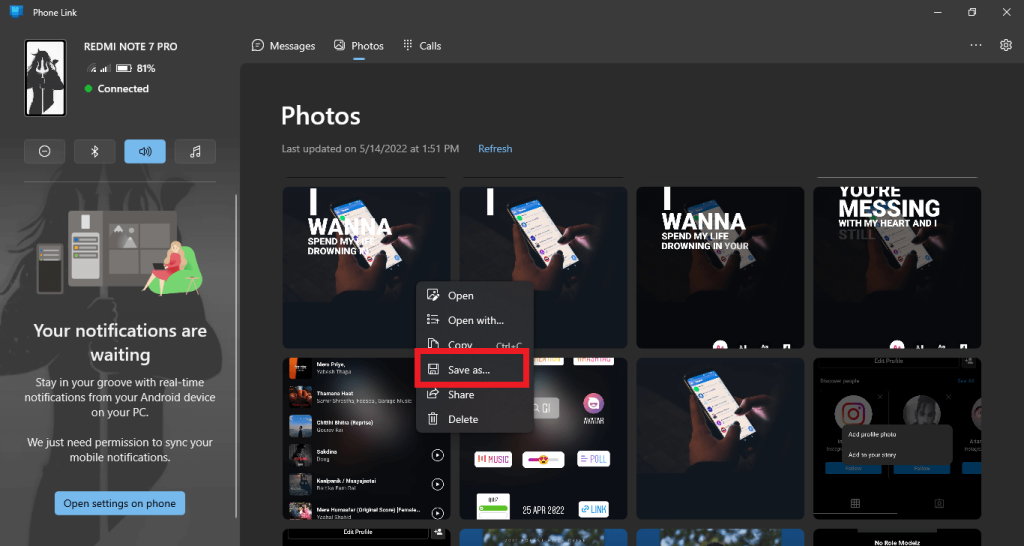
After users complete the above steps, they can import photos from android to PC using an in-built app.
Conclusion
Photos carry a significant value in terms of memories and feelings of a captured moment. Using the above-described method, we can transfer photos from android to a computer depending upon our availability.


