The ability to capture your screen is a useful feature. In today’s world, you can record your screen to make tutorial videos and record gameplays, and the possibilities are endless if you want to learn the method to Screen Record on Windows 11.
Windows provides the ability to screen record with audio by default. For instance, Xbox Game Bar is an in-built tool in Windows 11 that allows users to record their screen on windows during gameplay.
In this article, we will discuss everything about methods to Screen Record on Windows 11 using Xbox Game Bar and other third-party applications.
What is Xbox Game Bar?
Xbox Game Bar is a gaming feature built into Windows 10 and 11 with excellent features.
You get the ability to modify individual audio channels’ sound loudness, a computer performance monitor, a resources widget to manage performance, play music while playing games, and utilize Microsoft’s Xbox features to get social services.
Xbox Game Bar Features
You may use the Xbox Game Bar widgets to record gameplay, take screenshots, find friends, and control performance without leaving the current game. Meanwhile, You can easily access the Xbox Game Bar using the straightforward keyboard shortcut Win + G.
Gameplay Video Capture and Screenshot Feature
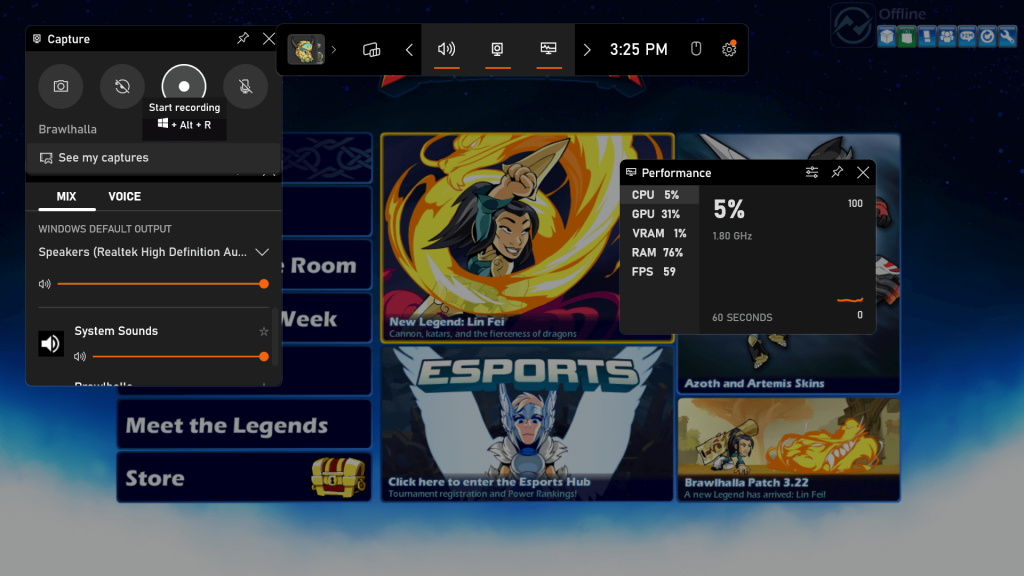
This feature comes in handy while you are playing a game. You can easily record your gameplay and even easily take screenshots. That is to say, you can open the game bar using Win + G and use the Capture widget.
Individual Audio Channels’ Sound Loudness Modification
The Xbox Game Bar automatically displays all the audio channels currently playing sound on your Windows device when you access it. In addition, you may adjust the level of each audio track using the slider.
Computer Performance Monitor
Xbox Game Bar has a performance widget that lets you monitor your computer performance while playing any game. Moreover, you can observe the fps during your game.
Methods to Screen Record on Windows 11
On Windows 11, you can record almost anything using the Xbox Game Bar function, but you can’t record while using File Explorer or the Windows desktop. But once you’re in the right app, you may freely begin recording, taking screenshots, and other actions.
These are some methods you need to follow:
Method 1: Screen Record on Windows 11 Using Xbox Game Bar
We will be using Xbar Game Bar to record the screen. That is to say; It’s an application by Microsoft that provides a lot of capabilities. You can follow the given steps:
Step 1:
Firstly, open the application. This application or game should be the one you wish to screen record.
Step 2:
Secondly, Launch the Xbox Game Bar by pressing Windows + G keys on your keyboard.
Step 3:
In the Capture menu, select “Start recording” or press Win + Alt + R. When it starts recording the video, a stop symbol will show up.
Step 4: Finally, press Win + Alt + R to stop the screen capture when you finish your recording.
Once you follow the above steps, you will get a pop-up with the message “Game clip recorded.” This is one of the easiest and most trusted methods one can follow to screen record with audio and create a video clip.
Method 2: Screen Record on Windows 11 Using a third-party application.
If you don’t want to use Xbox Game Bar, you can Screen Record on Windows 11 Using a third-party application. Similarly, There are different applications with excellent capabilities and features that add to the good experience.
Before we get into the tutorial, let’s explore some of the best third-party applications on the internet with their unique features:
Top 5 Best Open-Source Screen Capture tools
| Name | Audio | OpenGL | Editing | Direct3D | OS | Output |
|---|---|---|---|---|---|---|
| Filmora | Yes | Yes | Yes | No | Windows & Mac | MP4 (H.264/HEVC), MOV, GIF, MP3 |
| ShareX | Yes | No | No | No | Windows | AVI, MP4, GIF |
| Capture Fox | Yes | No | Windows | Motion JPEG or Xvid in AVI | ||
| CamStudio | Yes | Yes | Windows | AVI, SWF | ||
| OBS Studio | Yes | Yes | No | Yes | Formats supported by libavformat | Win/Mac/Linux |
These applications are easy to use and provide good support. We have provided a download link; that is to say, you can visit the website to explore more about the features and ways of using them.
Likewise, you may have an old laptop with weak specifications. After you install a third-party application on your computer, this might affect your computer speed. Therefore, you can find time to Factory Reset your Windows 11 PC and install the screen record application.
How to Screen Record on Windows 11 using OBS Studio
For this tutorial, we will be using OBS Studio. The point often overlooked is that OBS Studio is undoubtedly the best application with almost every feature you wish for.
The feature list includes Real-time video/audio capture and mixing at high performance, Creating an infinite number of scenes that you can move between smoothly, a logical audio mixer with a source-specific noise gate, noise suppression and gain filters, and so on.
Step 1:
First, Download OBS Studio from their official website and install it.
Step 2:
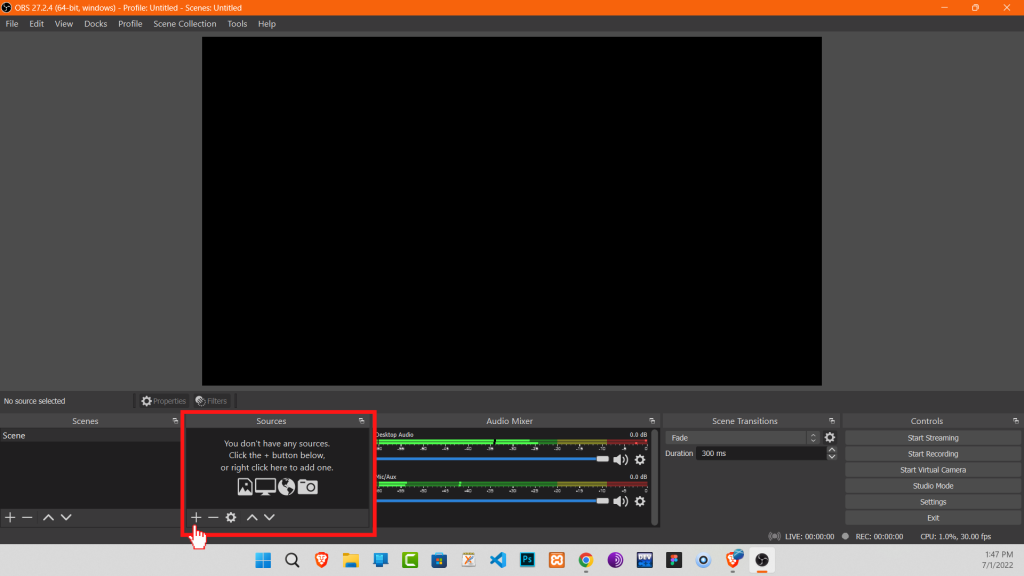
Secondly, open OBS Studio.
Step 3:
Choose the “+” icon to add the display. Likewise, You can find this option under the source section.
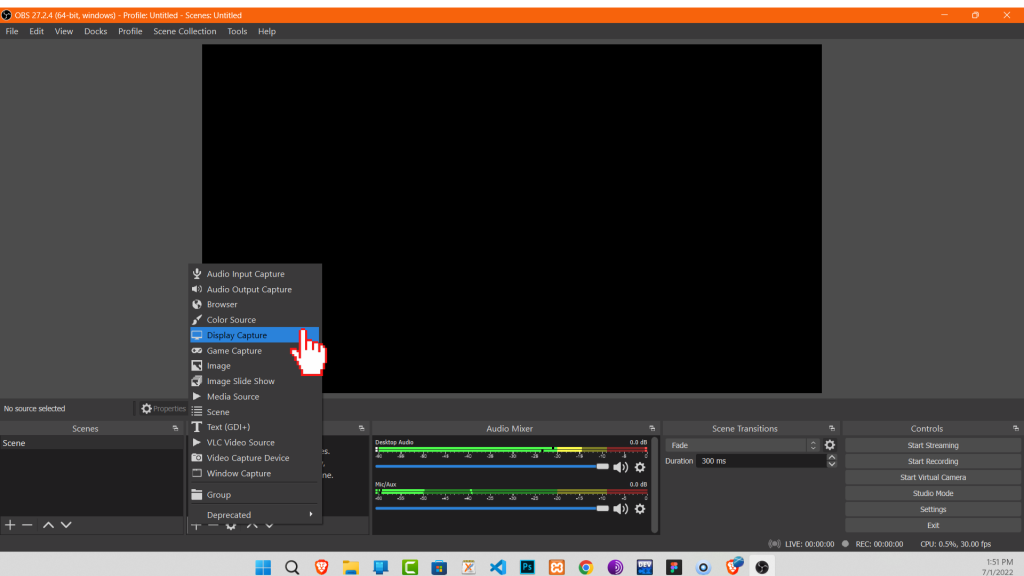
Step 4:
After that, choose “Display Capture” from the different options.
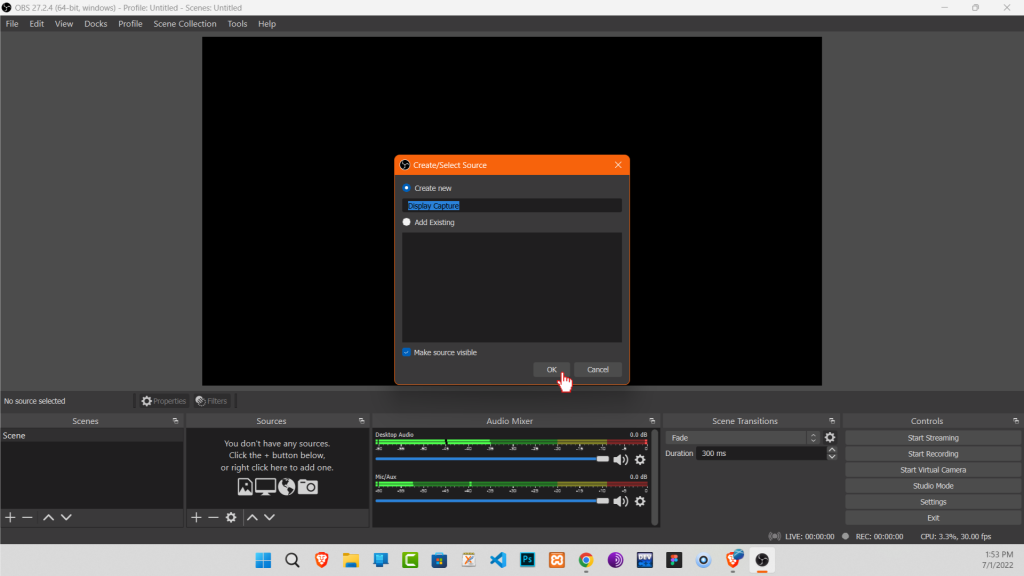
Step 5:
Here, you can give a name to the display name and click “OK.”
Step 6:
Afterward, select the display you wish to capture and click “OK.”

Step 7:
Finally, click on “Start Recording.”
In short, the functionalities you get with OBS Studio aren’t limited to screen recording only. Likewise, You can start an online stream on multiple platforms.
You can use display capture hardware to screen record another computer, smartphone, console, camera, and so on.
Final Thoughts
Therefore, you can easily Screen Record on Windows 11. It would be helpful for the person who wants to record a tutorial and make videos. Moreover, teachers can utilize this skill and, without a doubt, make education accessible to everyone.
We hope this tutorial was helpful and should reach out to more people. So, you should share this guide with people who want to learn.


