Microsoft Windows forces automatic updates in Windows 11. We agree that these updates are essential as they provide additional functionality and fix bugs. However, these updates are annoying and disturb you while using your laptop. If you have been through this situation, you must have searched for methods to pause and disable Windows 11 updates. Here is the good news, this article is a tutorial for the same issue.
Many users want to have complete control over their windows updates. This article will guide you through methods to stop windows 11 auto-update on your computer.
There are several methods available, and we have tested them. This guide will include solutions that are experimented with and ready to use.
Reason to Turn off Automatic Updates
Many students and employees use their laptops on the go. If you are one of them, you should be searching for ways to disable Windows 11 updates on your PC.
Students can’t wait for their ms windows laptops to update; due to this, it is helpful to turn off automatic updates and resume the updates when you are free.
Likewise, travel vloggers visit different places and use their laptops more often. As a result, Windows 11 unexpected updates are the last thing they wish to deal with.
On the other hand, you can imagine a situation you are about to give an important presentation, and Windows begins its updates. Turning off or pausing updates greatly helps in such a situation.
Methods to Pause and Disable Windows 11 Updates
Before knowing the methods, you must understand that you can’t stop a Windows update entirely. There are several ways to pause or disable the updates, but they are not permanent solutions.
Some users prefer a way they gain the ability to choose the type of update that should be installed or disabled. For instance, security updates don’t take time to apply, whereas major software updates will cost you several minutes.
Therefore, we will guide you through disabling updates selectively with the help of visual tutorial images. In addition, these methods will be the same for all companies; it doesn’t matter if your device is from HP, Dell, etc.
Do you want to take a screenshot on windows 11? Follow the guide to take screenshots with different methods.
Method 1: Pause Windows 11 Updates Temporarily using Settings
This method is suitable for users who want to pause updates and manually update them in the future. Here are some steps you must obey:
Step 1: First, Open the settings. You can do this by pressing Windows + X and selecting “Settings.” You can also use Windows + I to access Settings directly.
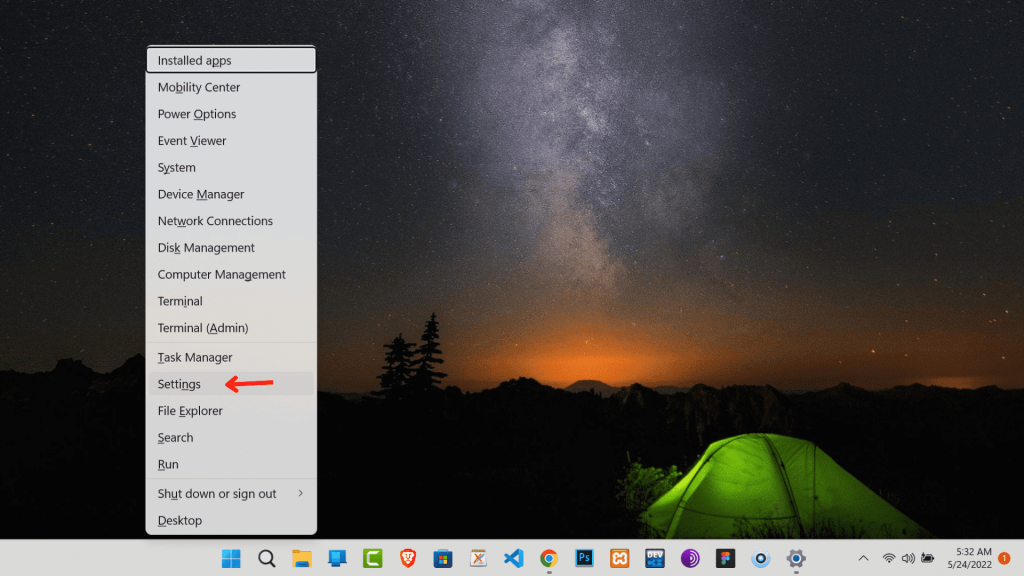
Step 2: Secondly, click on “Windows Update.” This section of settings contains all the latest updates and other information.
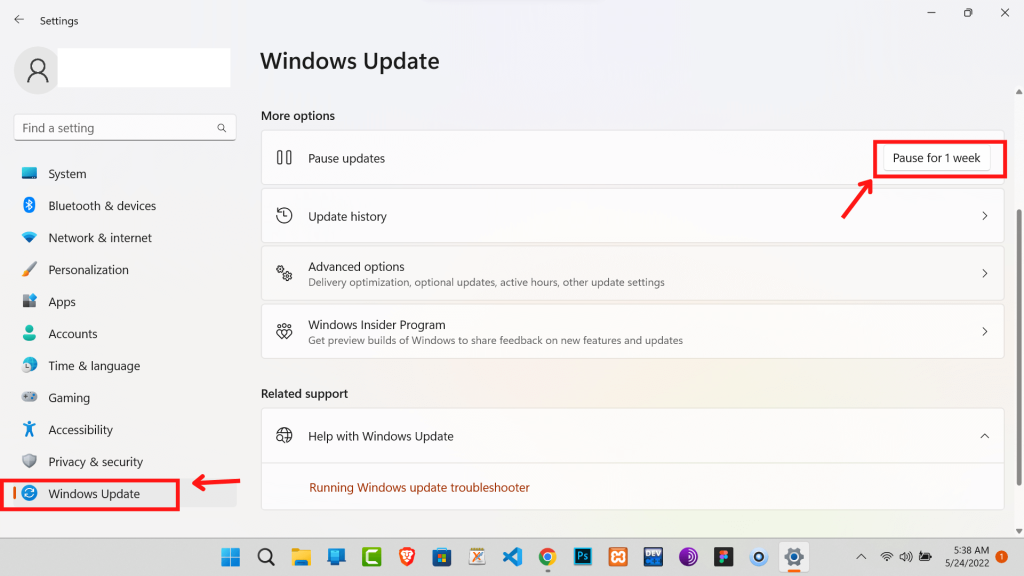
Step 3: Now, click “Pause for 1 Week” and select the option.
Finally, you have successfully disabled updates on your Windows 11 for seven days. This setting remains for a week, and you can turn off pause updates anytime by clicking on “Resume Updates.”
Method 2: Prevent Automatic Updates in Windows 11 using Windows Services
If method 1 is not fruitful, the following alternative might help you. This method involves the use of Windows Services.
Step 1: First, you can open Windows Services using the Run feature. Open Run using Windows + R from the desktop.
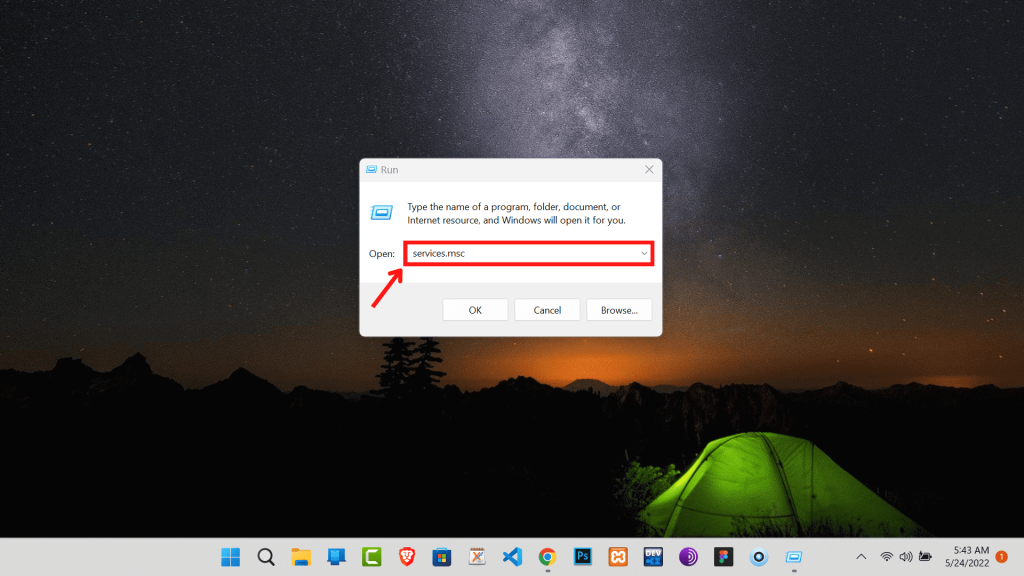
Step 2: Type “services.msc” and press Enter.
Step 3: Now, you will see different services on the listings. Search for “Windows Update” and Double-click on it.
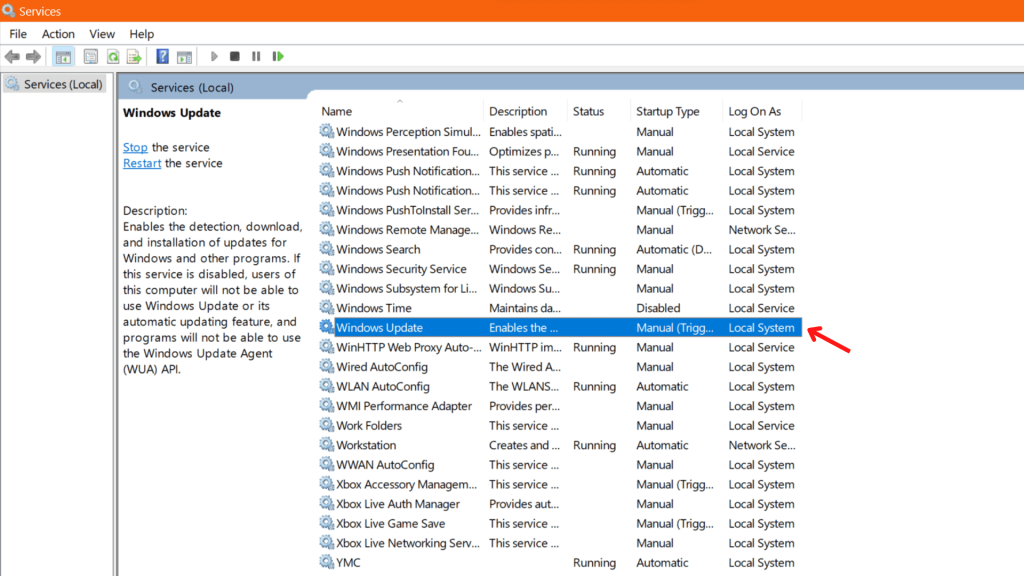
Step 4: You will be redirected to a new screen with different options.
Here, under the “General” section, click on the drop-down menu on the right side of “Startup type.” Here choose the “Disabled” option.
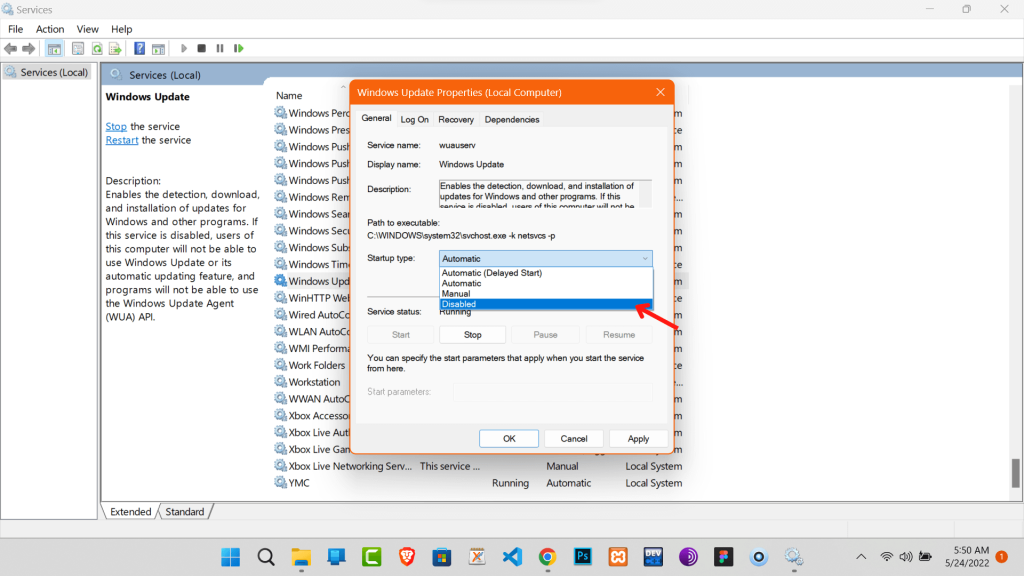
Step 5: Click “Apply” and “OK.” This will save the changes.
The above method will pause automatic updates; however, it won’t be disabled permanently. In the future, if you ever wish to revert to the previous settings, you change the settings to “Manual” or “Automatic” in the startup type option.
Method 3: Pause Windows 11 Updates by Editing the Registry
We will be using Windows Registry Editor or Regedit in our following method. Windows Registry Editor is a graphical editor in Windows 11 that let’s an authorized user edit the registry without the hassle of writing codes.
1. First, open the Windows Registry Editor by launching Windows + R, type “regedit.exe,” and click OK.
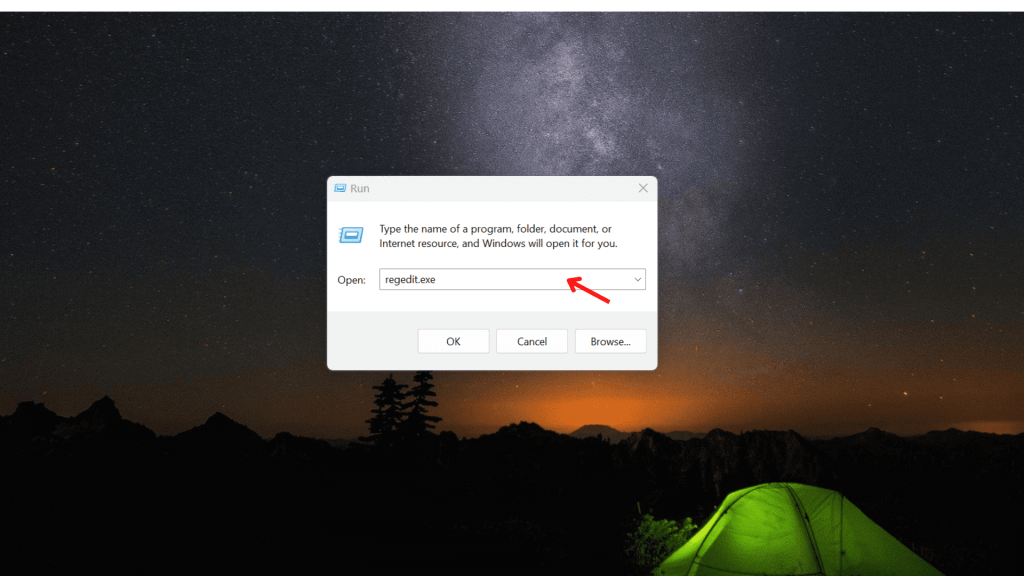
2. You will get a pop-up asking for the admin privilege. Click “Yes” to confirm it.
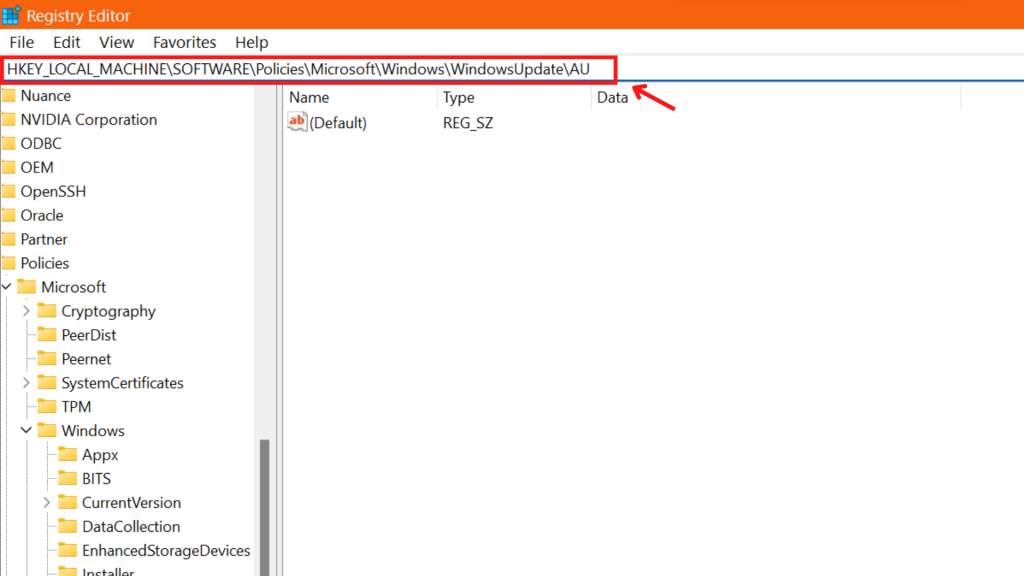
3. You now need to replace the text on Address Bar with the given text and Enter.
HKEY_LOCAL_MACHINE\SOFTWARE\Policies\Microsoft\Windows\WindowsUpdate\AU
4. On the next step, right-click on the white space. Now, Select New >> DWORD (32-bit) Value.
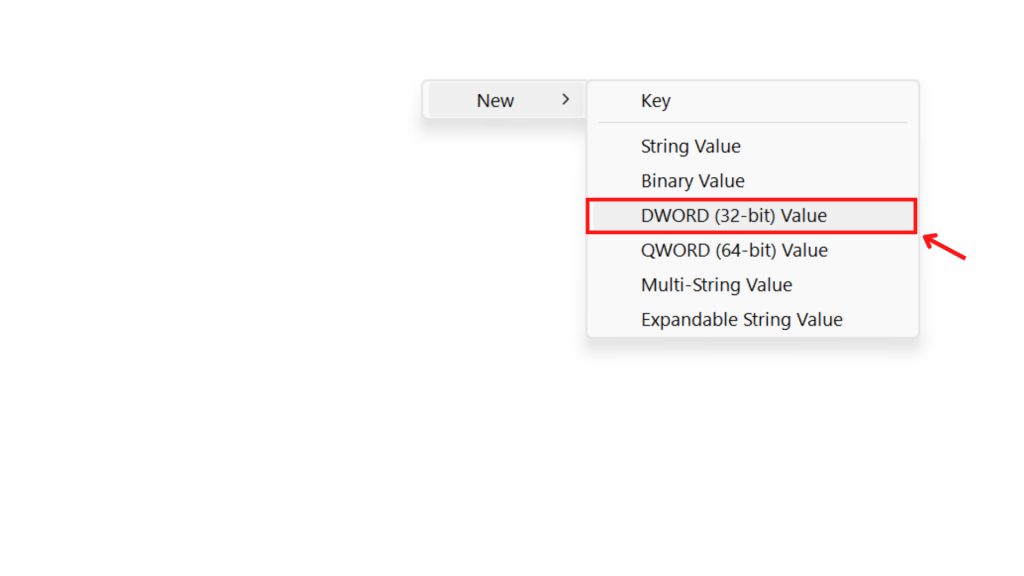
5. You should give a name to it. For instance, we named it “NoAutoUpdate.”
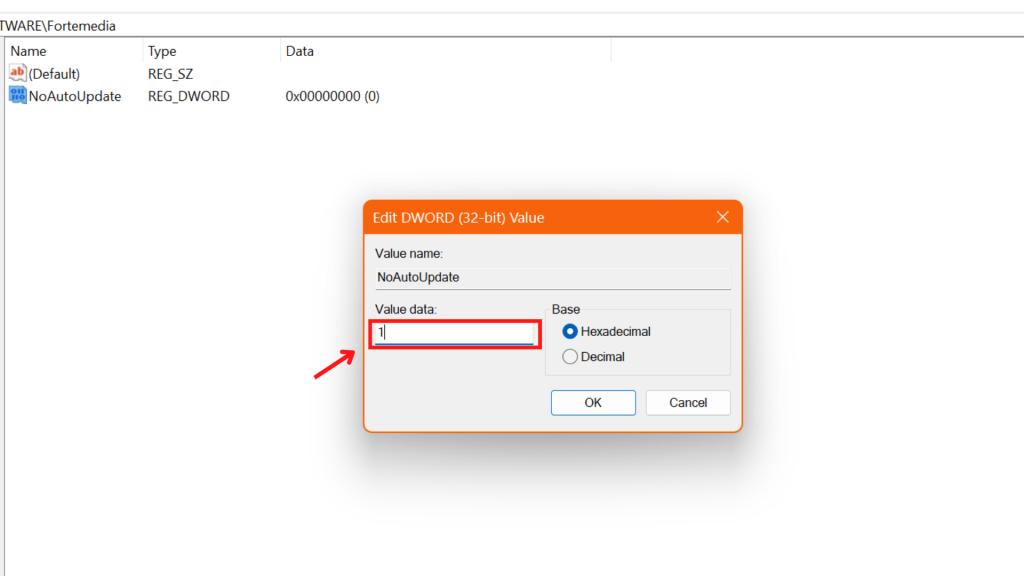
6. Double-click this “NoAutoUpdate” and put “Value data” to 1.
Method 4: Fix a Metered Connection to Prevent Windows 11 from Automatically Updating
You may be wondering how can a metered connection help to stop disabling Windows 11 updates. When using a metered connection, you limit the use of data in the background.
Let’s get straight into the steps to fix a metered connection:
1. First, Open the settings. You can do this by pressing Windows + X and selecting “Settings.” You can also use Windows + I to access Settings directly.
2. Secondly, navigate to “Network & internet.”
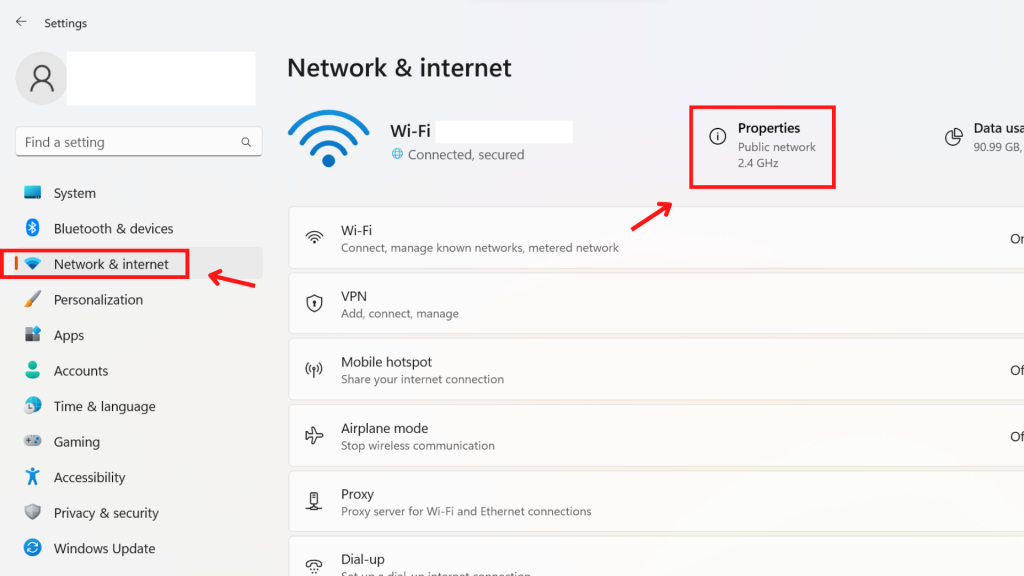
3. Next, you need to click on “Properties,” which will be on the right side of the wifi name.
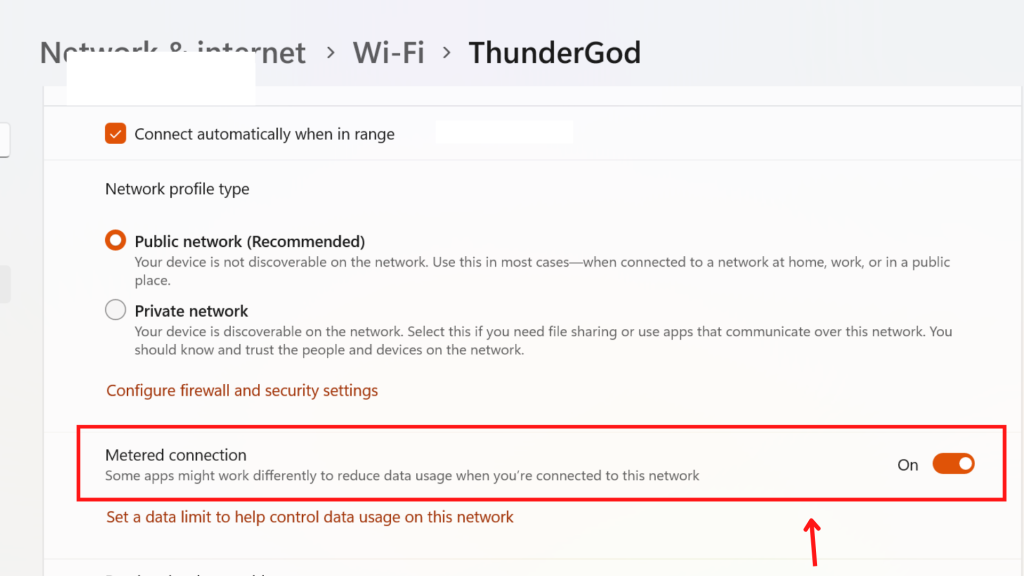
4. You will see the option “Metered Connection.” Please turn it on.
6. Click “Windows update” and “Advanced Options.”
7. Finally, you will see the option “Download updates over metered connections.” Click on it.
This method can also be used for another background process. It’s helpful to have the skill to set a metered connection.
Final Thoughts
Above all, these were the best ways to pause and disable Windows 11 updates. You can use this method to stop Windows 11 updates temporarily.
This means we can reverse the settings whenever you want. There is no such to pause permanently. So, you can follow these four methods as short-term solutions.


