Random Access Memory, or RAM, is a physical chip installed on your computer’s motherboard and acts as the primary storage for all temporary data required to access the programs and software stored onboard. In this article, we are going to talk about ways you can follow to check your RAM on MS Windows 11.
Simply put, the more RAM your computer possesses, the greater it is potential to multitask, open programs more quickly, and even start up more quickly.
All of these criteria, though, also rely on secondary storage devices (HDDs or SSDs), but that discussion can wait for the moment.
Depending on how much data you would like to know, there are numerous ways to find out more about the RAM in your computer. Regardless of what you want to see, we’ll show you a few distinct interpretations you can take.
And also, you can check out our other article on how to Rotate the Screen in Windows 11.
What is the need to check RAM on Windows?
Knowing how to test RAM on windows 11 can be helpful in a plethora of situations.
Like when assessing if the software can operate on your Windows 11 computer or diagnosing a lethargic computer. Sometimes, even when you want to upgrade your RAM or any storage-related hardware, knowing about RAM can be beneficial.
Examining Windows 11’s requirements and ensuring your PC can sustain your workload is a good idea. You’re more likely to run into problems with Windows 11 if you don’t have the minimum requirement of 4 GB of RAM.
Check RAM Specs on Windows 11
One of the key facets impacting your computer’s speed is RAM. If your system is running slow despite having a fast SSD drive and a good system, you should look into the amount of RAM loaded.
Getting this information was only made somewhat simple by Windows. However, doing so is a little bit simpler in Windows 11. Whether upgrading your system or designing a fresh computer, you will need more RAM to run numerous apps at once.
Since there are several ways to check the RAM type on Microsoft Windows 11, let’s explore each.
The steps below should work properly on any computer running Windows 10 or a later version, including Dell, Asus, Asus, Lenovo, MSI, and HP laptops.
In our test, we used a Dell Inspiron 14 (5402) laptop.
Method 1: Check RAM Information Using System Settings
The Settings app may be the quickest way to determine how much RAM your laptop or desktop has. Within a few clicks, you can observe the amount of RAM you have, your device model, and a few more System information.
Follow the steps given below to check RAM on Windows 11 PC using System Settings:
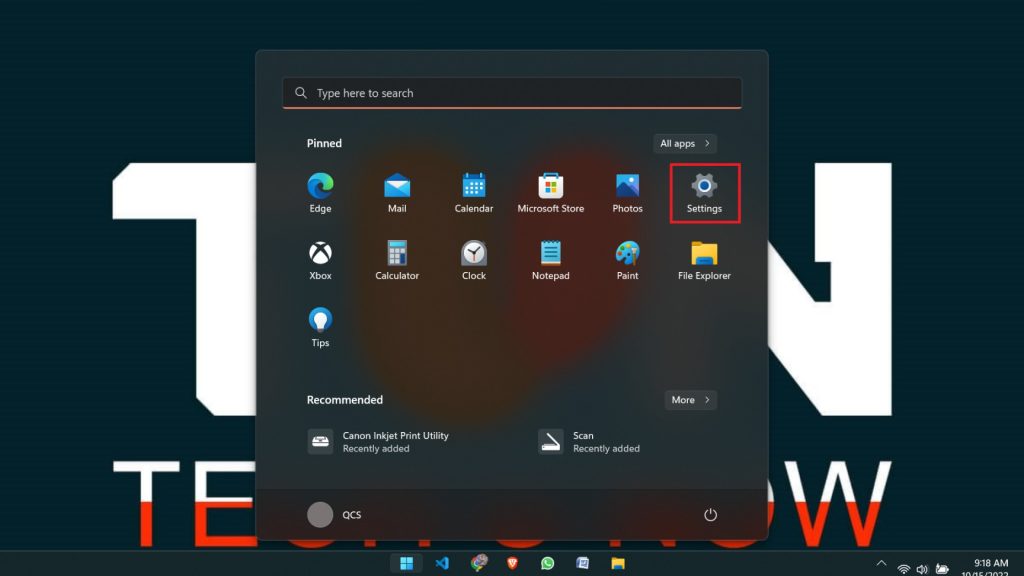
1. First, click the “Settings” app from the start menu accessible on your PC’s taskbar.
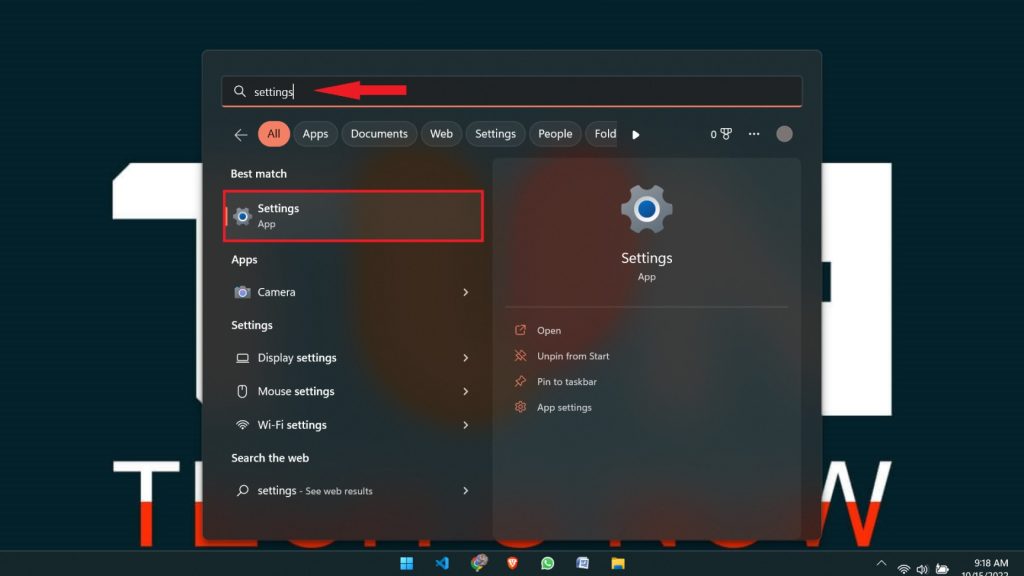
2. You can also search “Settings” from the Task bar’s search bar.
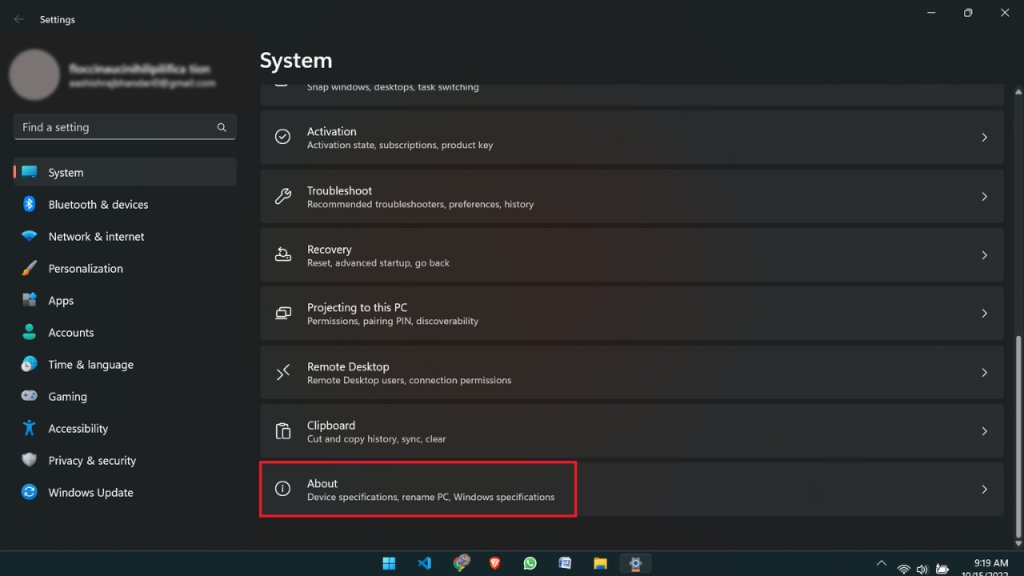
3. After selecting the “System” tab on the left pane, scroll down and select “About” in the right pane.
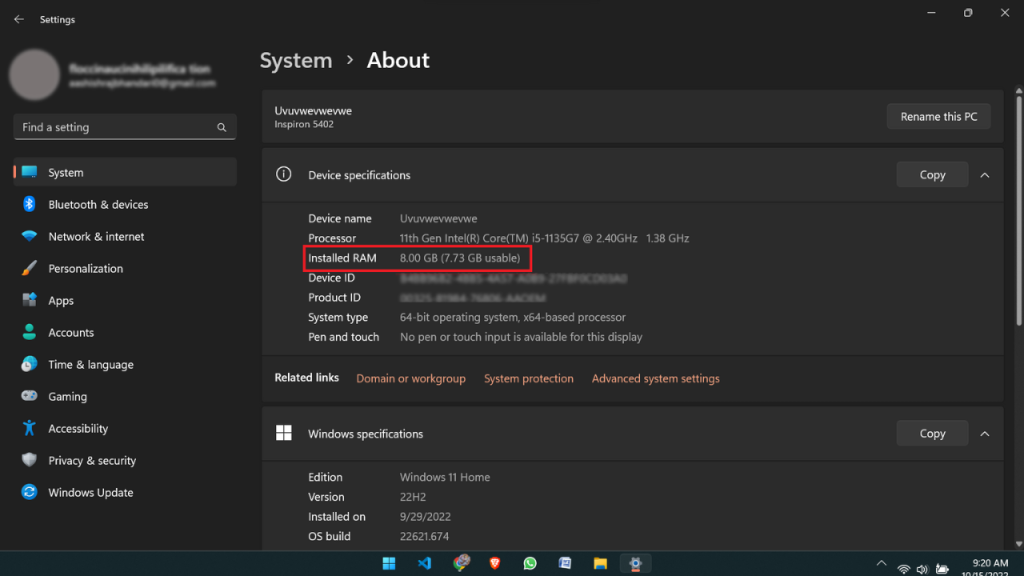
4. Finally, under the window’s “Device specifications” section, you will be allowed to view the already installed RAM.
This is how you can find RAM information on Windows 11.
Additionally, you can click the Copy option if you desire to share your system’s specifications; you could therefore paste the configuration in another location.
Because some memory might be shared with the GPU in your computer, you’ll typically find that the total usable RAM is less than what’s installed. It doesn’t indicate that your computer is malfunctioning in any form.
Method 2: Check RAM Information Using Task Manager
Task Manager is the right alternative if you’d like a more up-to-date statistic of the amount of RAM your system uses.
The Task Manager provides a wide range of metrics in addition to RAM usage. It can assist you in understanding how your system is utilizing its resources.
Follow the steps mentioned below to check your RAM size usage using Task Manager on your Windows laptop or desktop:
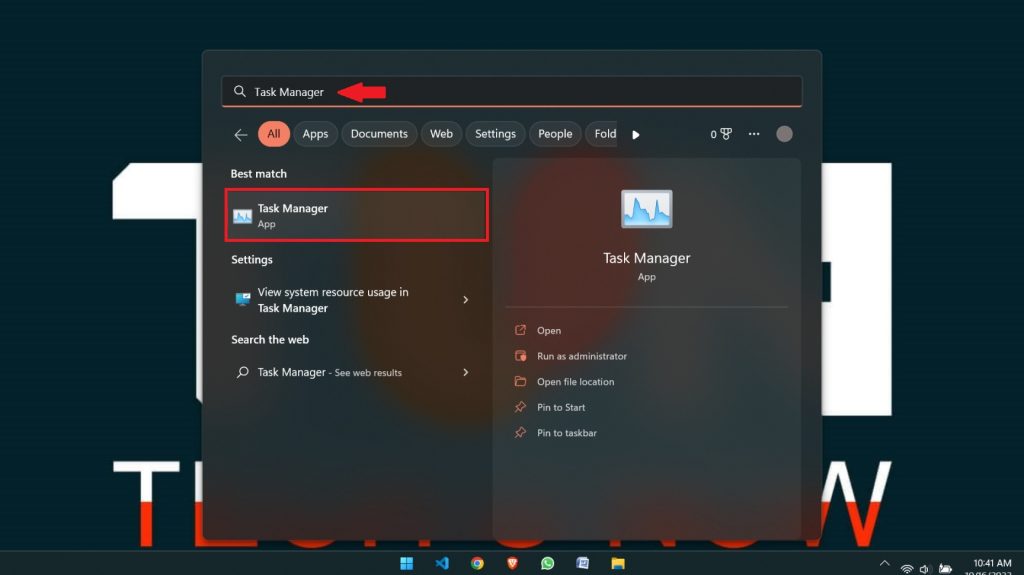
1. Click the “Search” icon on your Windows 11 computer’s taskbar.
When the search results appear, click on the tile labeled “Task Manager” after typing “Task Manager” into the search box.
Alternatively, you can open it by pressing the keyboard shortcut Ctrl+Shift+Esc.
2. From the “Task Manager” window, select the “Performance” tab on the screen’s left side.
Select the “Memory” tab from the sidebar after that.
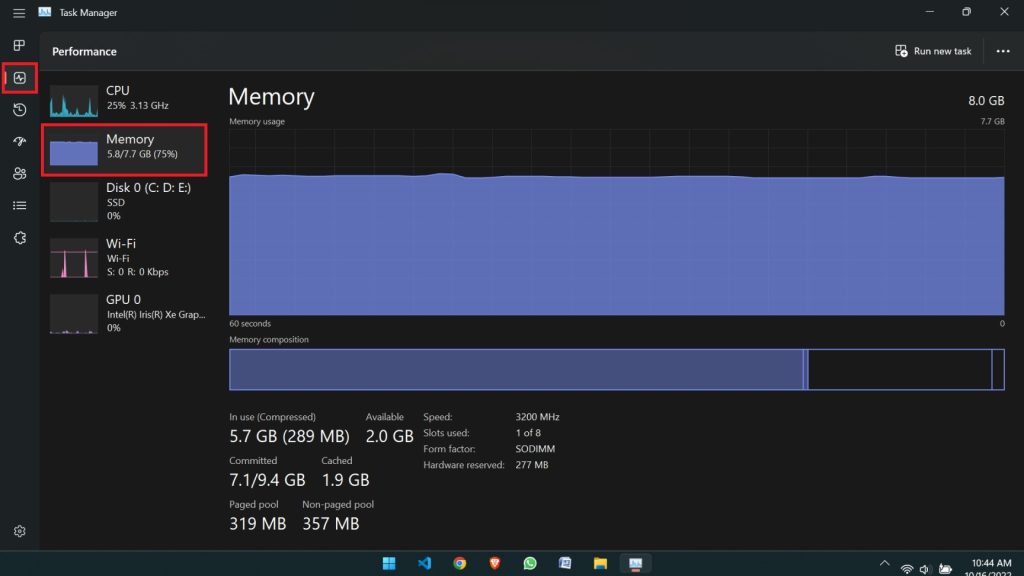
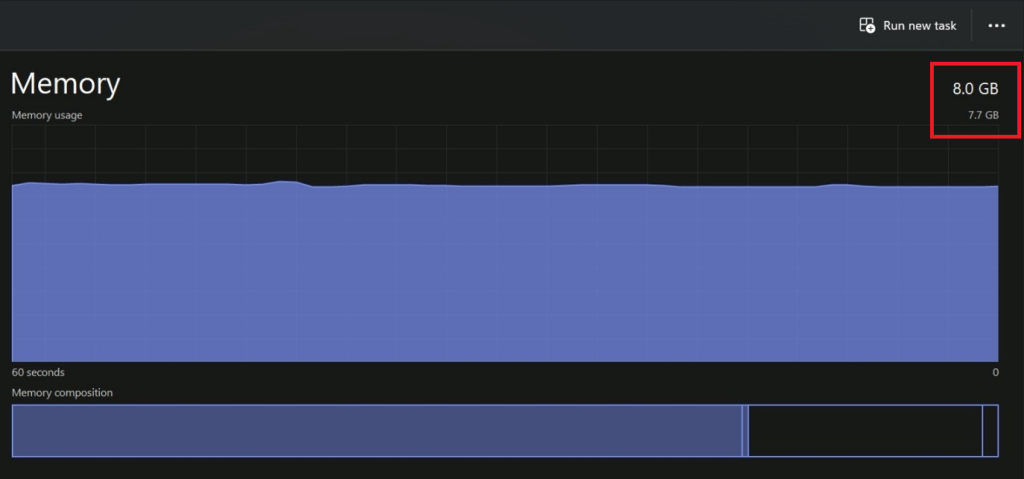
3. On the upper right side of the window, you can see the total amount of RAM available for your system.
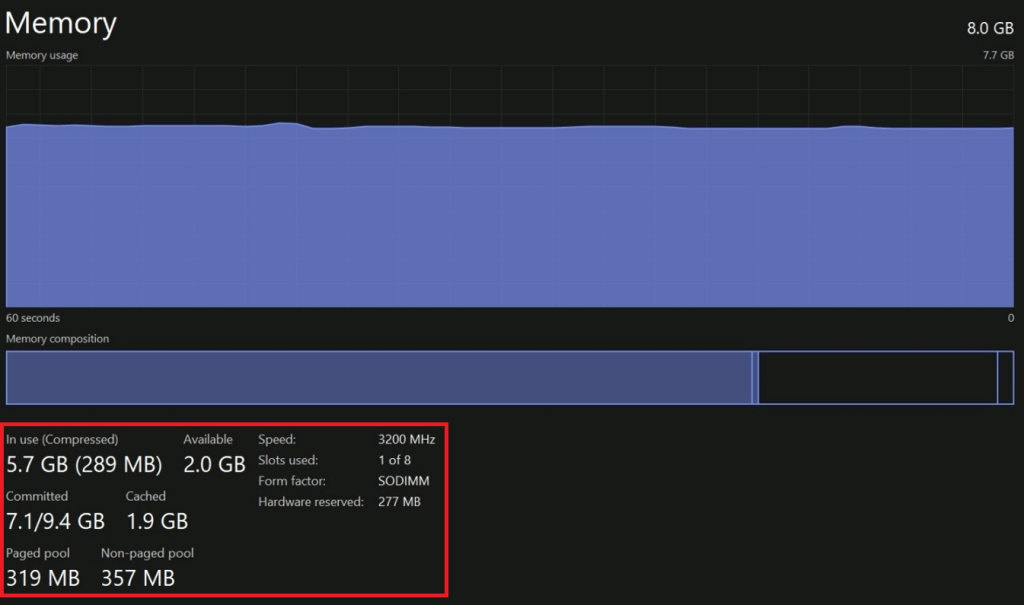
4. You can monitor the amount of “In Use” RAM, “Available” RAM, form factor, “Slots Used” on the motherboard of your computer, speed, and “hardware reserved” RAM in the lower right corner of the window.
The RAM currently in use is displayed below the “In use” label under the “Committed” label. And there is no feature telling you the brand of your RAM.
In this way, you can find out your RAM specs on Windows 11 PCs using Task Manager.
The process sure seems lengthy, but if you are a techy person and know about technical terms, this method is ideal for you.
You can also learn how to Unblur an image or photo for free.
Method 3: Check RAM Information Using System Information
Undoubtedly, the Settings app is a pretty easy way to find out how much RAM is loaded on your computer. And we can find more technical terms in Task Manager, which can confuse some people.
However, you can open the “System Information” window if you require a little bit more simplified information than that.
You can follow the instructions given below to check RAM size information using the system information:
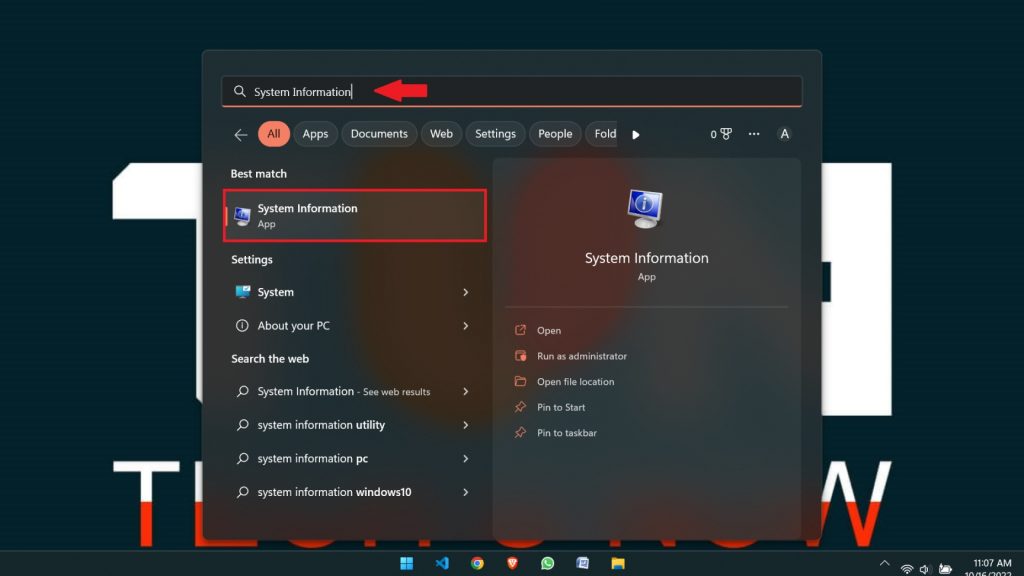
1. As we did previously, open the Taskbar and search for “System Information” in the search bar.
As a result, after clicking the app tile, your computer’s screen will display the “System Information” window.
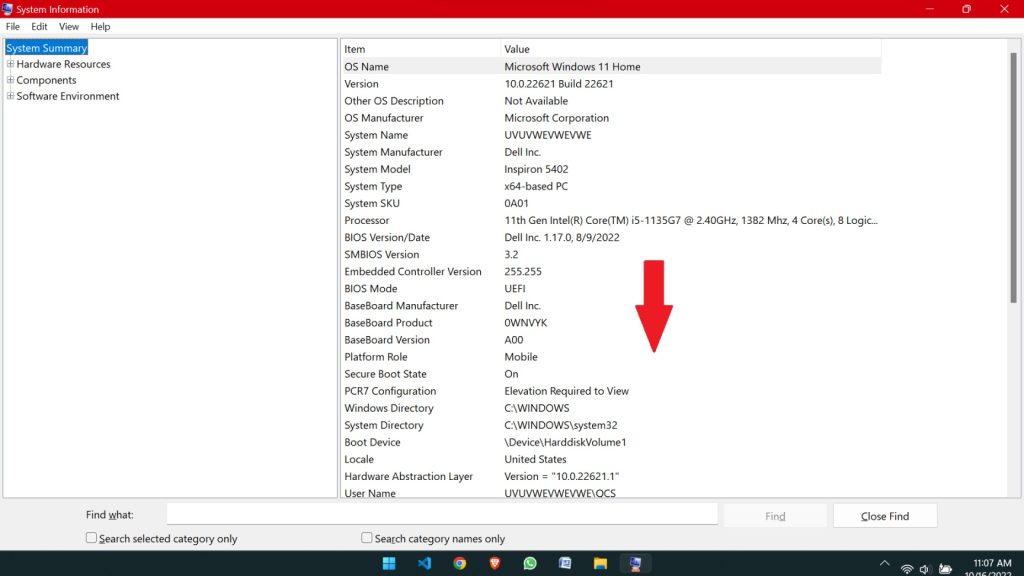
2. After clicking the app tile, as a result, your computer’s screen will display the “System Information” window.
You can see a variety of additional system-related settings. Now, navigate to the right side of the window, then scroll down.
3. There are times when knowing the entire memory capacity is all you need to know, but you might also want to learn a little more.
Here you can see details about your RAM, not in so many technical terms but still complex enough to deceive anyone.
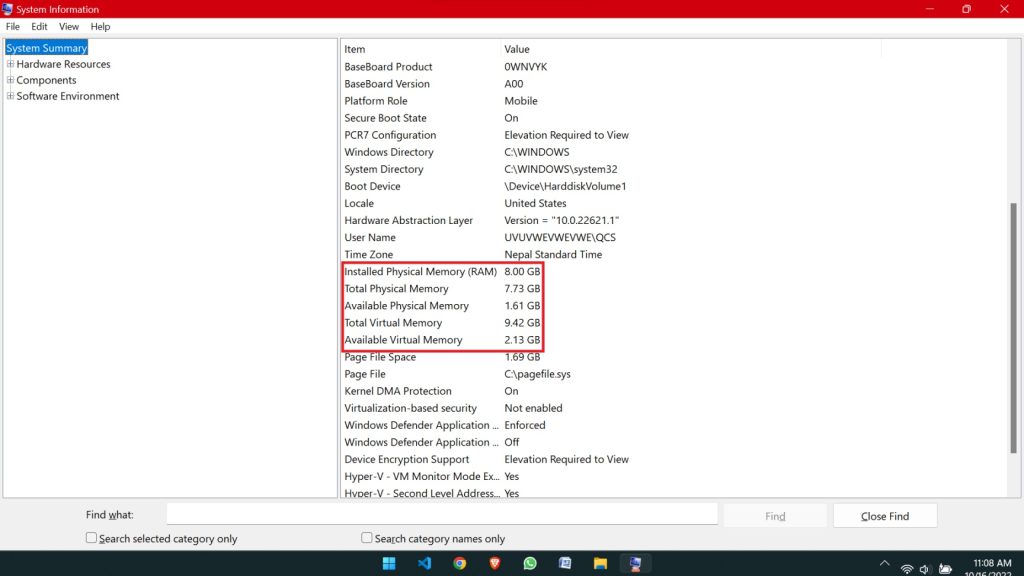
So in this way, you can check your RAM information using the help of System Information. This one was a really simple and basic method.
Method 3: Check RAM Information Using Windows PowerShell
You can also use Windows PowerShell to reveal the total system memory and other system details.
Use the steps further to check your RAM utilization in PowerShell:
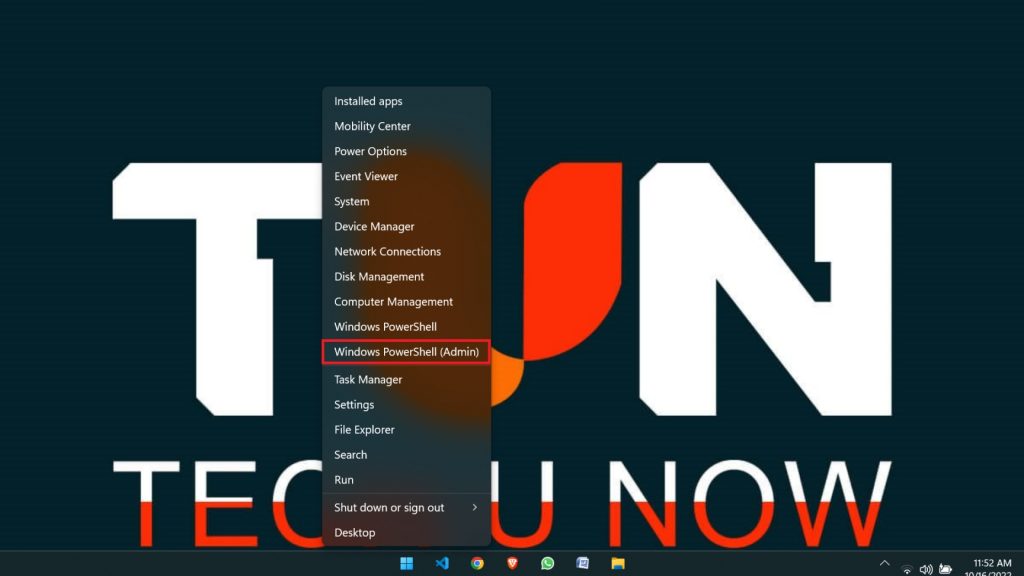
1. Select Windows Powershell (Admin) from the menu by right-clicking on the Start button.
2. In the Powershell terminal, type “systeminfo” and enter.
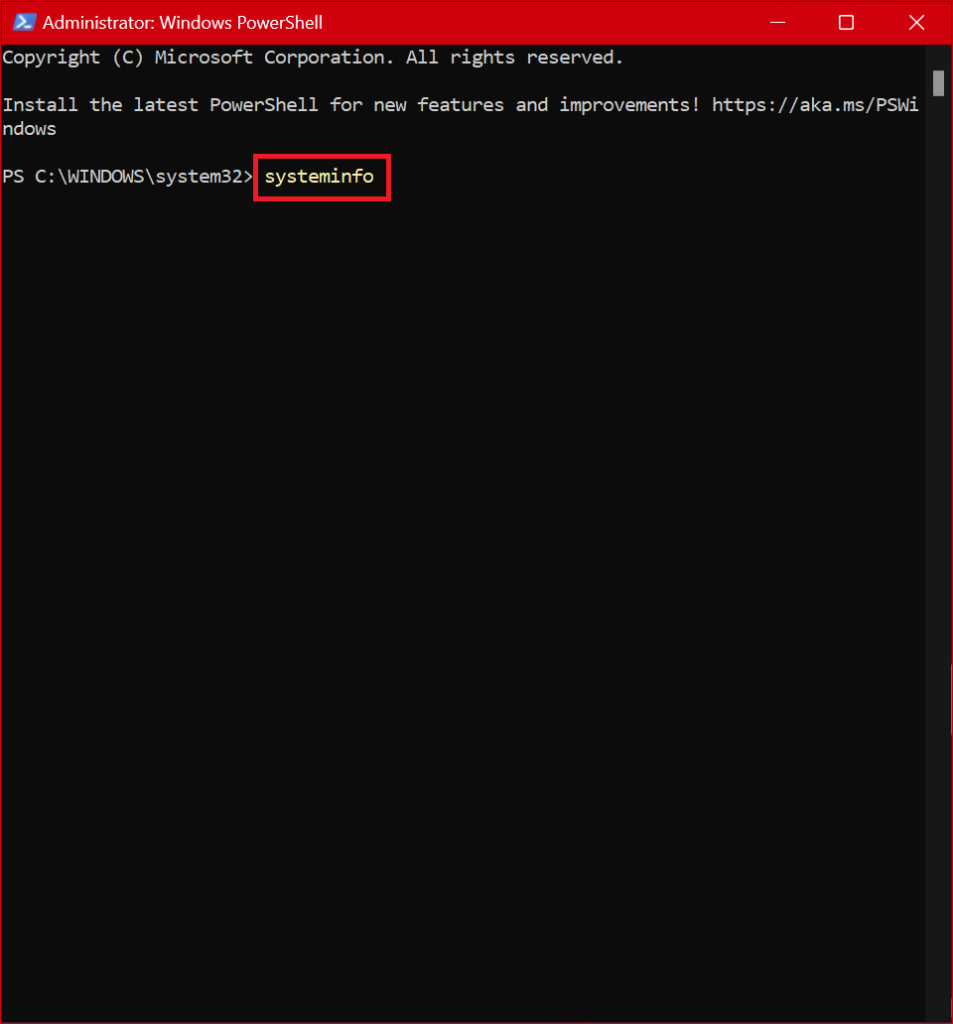
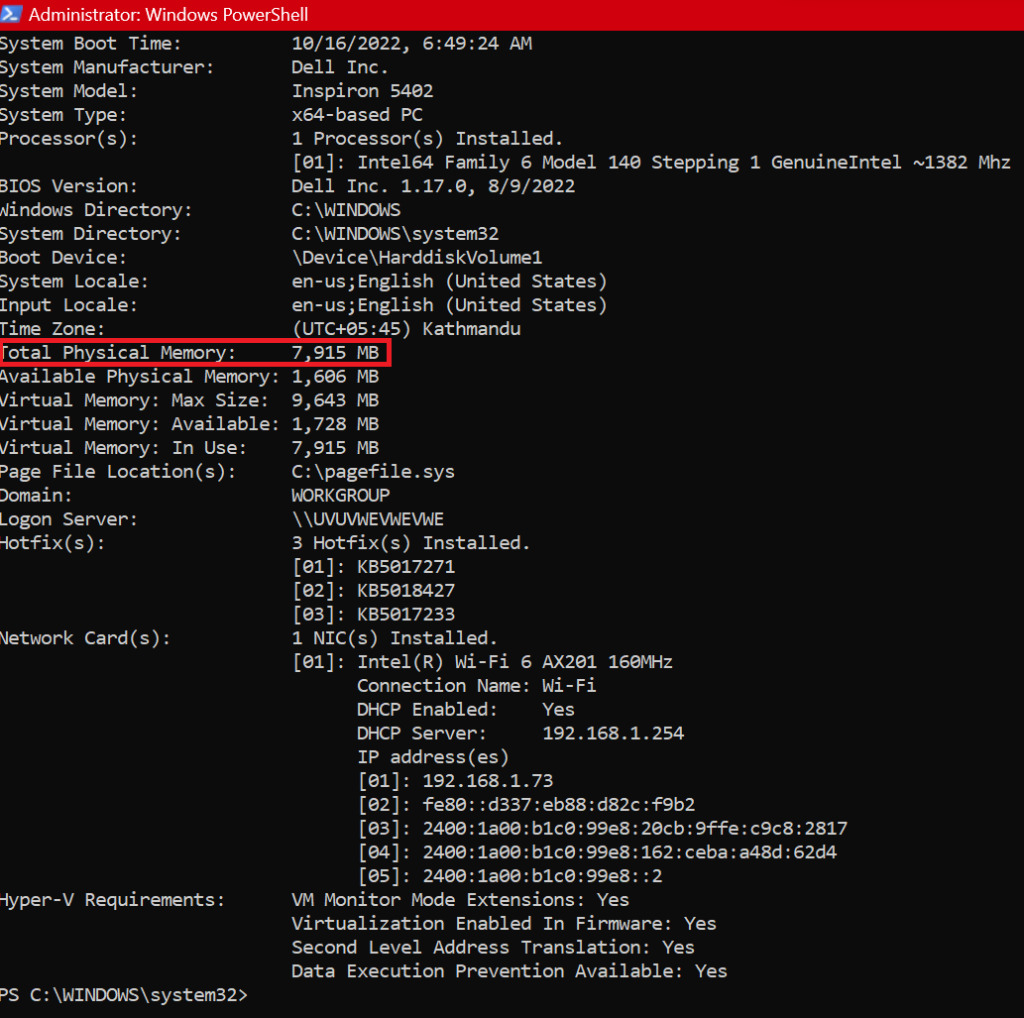
3. Look for Total Physical Memory in the system data that PowerShell accumulates.
So this is how you can view RAM information on Win 11 using Powershell. Follow every step mentioned above to quench your thirst to find information about your computer’s RAM.
Remember that the instructions mentioned below can only be carried out on Windows 11 and later.
Same steps can be followed on Windows 10, but as the layout and features are drastically different, you cannot follow the steps mentioned above on Windows 8.
Additionally
Here is a quick summary of each one in case you are curious about what the terms inside Powershell entail.
- Total Physical Memory: The hardware needs a portion of the installed RAM to operate. As a result, this will never be equivalent to the installed RAM. And it will always be the exact amount that your OS can access.
- Available Physical Memory: This part displays the amount of RAM currently available for consumption by other applications and/or services on your computer and is not currently being used by your system. Depending on the capabilities of specific computers, the value may vary.
- Total Virtual Memory: Virtual Memory does not take up physical space on your computer’s motherboard, as its name suggests. To make up for the lack of physical memory in your computer, you can use virtual memory, which is spare space on your hard drive.
- Available Virtual Memory: This field shows the amount of Virtual Memory that is not currently in use and can be assigned to programs and services.
Conclusion
It’s also worth noting that you can find your hardware and system specifications with the default system tools. Windows provides numerous options for checking RAM information, but if you want free third-party software, you can download Speccy.
And that is how you can discern your Windows 11 computer’s RAM specifications. This should provide you with all the information you require.
So whether you’re looking to upgrade your RAM or merely want to know whether your PC is compatible with a specific bit of code, this must be able to aid you.


