In our personal and professional life, we have used different tools and techniques to take screenshots. But there might be various occasions where taking screenshots isn’t enough and need some annotation. So, to attract the viewer’s attention to certain parts of the demonstration or highlight some lines or segments. We need to learn how to annotate screenshots and images on our devices.
Let’s say we are writing a tutorial about screenshot annotation tools. We want to highlight the steps, highlight your key finding on the research presentation, or want to play around with annotations tools. Users can use different online also offline methods to annotate screenshots and images.
This tutorial will discuss the available methods users can use to annotate screenshots and images on various platforms such as PC, Android, and iOS.
Different Methods of Annotating Screenshots And Images
There are many methods, including online and offline techniques for cross-platform devices. Let’s start with PC devices.
Method 1: Annotate Screenshot On Windows PC Using Paint
One of the familiar in-built tools we can use on Windows computers is MS Paint. Paint is available in the latest versions of Windows, such as Windows 10 and 11.
Microsoft paint offers shapes, text, painting, and many annotation tools. The best thing about it is it’s completely free and systematically installed on your Windows PC.
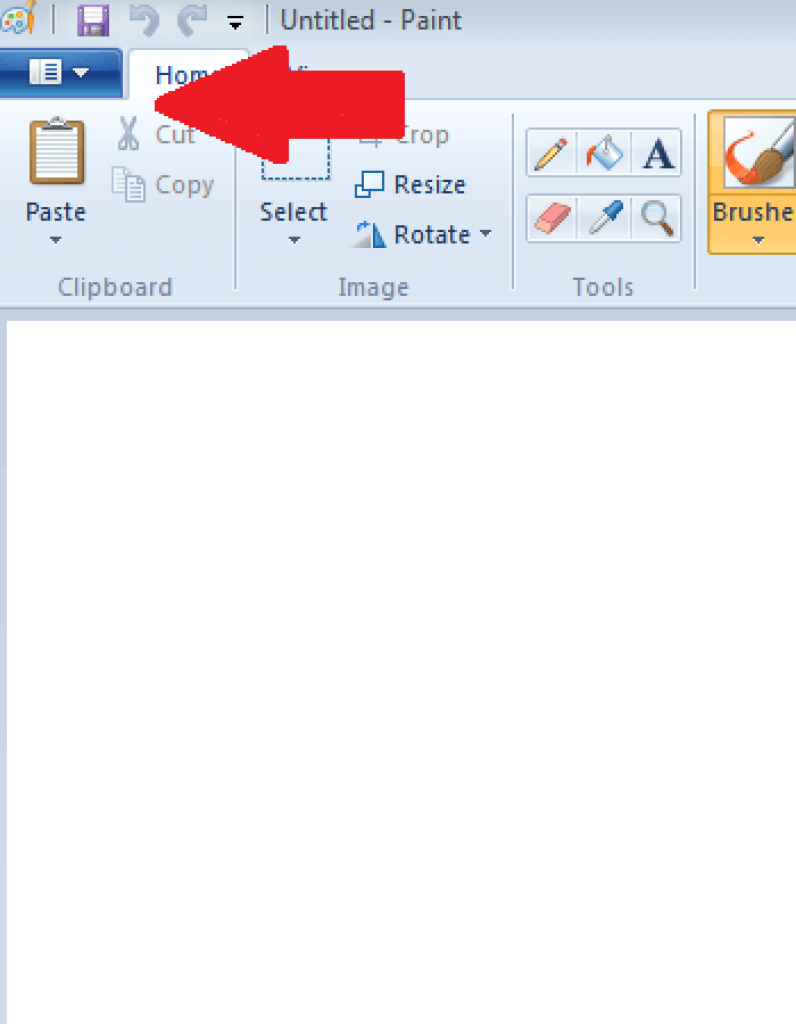
1. Press the Windows key, search for MS Paint, then click on it to open the application.
2. Tap on the file or the drop-down menu from the top bar, then select an open option and choose the captured screenshot to annotate it.
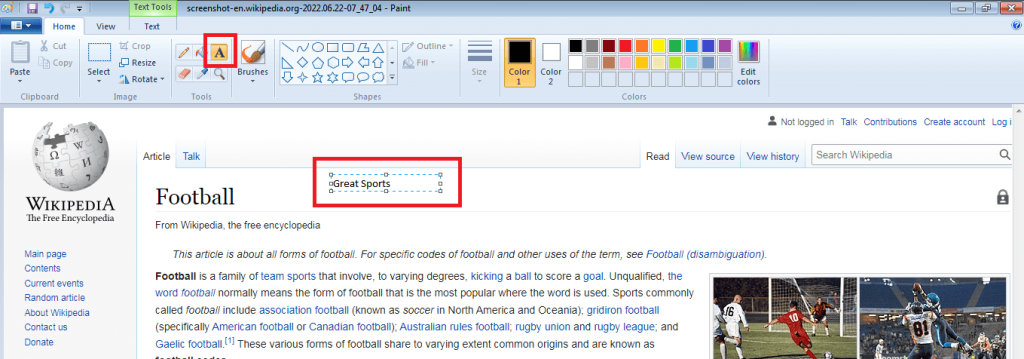
3. Select the text option from the tools section, and type anything to add text to the screenshot.
4. To highlight a key text, users can use the Marker option from the brushes section. Remember to select a transparent color for more details.

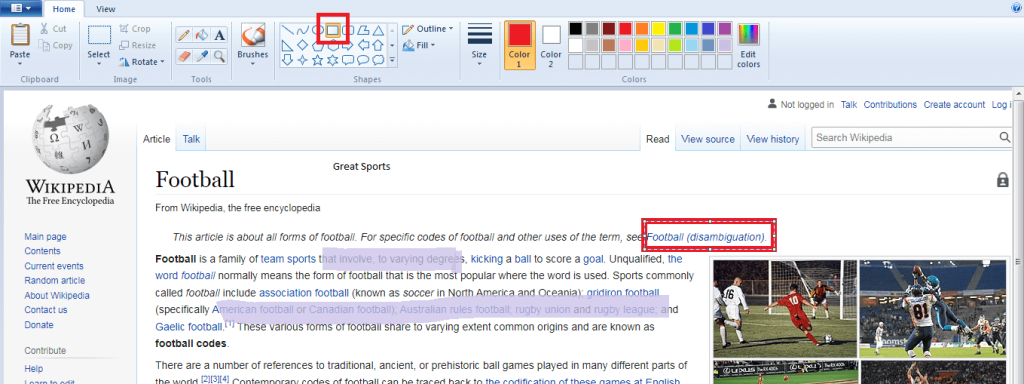
5. One of the most used tools for image annotation is adding shapes.
Tap on the rectangle or circle shape to highlight a key segment from the screenshot, then draw a box or circle around part of the image.
You can also put an arrow on a picture to attract viewers’ attention.
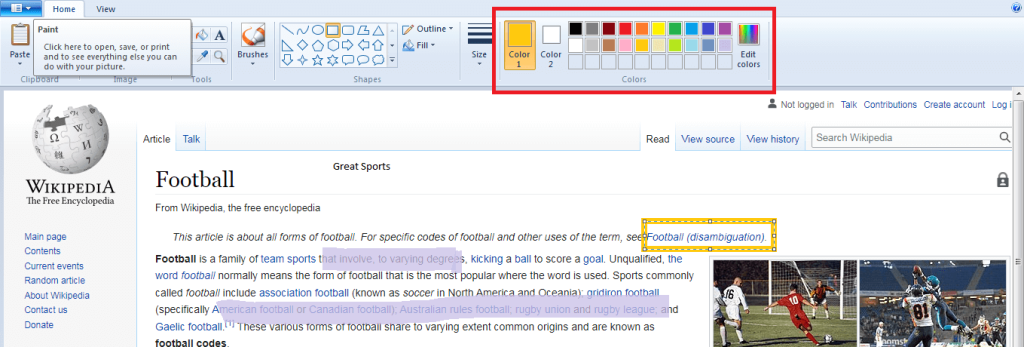
6. For all the annotations, you can specify the color from the Colors section or the Edit colors section.
7. After annotating the image, don’t forget to save the pictures. Click the File menu and tap on Save to save your current work.
After completing the above steps, users can use the in-built MS Paint application to annotate screenshots or images.
Method 2: Annotate Any Images Using Snipping Tool
Another in-built tool on Windows computers is the Snipping tool. Many users are familiar with these tools, but this might have a new experience for other users. It is a screen capture software used to take a screenshot and edit it on the go.
1. Press the Windows key, search for Snipping Tool, then click on it to open the application.
2. There are four modes to choose from. After selecting a type, draw around the part of the image your want to capture.
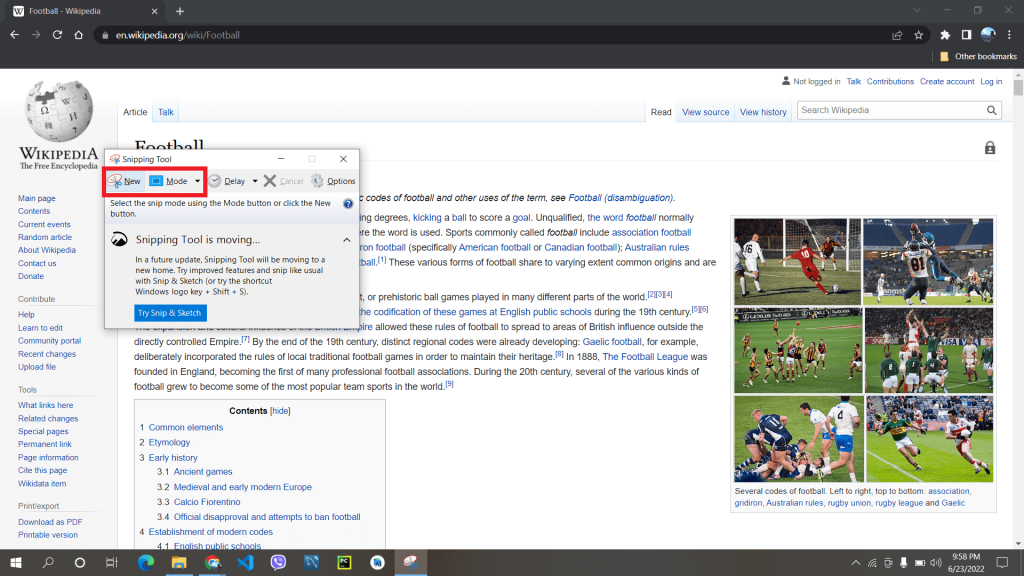
3. Once the screenshot is captured, a notification will pop up from the bottom right side of your screen.
Tap on the notification bar, and open the image with Snip & Sketch editor.
4. To highlight the text on the image, tap on the highlighter option, then select a color. Also, adjust the slider to change the size of the highlighter.
Now, highlight text by clicking the mouse’s left button and dragging it.
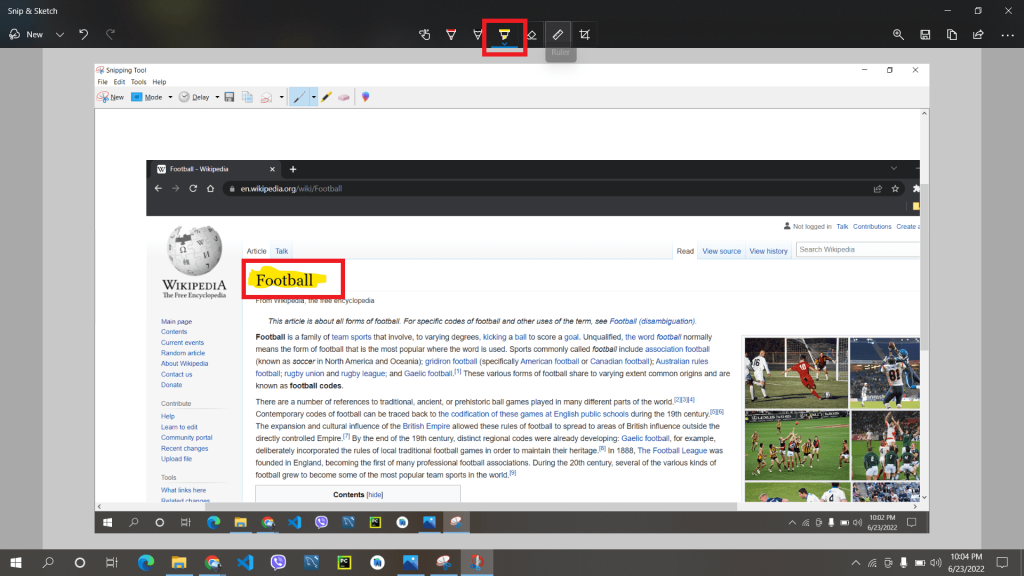
5. Unfortunately, there is no shape addition option on Snip & Sketch editor, but you can use a ruler to add a straight line.
Tap on the ruler option and select a ruler and protractor to draw a straight line and circle, respectively.
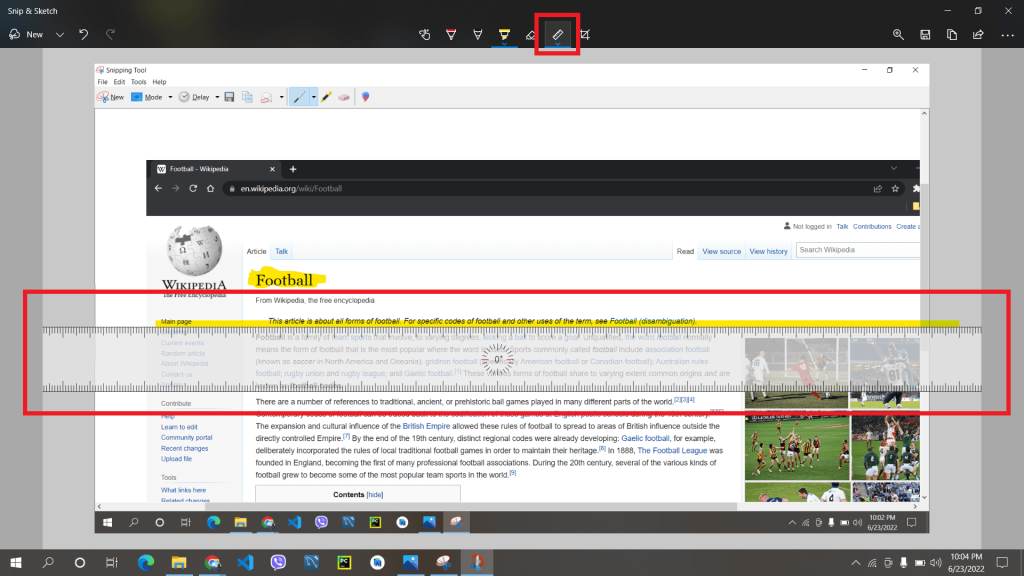
6. Users can rotate and alter the size of the ruler and protractor by using the mouse wheel button.
After completing the annotation, users can save the image by clicking the save icon and selecting the destination path.
Method 3: Annotate Any Images Using Online Software
For users using a Macbook or any Mac product, as well as a Linux distro, using MS paint is unachievable. However, they don’t need to switch to any other OS or use online tools.
There are many annotation tools online to choose from. We are using Good Annotation’s official website for this tutorial which is a fantastic markup tool.
Before starting this process, users must have a web browser on their devices. We recommend using Google Chrome to markup screenshots from your device.
1. Open your device’s web browser, go to the Good Annotation official website page, and log in/sign up for your account.
2. After loading the home page, tap the Create New button to make a new sample project.
3. We need to upload screenshots before annotating shapes, text, etc. Click the Upload icon from the sidebar and choose your images.
4. To draw a rectangular or circular shape, select the Highlight icon from the sidebar and tap on the shape icon to interchange between other available shapes.
Now, Draw and drag the box or circle with the help of the mouse’s left button.
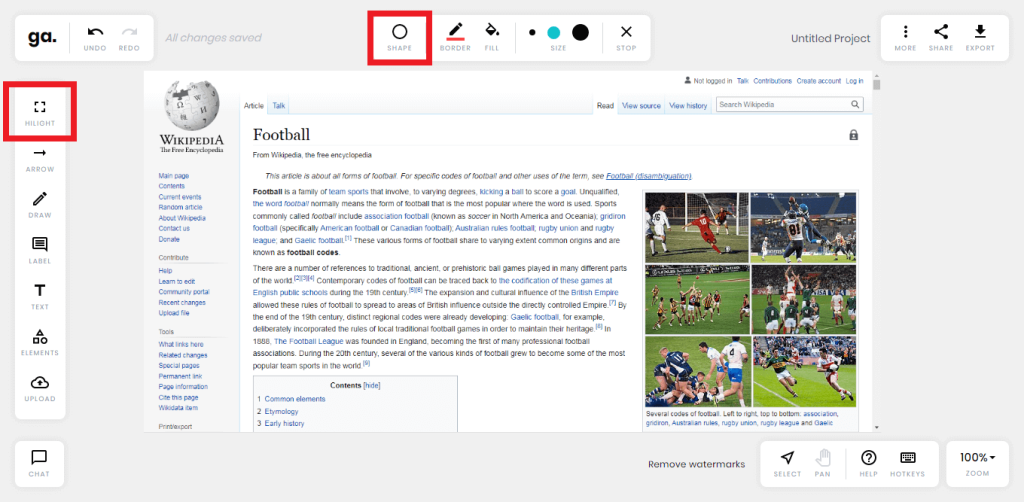
5. Let’s point out the part of the image. Tap on the arrow option, then draw and put the arrow on the photo.
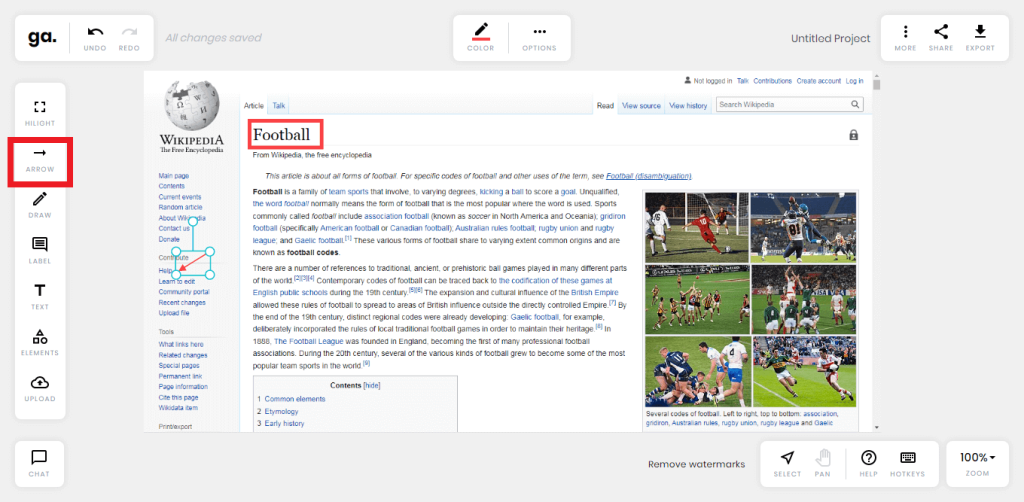
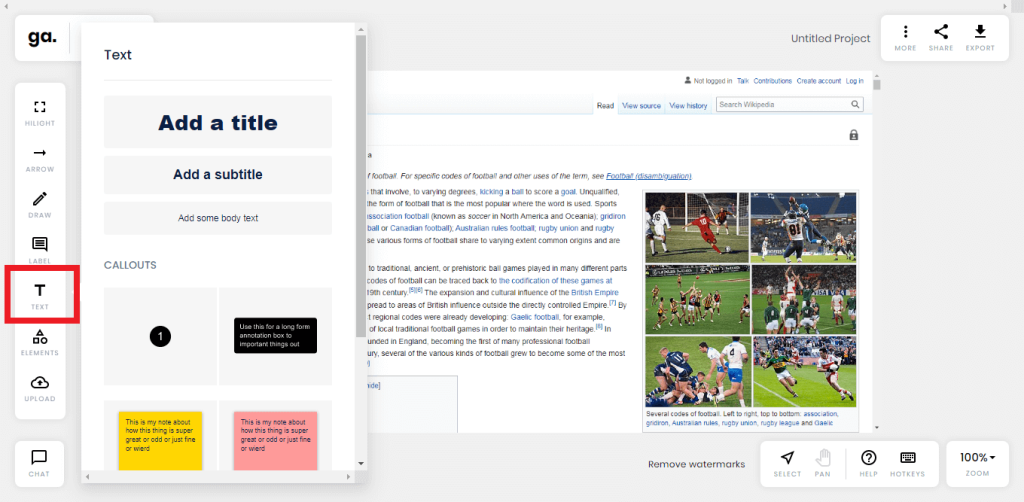
6. Just below the Label icon, we see the Text icon. As you suspect, we can use it to add either plain text or any callouts on the image.
Users can also change their color usage by tapping on the color icon.
7. To add any shapes to the photo, tap on the Elements icon and choose your desired shape.
8. Users can download the photo by clicking the Export icon from the top right of the screen.
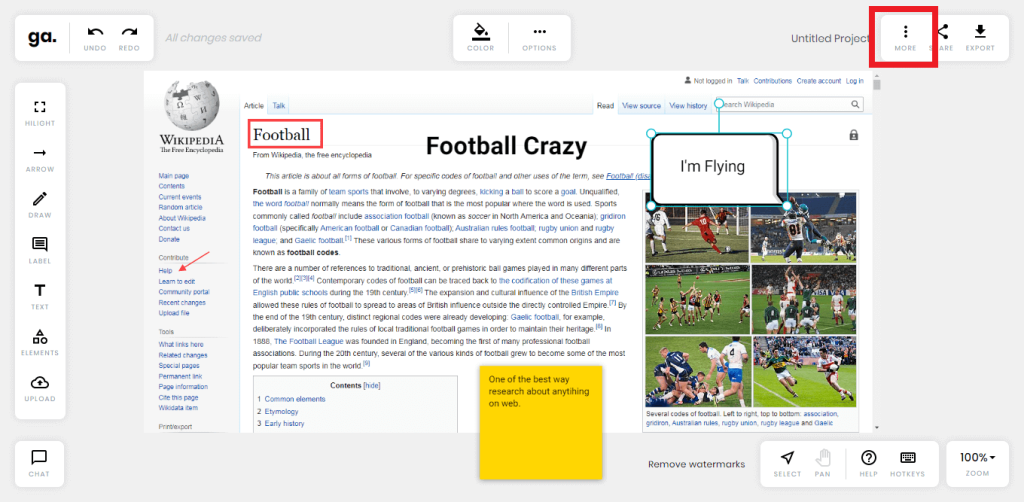
After completing the steps, different OS users can annotate the image.
Method 4: Annotate Your Captured Photo Using In-built Android Settings
Nowadays, every smartphone has editing software pre-installed on its Android-supported smartphone. We can use it to annotate our captured images.
Depending upon the manufacturers, there might be some changes. However, the overall process is still the same.
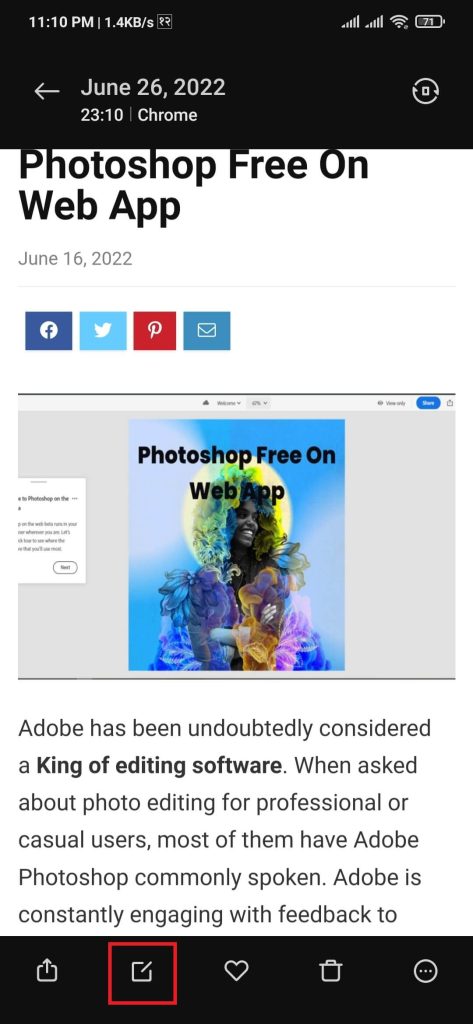
1. Open the screenshot photo on your Android-supported mobile phone, then press the Edit icon.
2. Swipe the available option, then select the Doodle option.
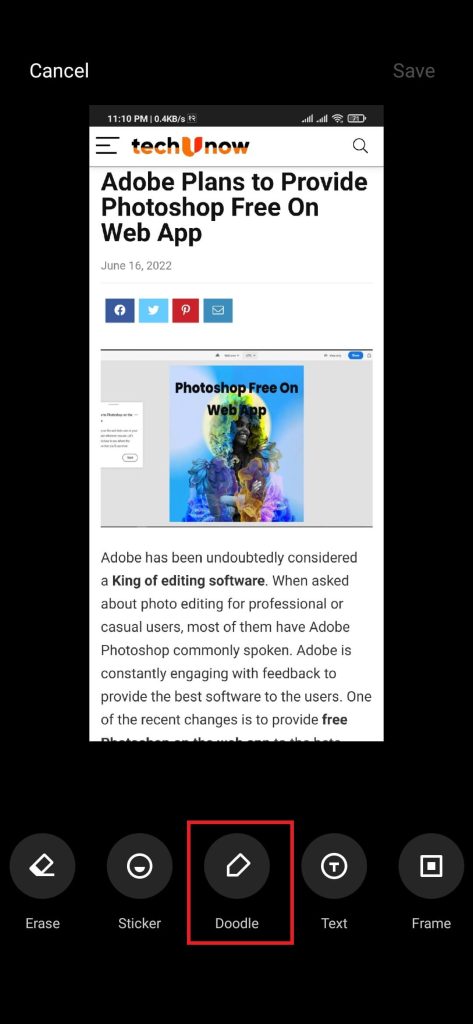
3. There are many shapes to choose from the available options. Tap the rectangular option, then click and drag on the photo to make a rectangular shape.
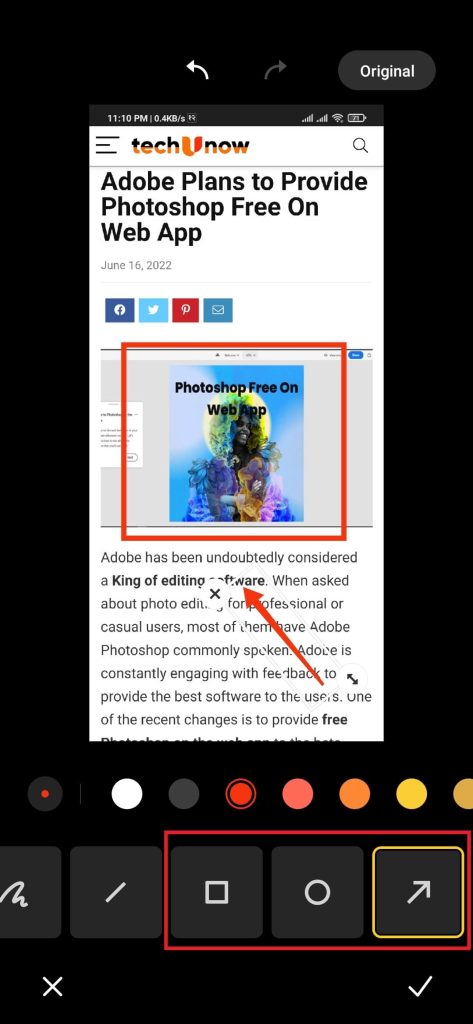
4. To point to specific text, lines, or any object. Tap on the arrow icon and click and drag as before. Users can tap on the arrow and rotate/resize it.
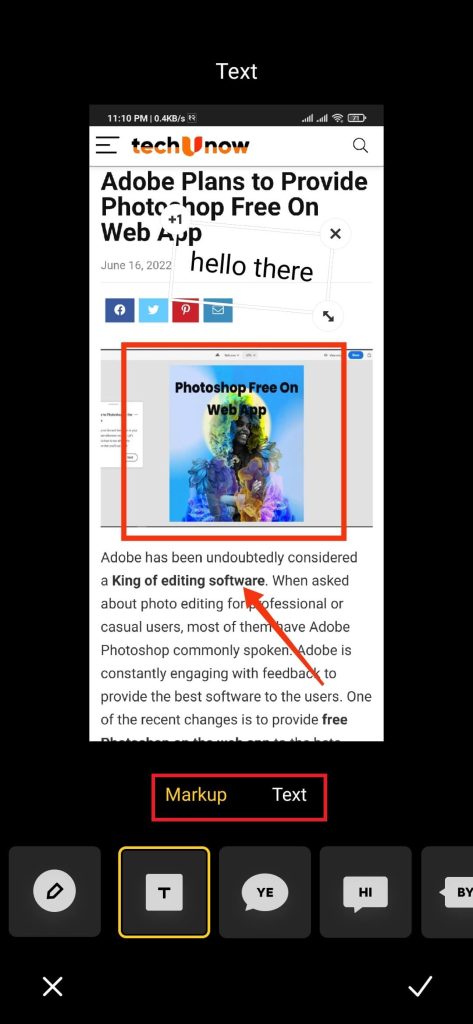
5. Press the tick mark to apply changes, then tap on the Text icon.
6. Users can choose between many markups and text styles to apply to the annotation. Pick any style you like, then edit the text with your custom words.
7. After applying the changes, tap on the Save option to save all the changes permanently.
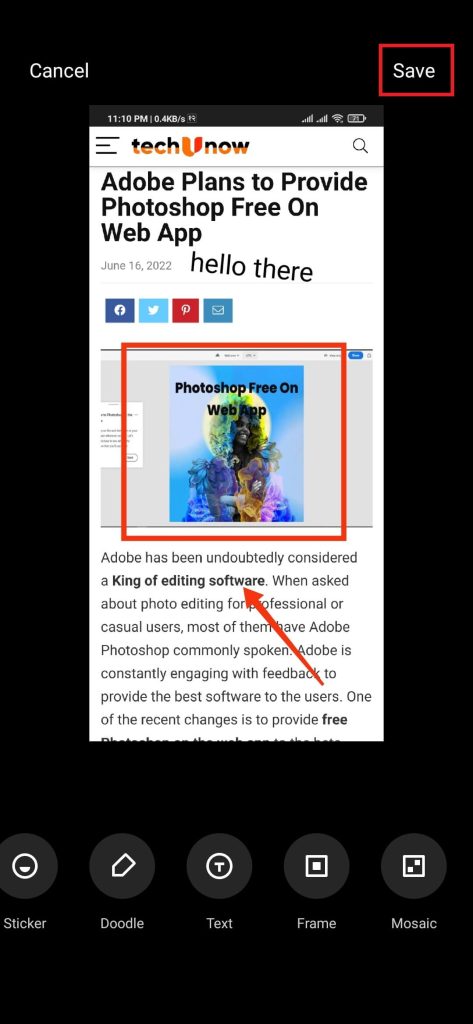
After saving the images, users can view the annotated version of the screenshots using an Android device.
Method 5: Annotate Your Captured Screenshots Using iPhone
Similar to Android, the best way to create annotated screenshots and images is to use the in-built edit feature.
1. Take a screenshot on your iPhone by pressing the lock screen and volume buttons simultaneously.
2. Just after taking a screenshot, you can see the taken screenshot on your screen. Before it fades away, tap it to open the editing mode.
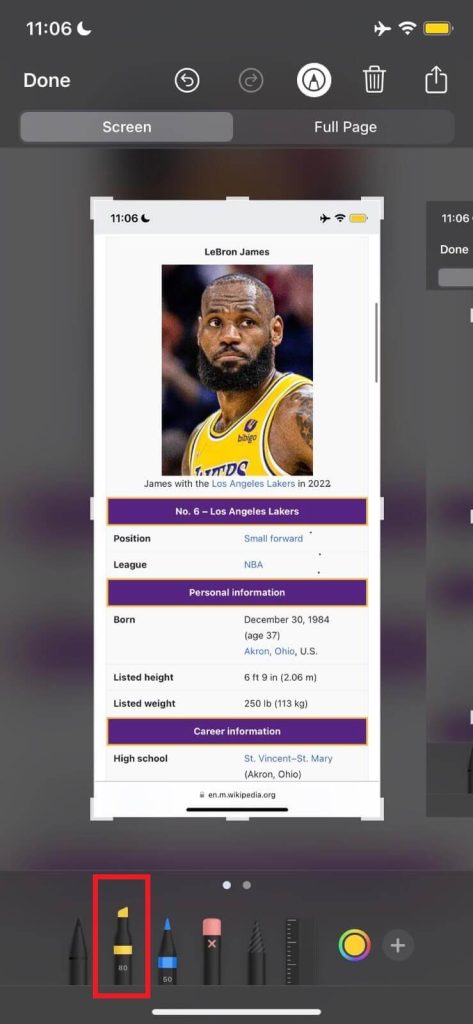
3. Tap on the 80 labeled marker to highlight any key text from the image. After selecting the marker, drag the highlighter on the image to draw a highlighted text field.
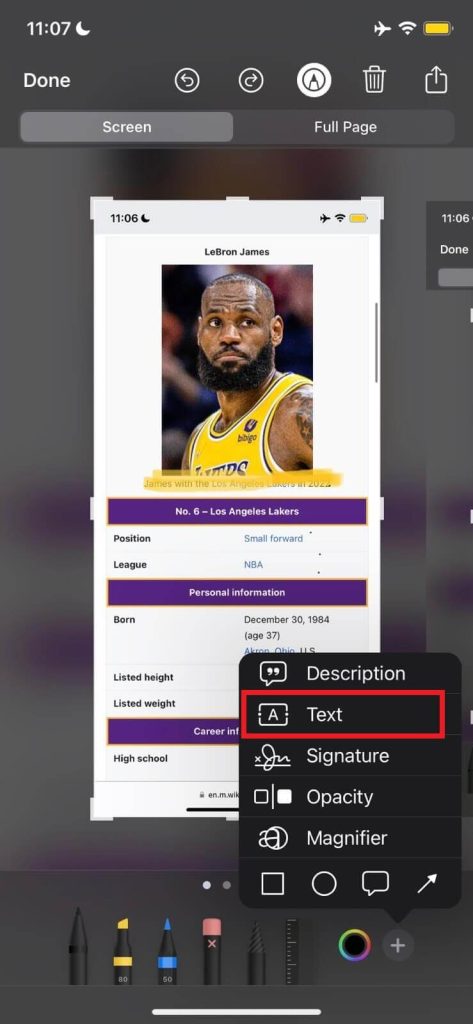
4. To add text, tap on the + icon, then select the text option. After selecting the text option, add your words and rearrange their position.
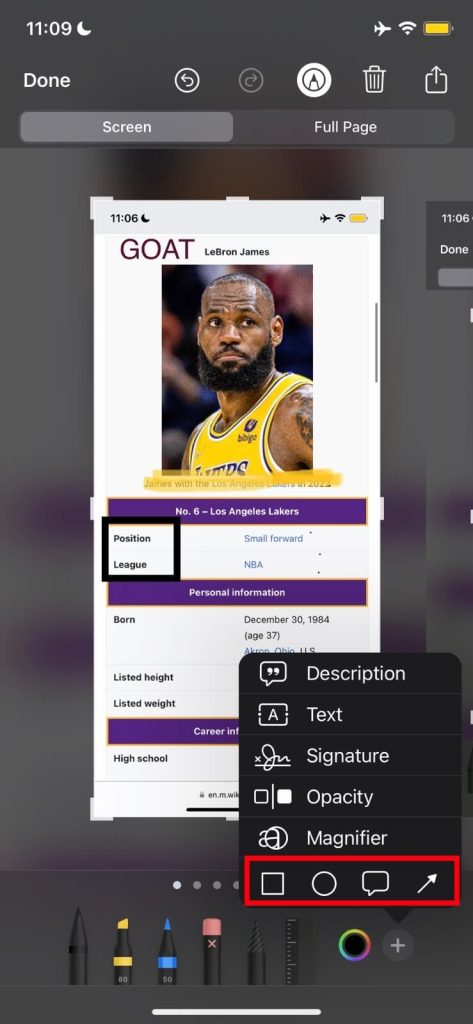
5. Let’s add some shapes to increase the dynamics of the image.
Tap on the + icon and select either rectangular, circle, arrow, or markup shape.
After tapping the object, it is drawn on the screen; users must rearrange the shapes.
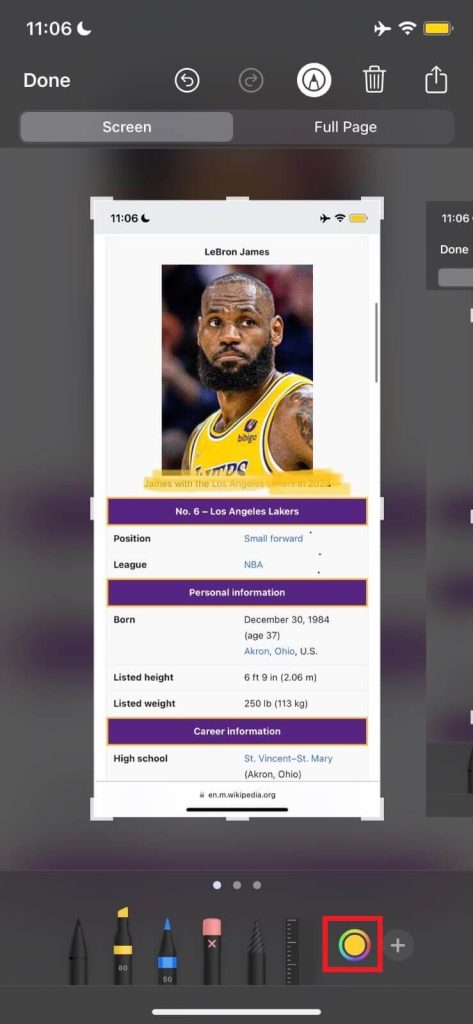
6. If users want to change the color, they can alter it by tapping on the color palette next to the +icon option.
After completing the above steps, press the export icon to save it on your device.
Conclusion
As a convenient way of providing feedback or highlighting things clearly, annotating screenshots is a great tool to have on your sleeve. With the increment in digital technology, the process required to edit/annotate objects onto the photo is easier than ever.
This tutorial provides a detailed way that users can annotate screenshots and images on their devices.


