Windows is the most used OS of all time. Windows provides the user with an easy user interface and features. One of the commonly used features is taking screenshots in Windows 10.
Occasionally you get a problem with your PC/Laptop and want to share the problems in a suitable form. Instead of painfully describing the problems across the phone, wouldn’t it be easier if you could show them? Taking a Screenshot would be the easier choice.
Different Methods of Taking Screenshots in Windows 10
There are many ways to capture screenshots on Windows 10 computer or laptop. Windows provides both in-built and external plugins to take a screenshot.
In this guide, we will describe many methods. Let’s start with the easy one.
Method 1: Windows shortcut to take a screenshot
This is probably the easiest way to take a screenshot.
- Press the Print Screen (PrtScr in PC or laptop) key located at the top right of the keyboard.
- By Pressing, The keyboard to take a screenshot of the entire screen.
- The picture will copy to the clipboard, where you can paste the screenshot into your application.
Method 2: Screenshot using another Windows shortcut key
- Press the Windows logo key + Print Screen (PrtScr).
- The picture is copied to the clipboard as well as automatically saved.
- To locate your screenshots in windows computer. Open File Explorer then select the Pictures folder and select Screenshots.
Method 3: Use the Alt + Print screen shortcut key to capture a screenshot
- Press the Alt + Print Screen Key (PrtScr).
- The captured picture is copied to the clipboard.
Unlike the previous method, it captures only the currently displayed active window.
Method 4: Take a screenshot in windows 10 using the snipping tool
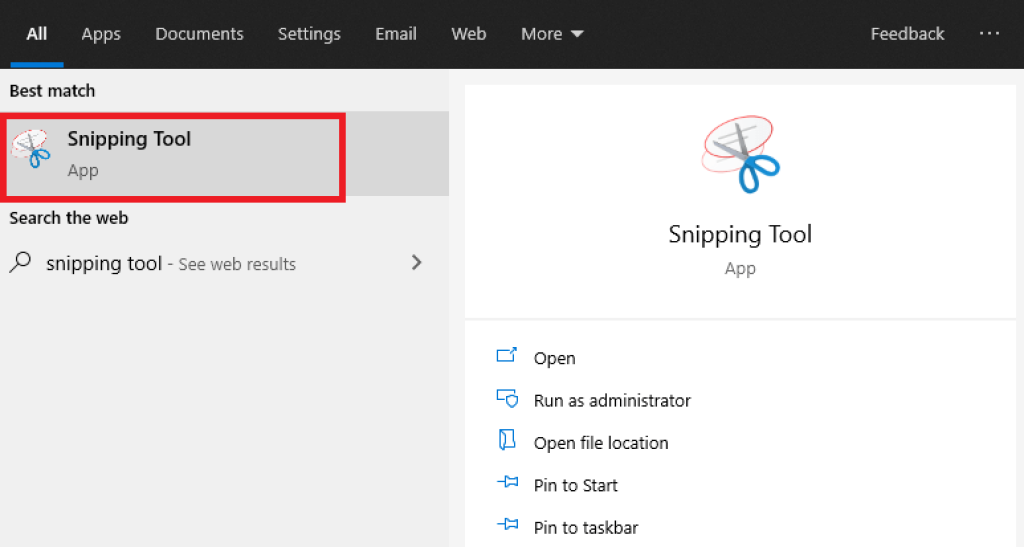
- To open the Snipping Tool, first select Start, enter the snipping tool in the search box, then select it from the results.
- Press New.
- Drag the desired area to screenshot.
- The screenshot is automatically copied to your PC clipboard. A notification also appears after you’re finished taking a screenshot and you can select it for more editing options.
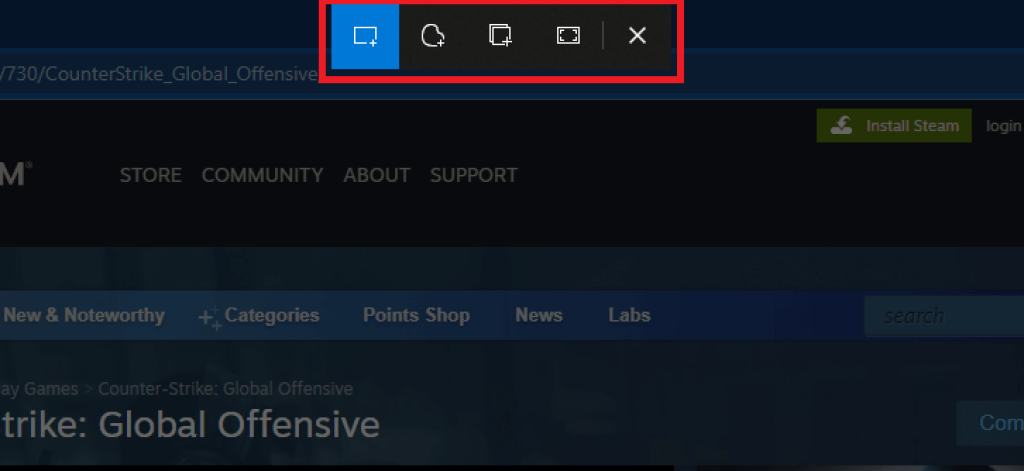
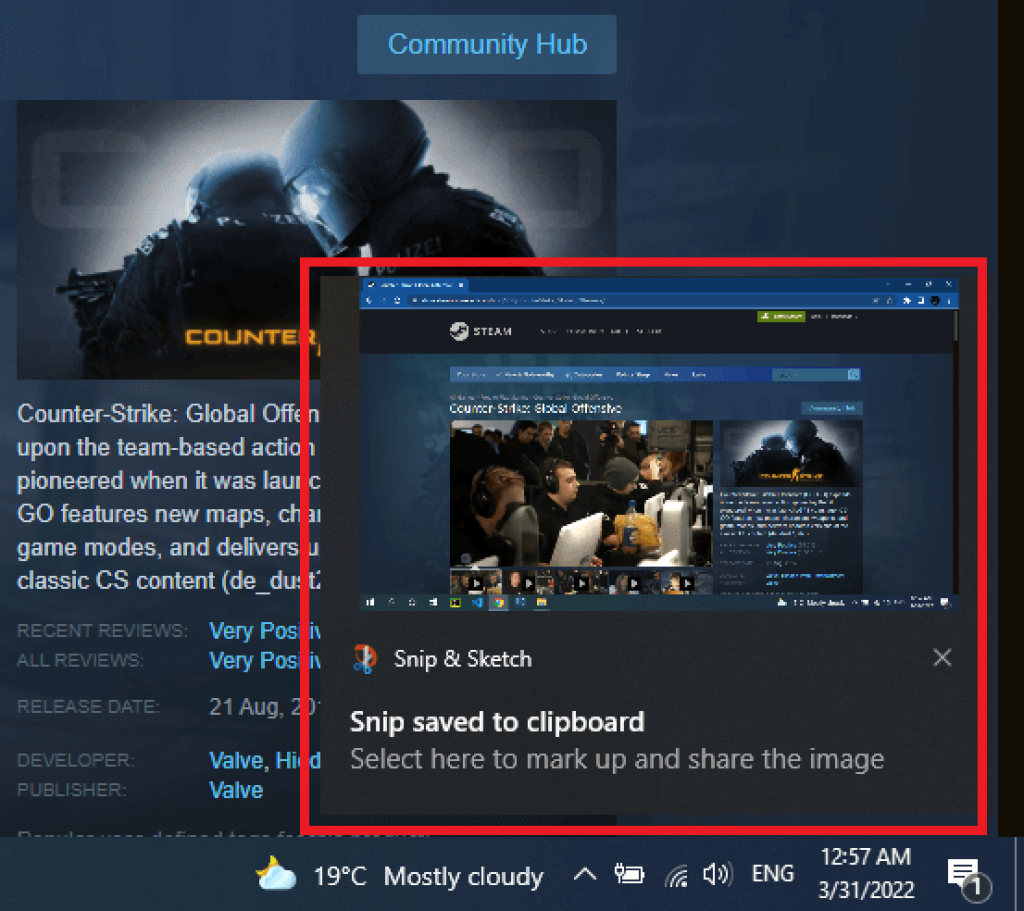
Method 5: Use Snip and Sketch tool to capture the screen in windows 10
- Press the Windows logo key + Shift + S.
- The desktop will dim while you select an area for the screenshot.
- The rectangle is the default mode. You can choose from 4 modes. Rectangular mode, free-form mode, window mode, and full-screen mode.
- After taking a screenshot, a notification will appear where you can save the picture.
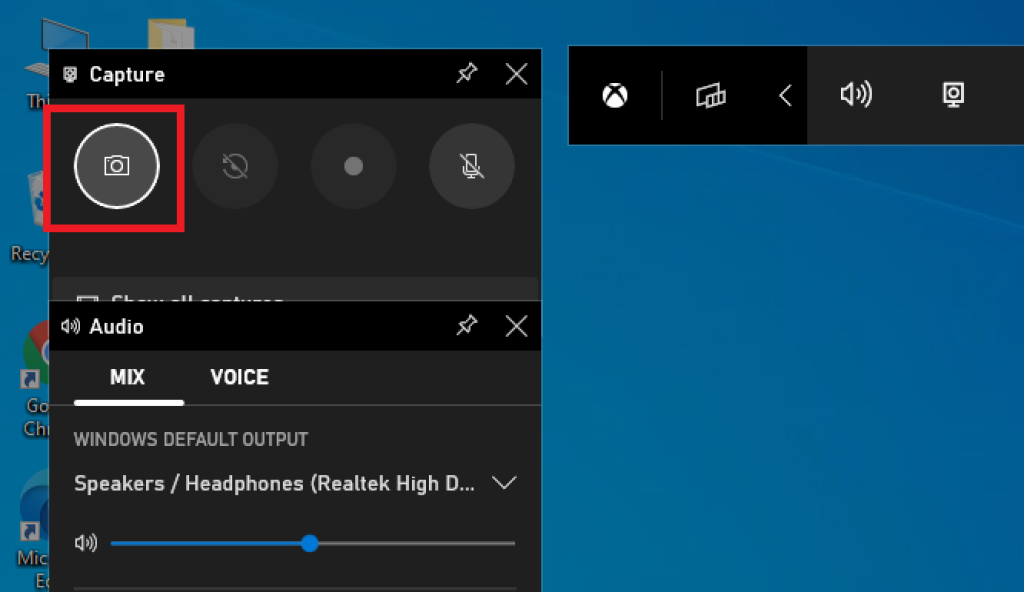
Method 6: Using Xbox Game Bar to capture screen
Xbox Game Bar is also an in-built function of windows computers. To use the Game bar, you must have enabled Xbox Game Bar.
- Press Windows logo key + G.
- On the top-left, click the capture button to take a full-screen screenshot.
- To locate your screenshots. Open File Explorer then select the Videos folder and select Captures.
Method 7: How to screen capture on windows 10 using ShareX
If the in-built screenshot method isn’t working, you can always use various third-parties software. This software provides features like image editing, project management, file sharing for ease.
ShareX capture screen using web-browsers like chrome. You don’t need to install any software for this.
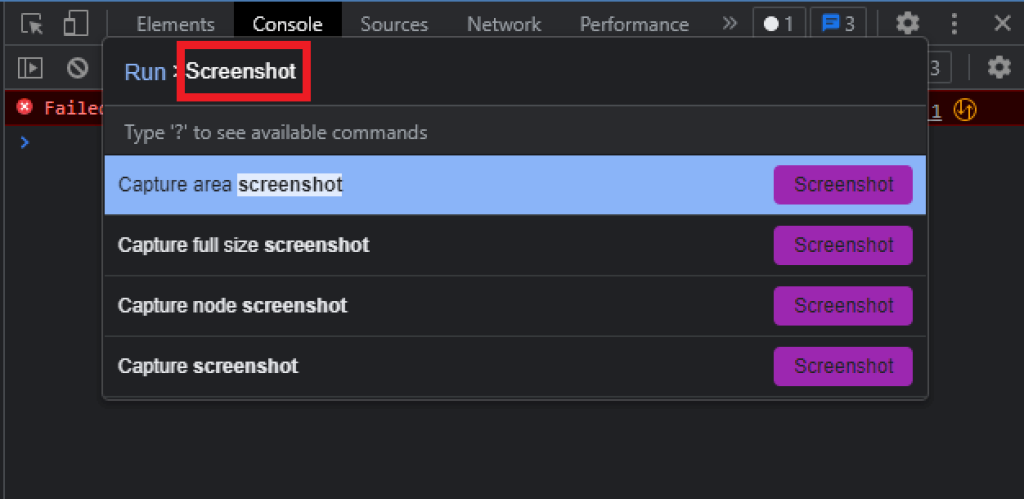
- Press F12 to open developer tools.
- Press Ctrl + Shift + P to open the command menu.
- Type Screenshot and desired capture mode.
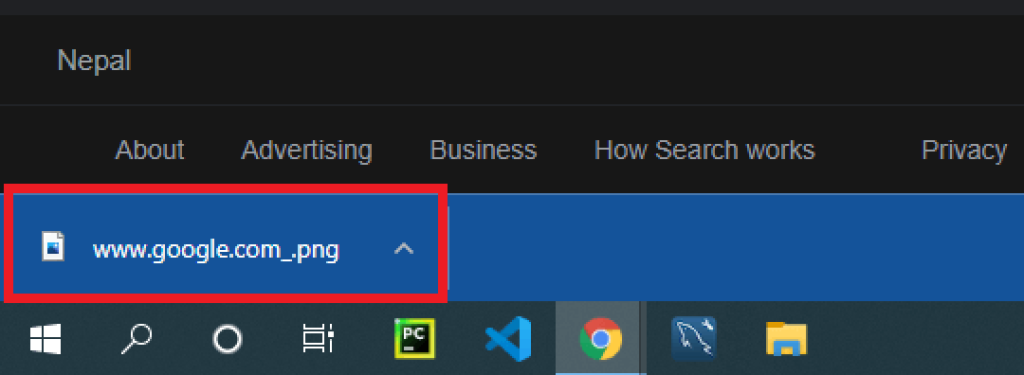
- Chrome will automatically capture the screen and download the image.
Method 8: Screen capture on windows 10 using Greenshot
Greenshot is commonly used third-party software to capture screenshots on a PC. Lightweight, availability makes Greenshot the perfect third-party app.
- Please check if you have Greenshot installed on your computer. If not installed, you can download and install it from this here.
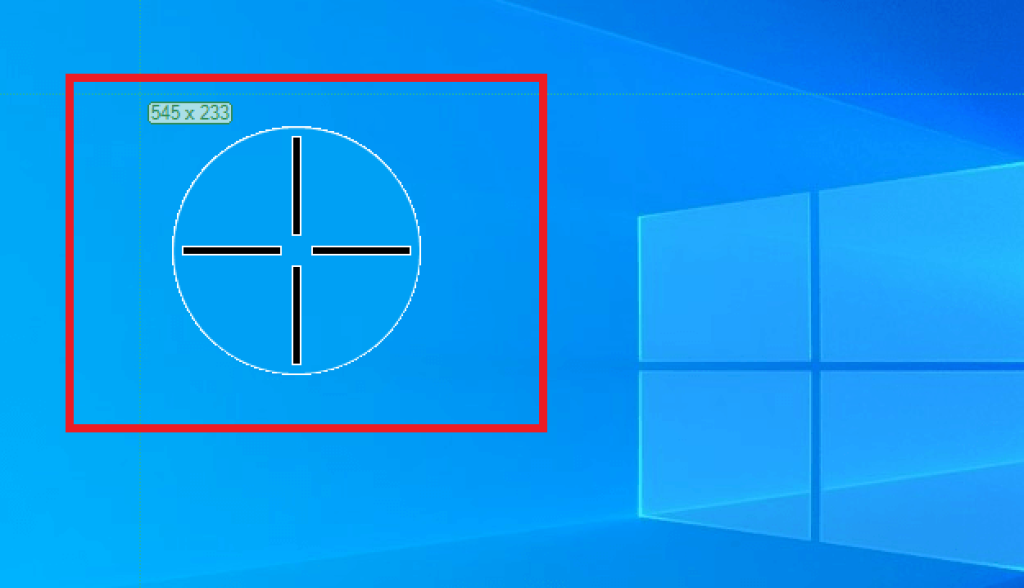
- There are many modes to choose from. To capture desired size Press the windows screenshot shortcut PrintScr or select Greenshot from the taskbar.
- You will see crosshair on the screen.
- Click and drag the region where you want to take a screenshot.
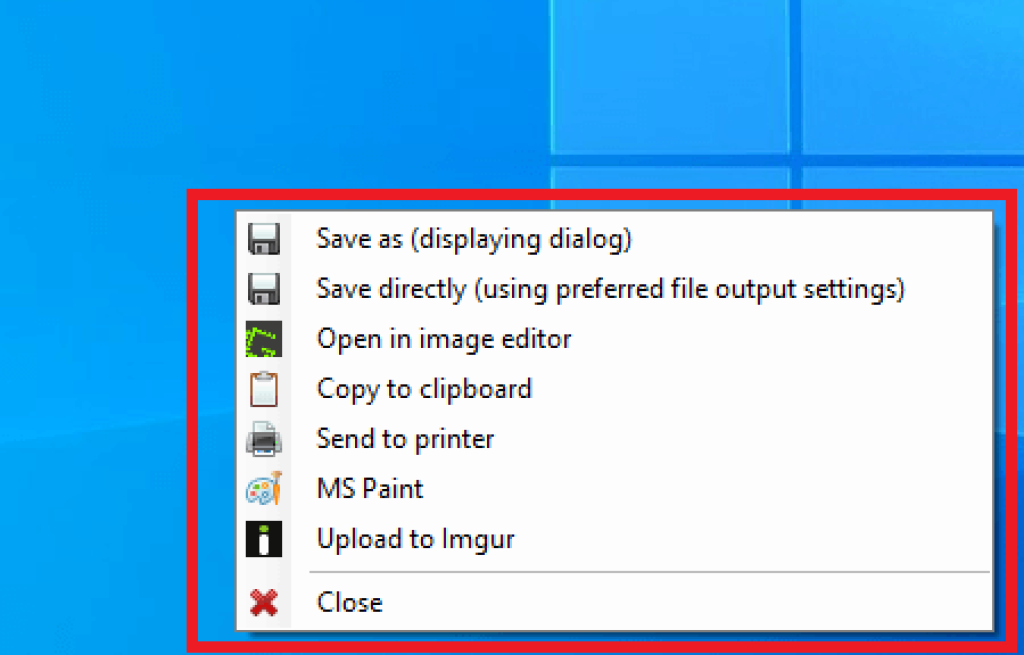
- After capturing, a notification will appear where you can save the images.
In this article, we show how to take screenshot in a windows 10 computer. Using the steps you can take the screen on Windows 10 PC or Laptop.
Although we use simple methods to take a screenshot, there are some other variations that can provide us with our goal with ease. Depending upon your desire you can choose any of those methods for your computer or laptop.
We hope this blog has taught you how to take screenshots in Windows 10 and 11.


