Windows 11 offers many customization options using which you can personalize your computer. The primary way to customize your windows is by changing the text or font. For Beginners, It will not be comfortable to Install Fonts on Windows 11. This is because Microsoft Windows 11 was released with noteworthy UI changes.
Microsoft Windows supports almost all font formats, including WOFF, WOFF2, TrueType (.ttf), Open Type (.eot), OpenType (.otf), SVG, and more.
Although you can find some fonts in Microsoft Windows’ default Font Viewer, there are times when you want to add more to the library.
This post covers topics such as downloading fonts for Windows and adding fonts to Windows 11.
Methods to Install Fonts on Windows 11
Before installing awesome fonts on your Windows 11 computer, we should know the font files.
Font files are standard files that can be easily downloaded from the internet and further used to customize the text style on your PC.
GoogleFonts, FontBundles, Behance, and many more sites are excellent sources for downloadable Microsoft fonts. In addition, Windows 11 has a built-in tool that helps you add a font in MS Windows.
This method will also be applicable in a situation where OTF or TTF file formats are not detected. Although these are font file extensions, Windows 10 and 11 don’t recognize them.
Method 1: Install Fonts From the Website
To give you a clear idea, dafont.com is a font library that we will use as an example. Of course, you can use other methods as well.
1: First, visit the dafont.com website.
2: Secondly, Lookup any fonts you desire.
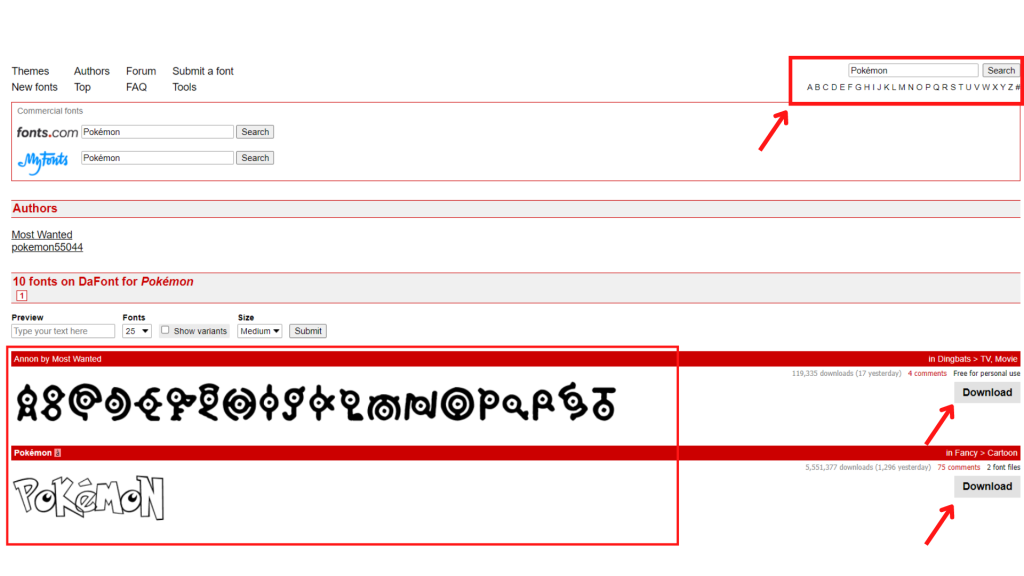
3: Now, you may easily download the font from the font list.
4: Now, you right-click on the file and extract the files to the desired location.
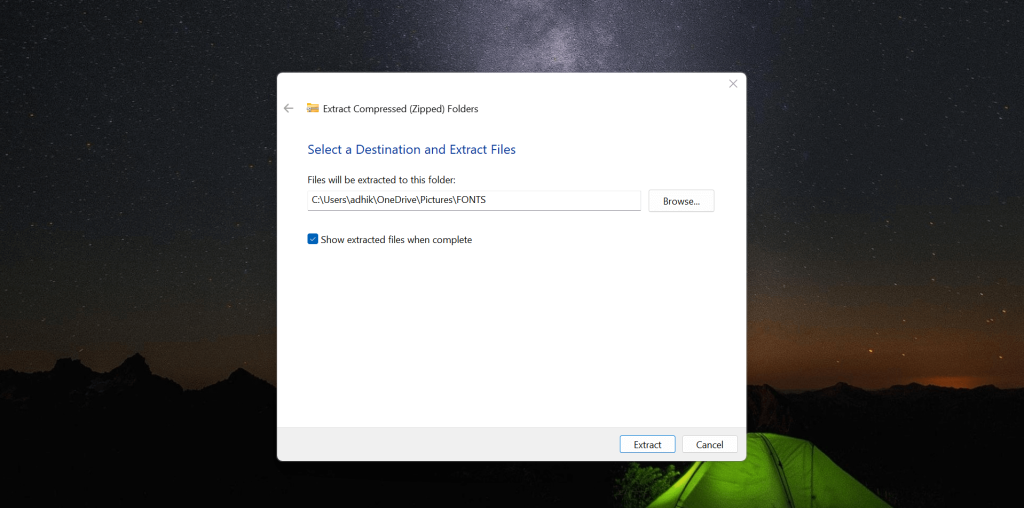
5: Finally, you can now install the file.
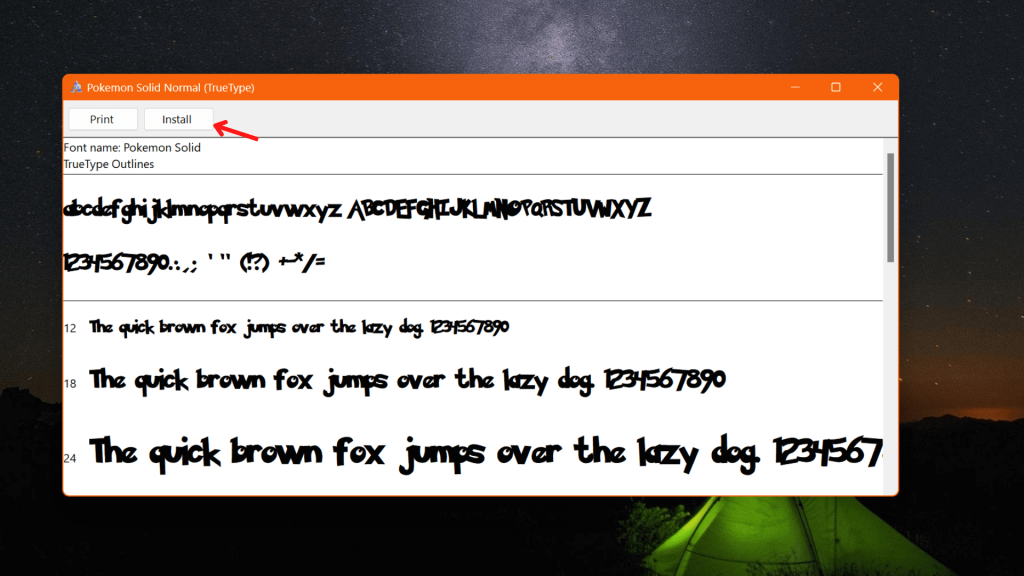
You can use this method to download free fonts or paid fonts from different websites and easily install them on your computer.
If you are tired of annoying updates, the article is to Pause and Disable Windows 11 Updates can help you.
Method 2: Install Fonts using Microsoft Store
If you don’t prefer using a third-party website, Microsoft Store offers ready-to-use fonts in Windows 11. So, you can follow the steps given below:
1: Firstly, navigate to Settings >> Personalization >> Fonts.
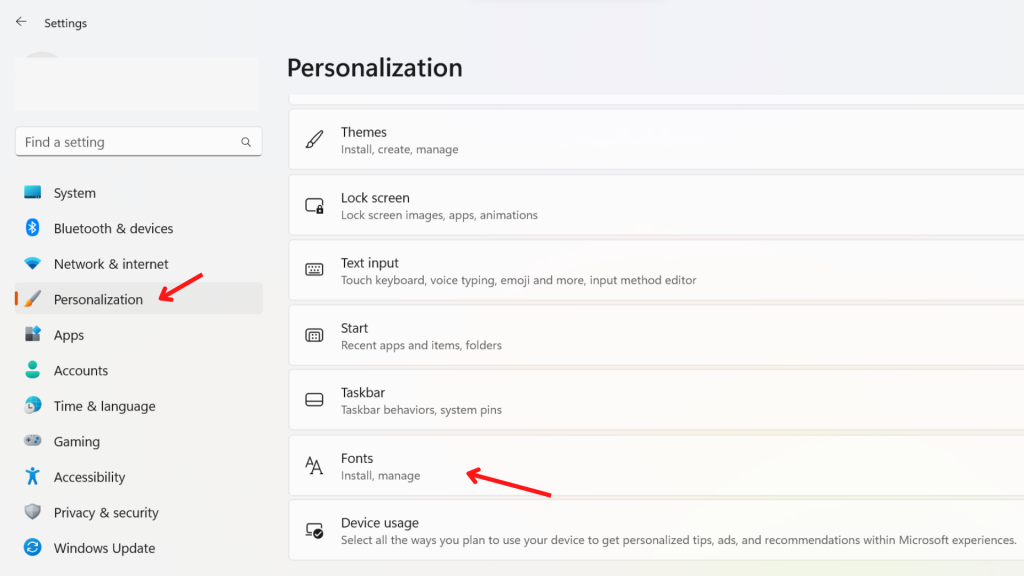
2: You must click the “Get more fonts in Microsoft Store” option.
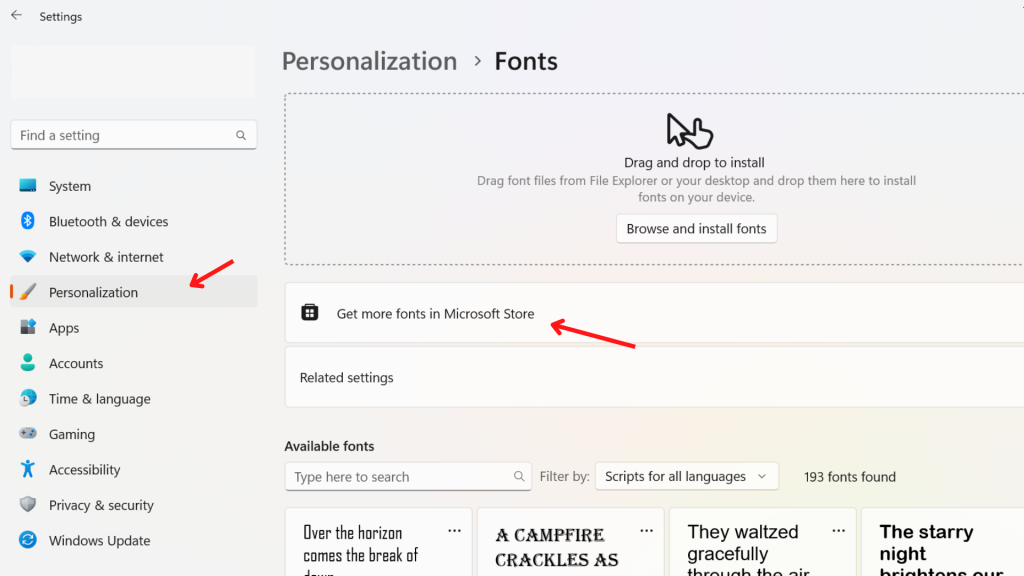
3: Finally, you may press the “Get” button.
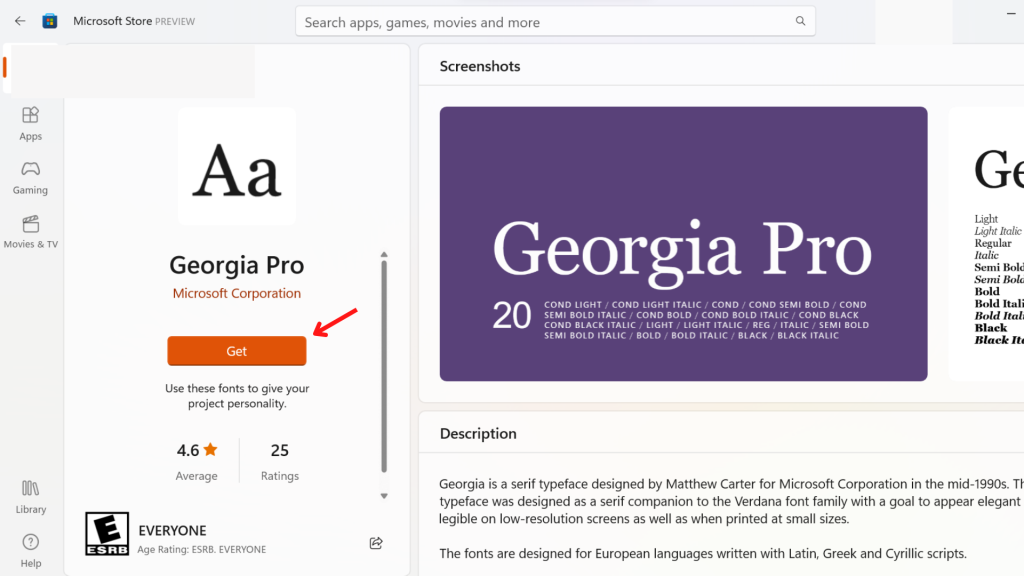
Meanwhile, you have successfully installed fonts using Windows Store. Similarly, if you are tired of adding fonts individually, you can add multiple fonts at once.
Method 3: Install Multiple Fonts in Windows 11
The following method can help you if you are tired of installing fonts one by one. You will surely save some time and install a font package instead of installing the same font format.
1: Firstly, you should download the PC font package.
2: Secondly, you need to extract the font.
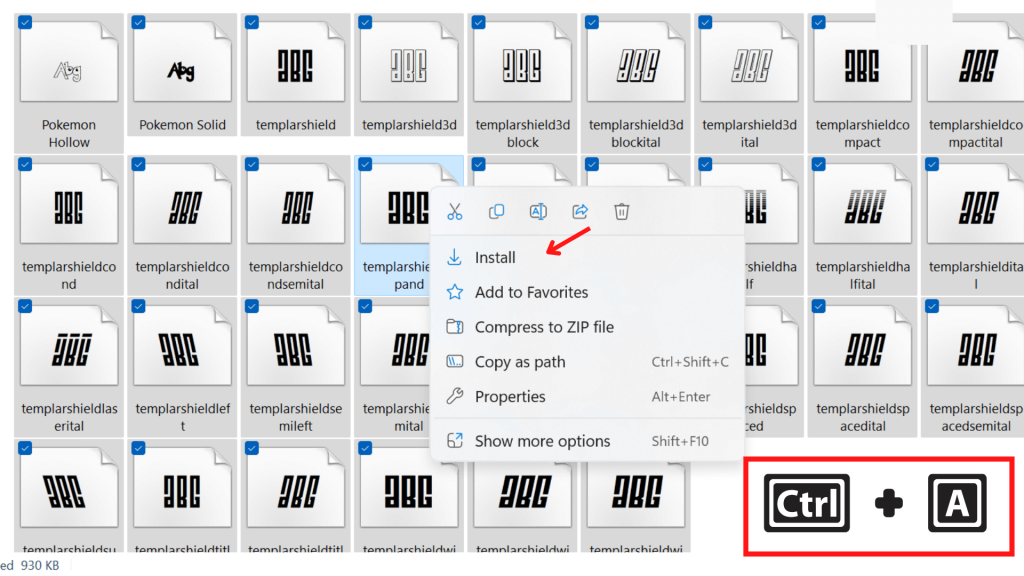
3: Now, Press “Ctrtl + A” to select all fonts file and right-click from your mouse.
4: Select “Install” from the menu.
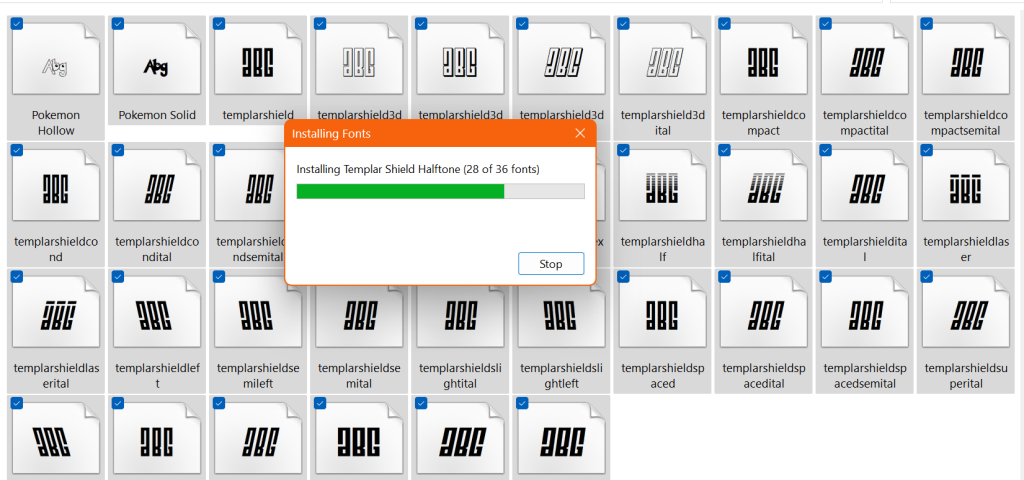
Finally, the installation procedure will be carried out automatically.
Methods to Delete Fonts in Windows 11
You may have installed a new font, but you know it is an unwanted font, and you want to remove it. This is when our guide on methods to Delete Fonts go into action.
Method 1: Using Control Panel
In this method, we will use Control Panel to remove fonts in our Windows 11 laptop.
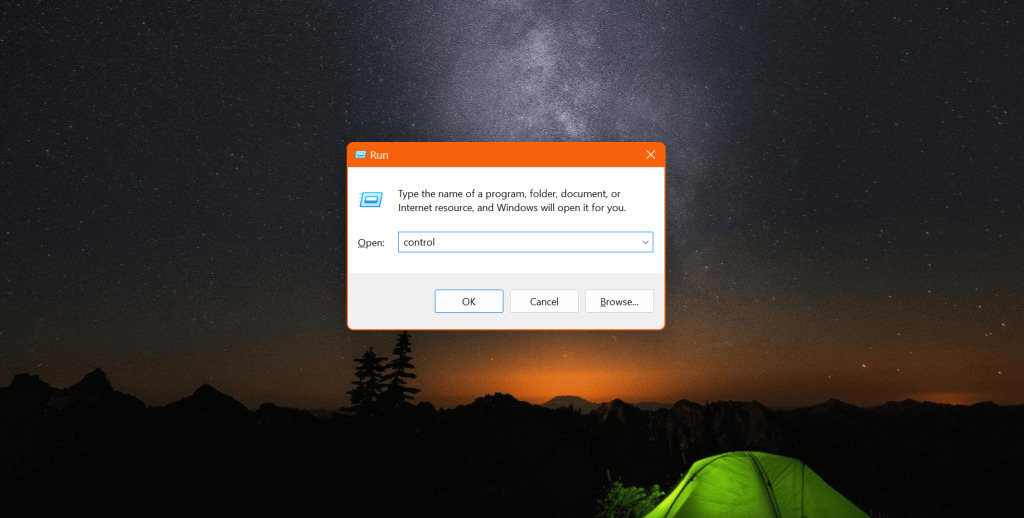
Step 1: Firstly, open Run Feature using the Windows key + R. Type “control” in the text box and click enter.
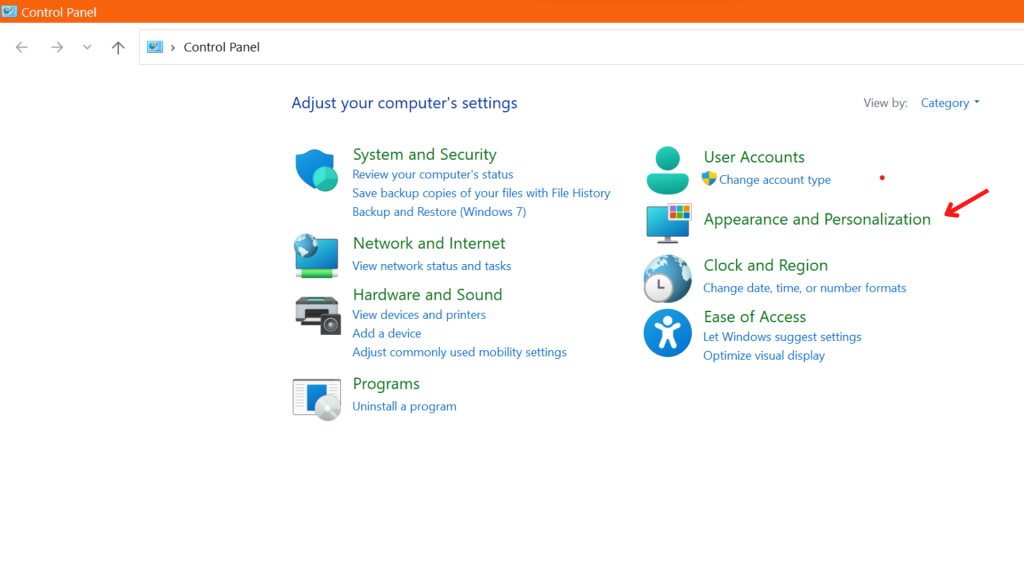
Step 2: Secondly, you will be on the control panel screen.
Here, you will find the “Appearance and Personalization” option. Click on it.
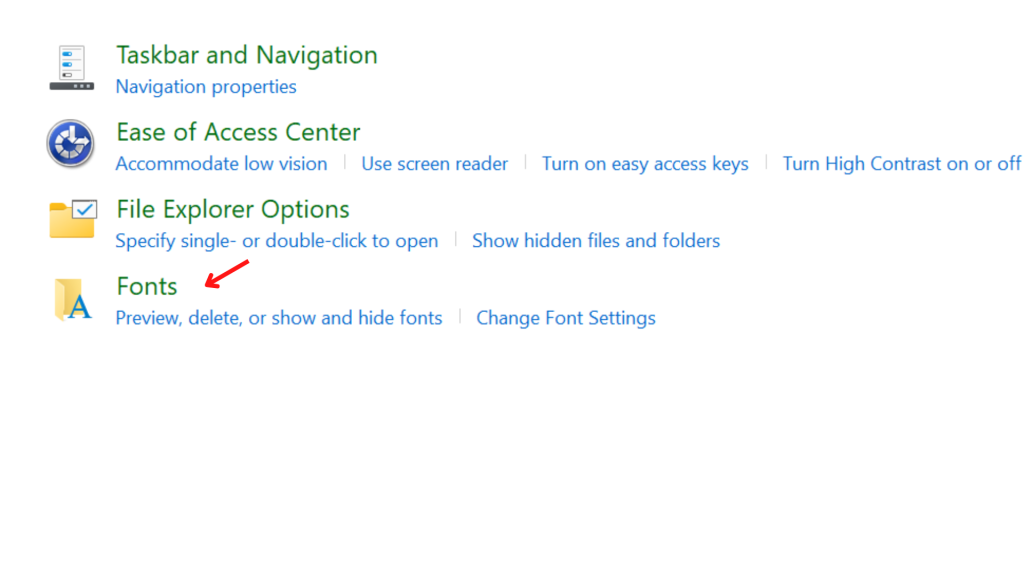
Step 3: Next, click on the “Fonts” option. This will open the Windows fonts folder for you.
Step 4: After this, you need to single-click on the font and click “Delete.”
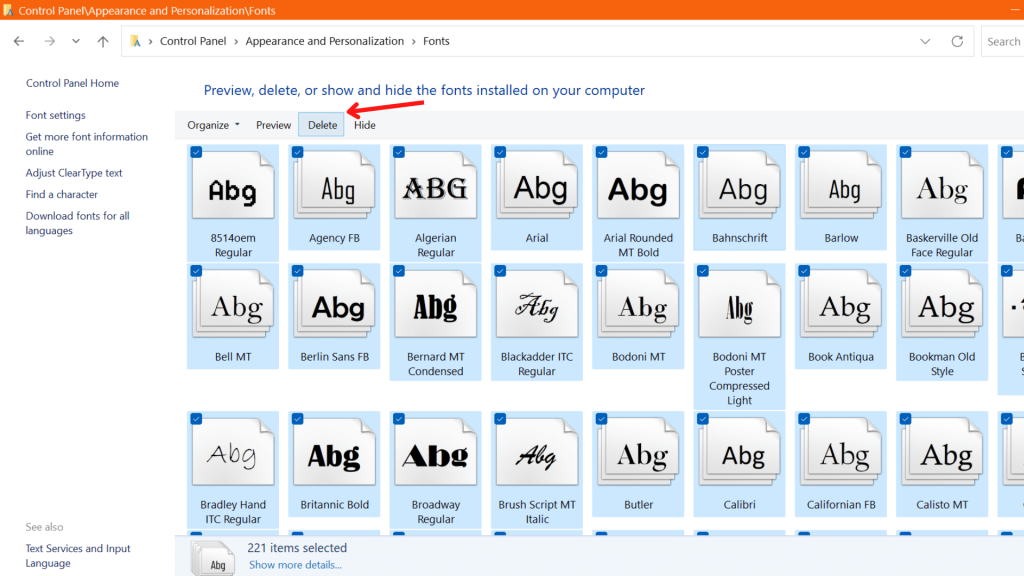
You have successfully uninstalled or removed fonts from your device. Likewise, you can select multiple files to delete many font files or select all to delete all of them.
Furthermore, we thought of listing some of the best third-party websites that can give you access to those unique fonts unavailable on the Microsoft Store.
Best Websites to Download Fonts for Microsoft
We hope you have learned everything you need to know about installing fonts in Windows. The above method is dedicated to Windows 11, but those methods will work for Windows 10 when you use the control panel.
This is another problem most users face when finding downloadable Microsoft Word fonts. Therefore, we have a list of websites that will assist you in finding excellent and interactive fonts:
1. Google Fonts
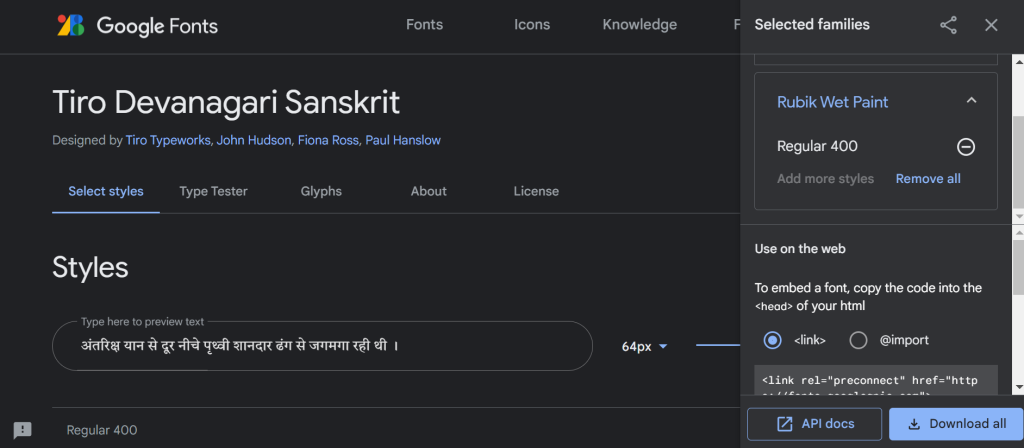
The first on our list is Google Fonts. Google Fonts is one of the most popular free-to-use font libraries.
It has over 1000 beautiful fonts to choose from, including Hindi font, Chinese font, and many other languages.
2. Befonts

Befonts makes Windows 11 fonts download easy and simple. It offers font resources that are creative and easy to download.
You can easily download, apply, and customize fonts to give your Windows 11 a fresh look.
3. DaFont
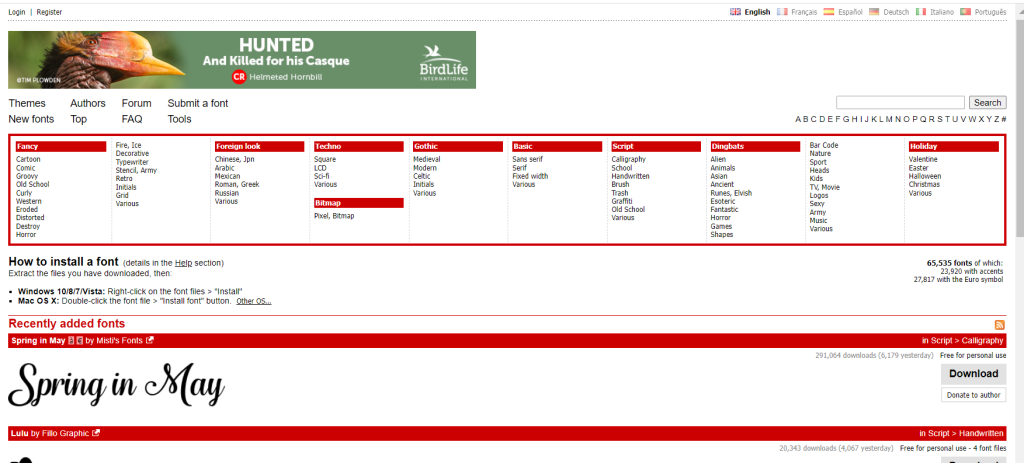
DaFont is the next font library that supports almost six different languages. It’s easy to find the desired font on this website. This website arranges fonts according to the user’s preference; designers can find the right font easily.
Similarly, the Pyidaungsu font download is available at unicodetoday.org, but all paid and free Win fonts are available at myfonts.com.
Final Thoughts
We hope our article on How to Install Fonts on Windows 11 was fruitful. Unfortunately, it was always a problem for Windows users to install desired fonts on their computers.
Although Microsoft Store claims to offer a wide range of fonts, it still lacks many of the best and most highly demanding fonts. We are all aware that Apple has been developing its font book to a level where it now supports Unicode, has plenty of trending fonts, and offers an easy user interface.
So, Windows must improve its font library; until then, using third-party sources is only the option. It doesn’t matter the brand of Windows laptop you use, HP or Dell; it won’t matter until Windows makes any improvements.


