Spam Message On Facebook Messenger is any undesired, uninvited digital messages distributed in large quantities. Spam messages are those that you receive from Facebook users who are not your friends.
Facebook treats them as spam right away to protect your account. It could contain emails with too many links and texts in bulk.
In Message Requests, Facebook Messenger features a hidden spam folder. Facebook transfers texts from people who are not friends with you to Message Requests, where you must approve them before receiving them.
This article will discuss everything on FB messenger spam messages and guide you through the easiest methods to view spam messages.
How to see spam messages in FB messenger?
There are some accessible alternatives that you can use to find spam messages. The method on the smartphone that you can use for both Android and iPhone.
Furthermore, the messenger web on your PC follows a similar method.
Method 1: View Spam Message On Messenger on Smartphone
Before we start the guide, it’s essential to know that the steps mentioned below work for Android Messenger version 377.0.0.13.101 and iOS Messenger version 377.0.
Here are some easy and simple steps one should follow:
Step 1: First, Open messenger on your Android and iOS device.
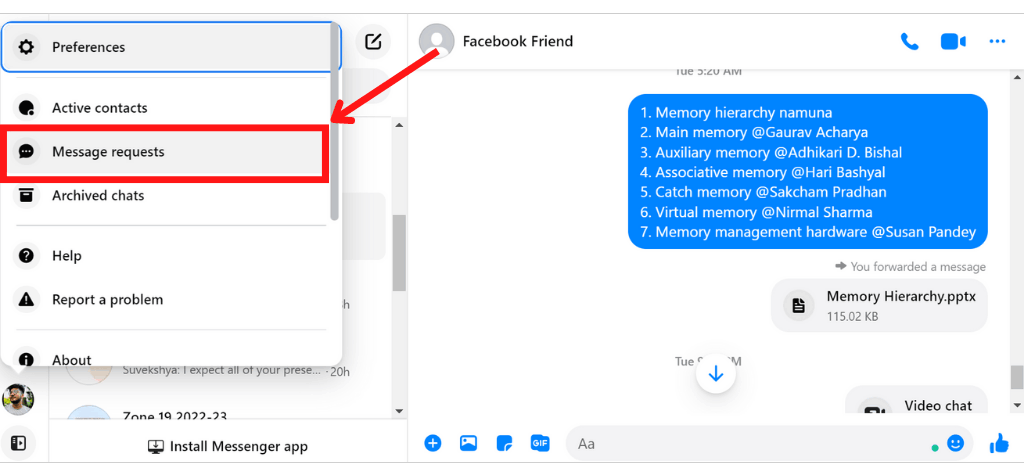
Step 2: Click on your profile photo from the top-left corner.
Step 3: Next, choose the “Message Request” option.

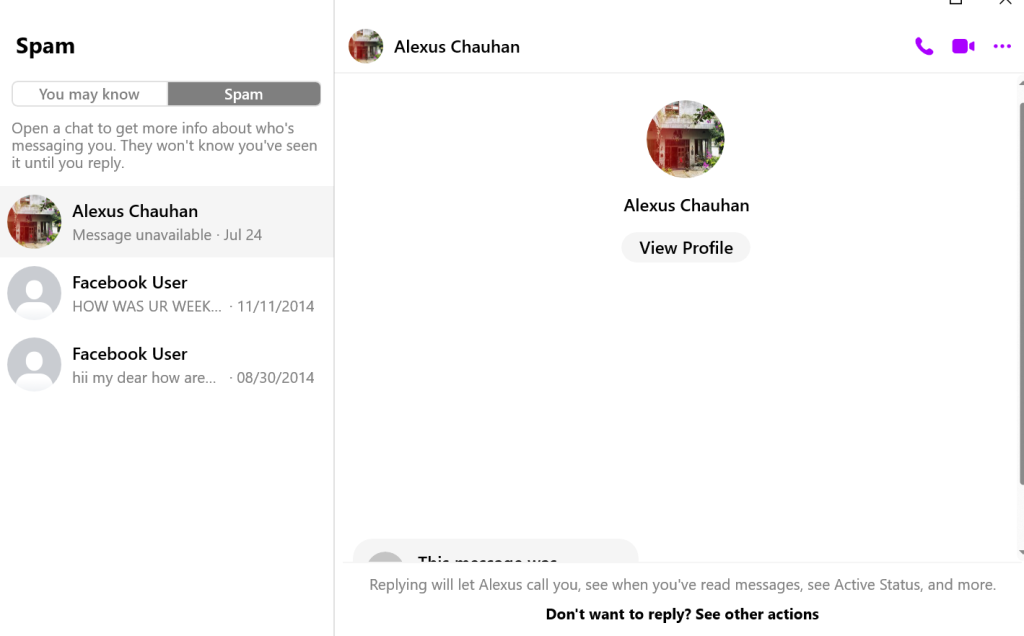
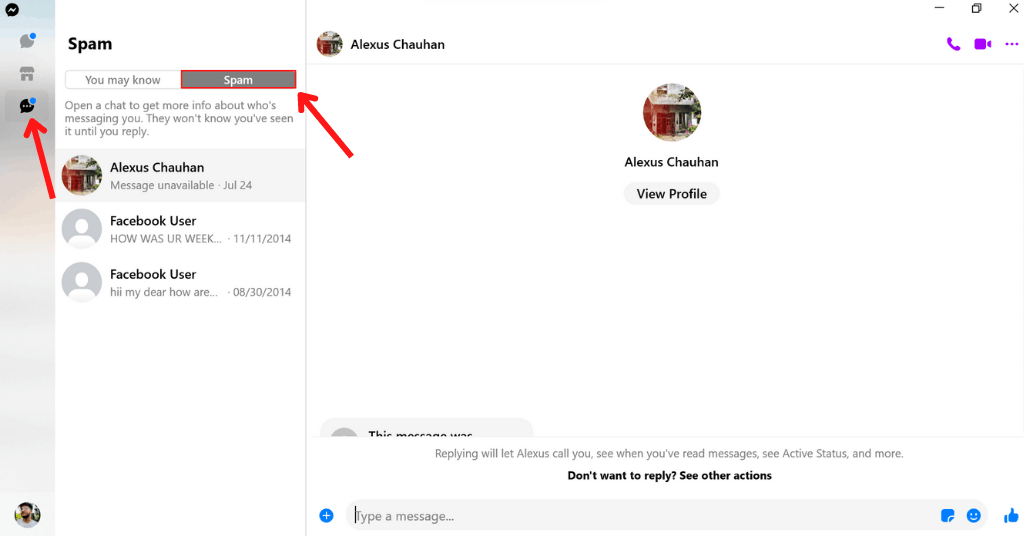
Step 4: After this, Select the “Spam” tab.
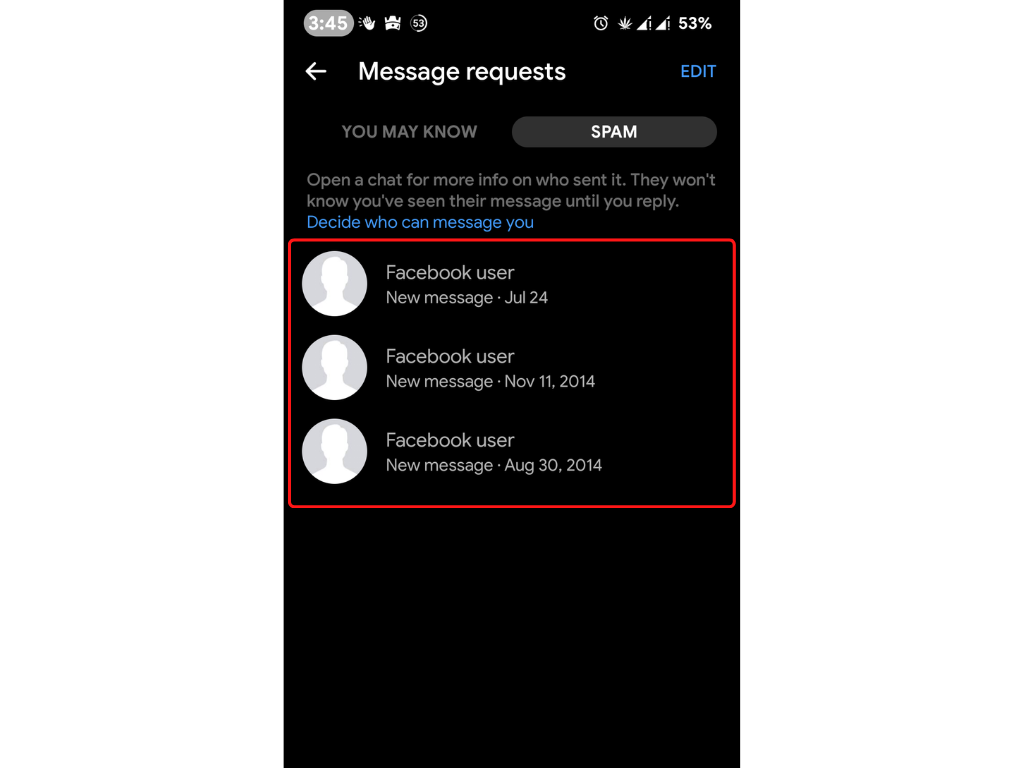
Step 5: Finally, you can view all the spam messages.
Note: The mobile application version for both Android and iOS share the same user interface. So, the steps mentioned above work for both platforms.
Method 2: View Spam Message On Facebook Web App
You can visit Facebook Message Page from your PC or laptop for this method. You can use this method for Windows, Linux, and Mac from your web browser.
Step 1: Firstly, log into your account by visiting facebook.com inside a web browser.
Step 2: Click on the messenger icon from the top-right corner.
Step 3: You must hover over any conversation and click on the three-dot menu.
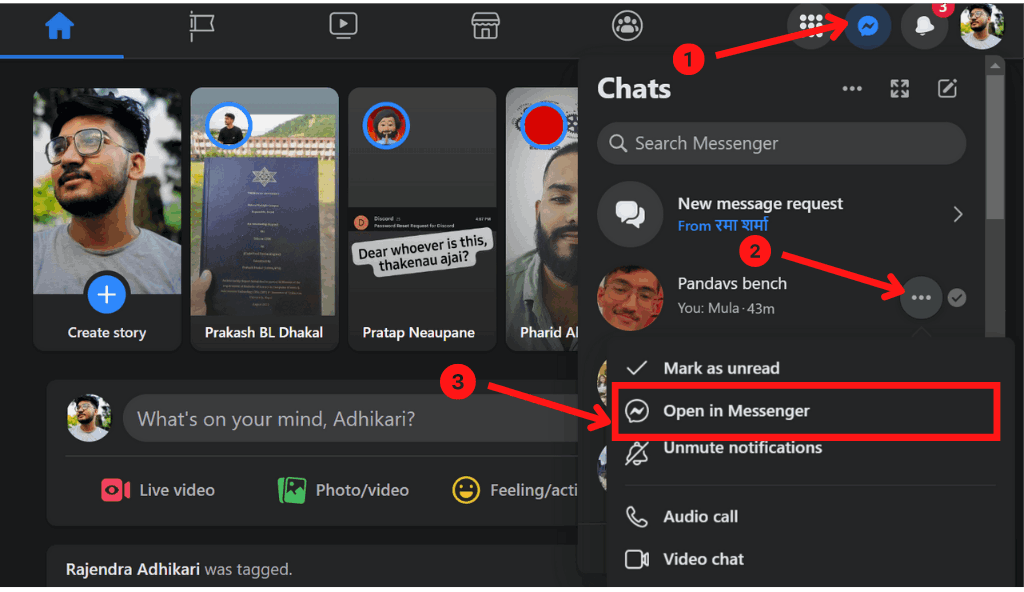
Step 4: In the next step, choose the “Open in Messenger” option.
Step 5: Next, click on the three-dot menu and choose the “Message Request” option.
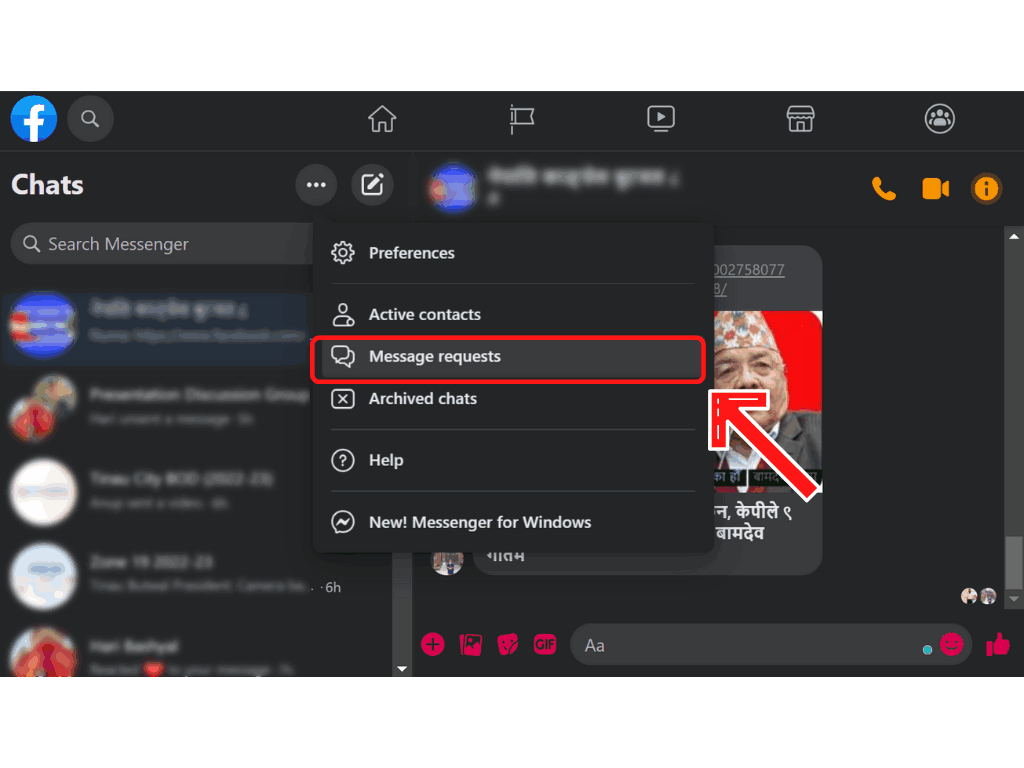
Step 6: After this, Select the “Spam” tab.
Step 7: Finally, you can view all the spam messages.
Method 3: View Spam Message On Messenger Website
Messenger is an online messaging service that can be used for Facebook or with a phone number.
If you use Facebook Messenger on your laptop, it’s simple to find Spam Messages. You need the given steps:
Step 1:
Firstly, visit messenger.com from your web browser and log in to your Facebook account.
Step 2:
Secondly, click on your profile picture. This will reveal different options.
Step 3:
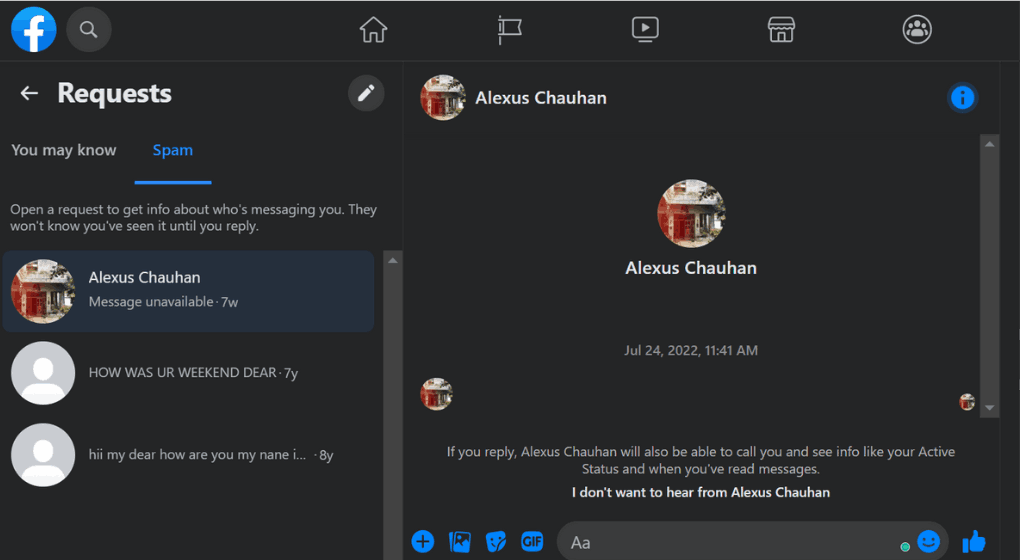
Now, choose the “Message Request” option.
Step 4:
After this, Select the “Spam” tab.
Step 5:
Finally, you have access to all spam messages.
The above method works for users who wish to View Spam Message On Messenger from their Desktop. If you don’t want to use your web browser, there is a Messenger application for your computer.
Method 4: Find Spam Messages on Messenger Desktop App
It’s now easier to message and video chat with friends and family from your computer, thanks to Facebook Messenger’s new desktop software. You may communicate with buddies and prompt video chats utilizing the app.
Moreover, the application is available on both Microsoft and Mac App stores. Also, the user interface is easy, which is precisely similar to mobile and online versions.
Step 1: Firstly, download the messenger application from their official website. You can also visit Microsoft Store and Mac App Store.
Step 2: Secondly, Login using your Facebook account.
Step 3: Now, you can click on the message icon.
Step 4: Next, switch to the “Spam” tab.
Step 5: Finally, you can view every spam mail.
Frequently Asked Questions
It’s easy to remove message request spam. You need to reply to the conversation. The chat will return to your inbox after doing this.
To block a bot on Android, open the chat thread containing that bot, then press “Manage” at the top of the screen. In the menu that appears, select “Manage messages” next. There is an option to ban only sponsored messages or all communications.
Facebook automatically classifies unwanted or new messages from unknown users as spam in order to protect your account.
Spam message requests are simple to remove. Simply respond to the chat. After doing this, the conversation will return to your inbox.
Reading a Facebook message does not install a virus in you. Your first focus should be the message’s content. Is there a random file that asks you to download it? Or are there any questionable links or images? If so, your chances of receiving a virus are increased.
Final Thoughts
The feature of Facebook to automatically detect spam messages is incredible. However, sometimes your important messages may end up in the Spam Section. Therefore, the above-mentioned steps will help you view Spam Message On Facebook Messenger.
Are you tired of getting unwanted messages? In some unique situations, Facebook Messenger may fail to move unwanted messages to Spam. Here, you can use our guide as a reference to quickly Delete Messages on FB Messenger.
If you’ve made it this far, you’re probably already aware of how to view Spam Message On Messenger. Please share this post with your friends and family if you find it useful.


