It’s important to learn methods to Change Administrator on Windows 11. There may be numerous reasons for you to do so. For example, you may need admin privileges to perform specific actions if you are a Windows user.
For proper operation, many programs and games require administrator access. An administrator account is needed to completely control your computer and ensure that some programs function correctly.
You can continue with our guide to Change Administrator on Windows 11.
What is Windows Administrator Account?
You must encounter a popup asking permission with you to “Run as administrator.” It indicates that you are using the standard version of Windows and requires you to switch to the administrator.
Some applications and files, however, are so crucial that making the wrong modifications might damage the operating system.
The Windows Administrator Account was created for this purpose.
To stop viruses or unauthorized users from altering the system, Windows 11 hides and disables the Administrator account by default.
However, to install apps, switch Windows languages or keyboard layouts, change Windows passwords, or trigger dark mode, enabling the Windows 11 administrator account is sometimes essential.
Difference Between an Administrator and a Standard User
The administrator is a user with full and unlimited computer access. This account has permission to install new software, add new users, delete existing users, change account passwords, and access system files.
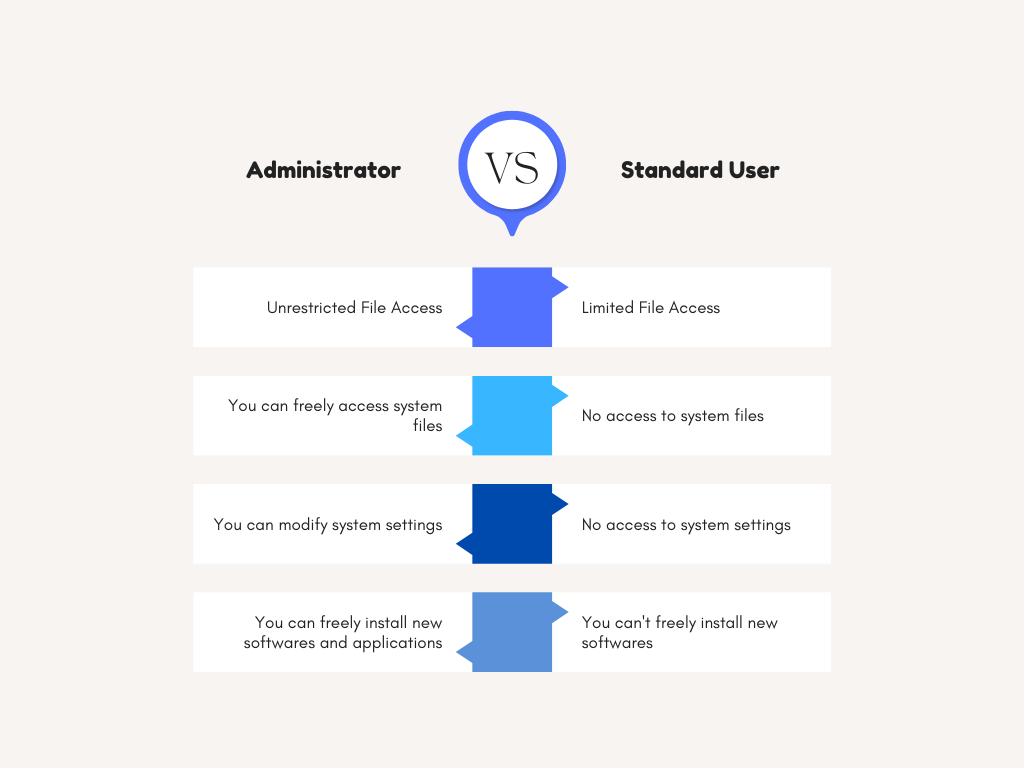
Meanwhile, standard users have limited access to computers. For example, you can’t freely install new software. Moreover, it prohibits you from accessing system settings and files.
Methods to Change Administrator on Windows 11
Let’s look at the best Methods to Change Administrator on Windows 11. You can do this using Windows Settings applications, Control Panel, and other alternatives.
Method 1: Using the Windows Settings app
The first method on our list includes the Microsoft Windows Settings application. Windows Settings is a collection of different options that lets you modify various elements in your computer.
Step 1: Firstly, open Windows Settings. You can use the Windows key + I from your keyboard.
Step 2: Click on the Accounts option from the left menu.
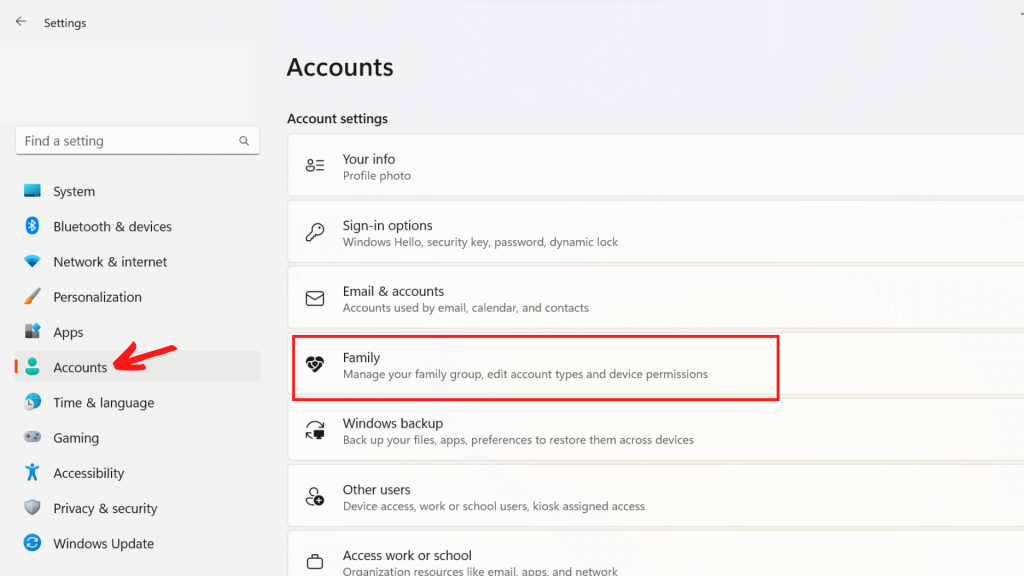
Step 3: After this, select the Family & other users option.
Step 4: Look for the standard account and click “change account type” under “Account Options.”
Step 5: Finally, update the Account type to Administrator and click OK.
Let’s assume you tried the above method but had no success changing the administrator account. So, we can use the next alternative.
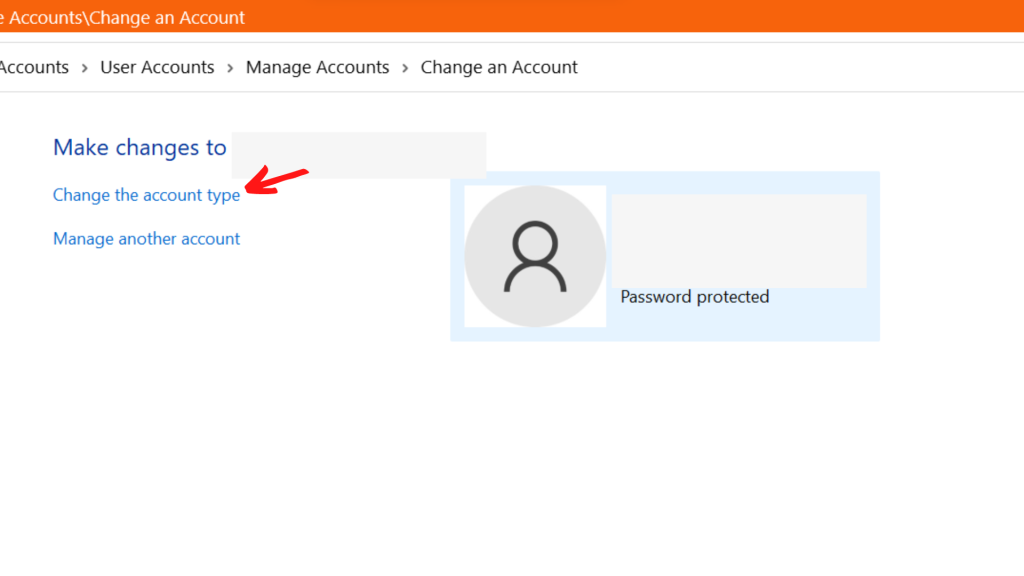
Method 2: Change Administrator on Windows 11 Using the Control Panel
The second method in our guide will use a control panel. Control Panel is a Microsoft Windows feature that provides different options to control our hardware and software.
Step 1: Firstly, click on the Search icon and search for the “control panel.”
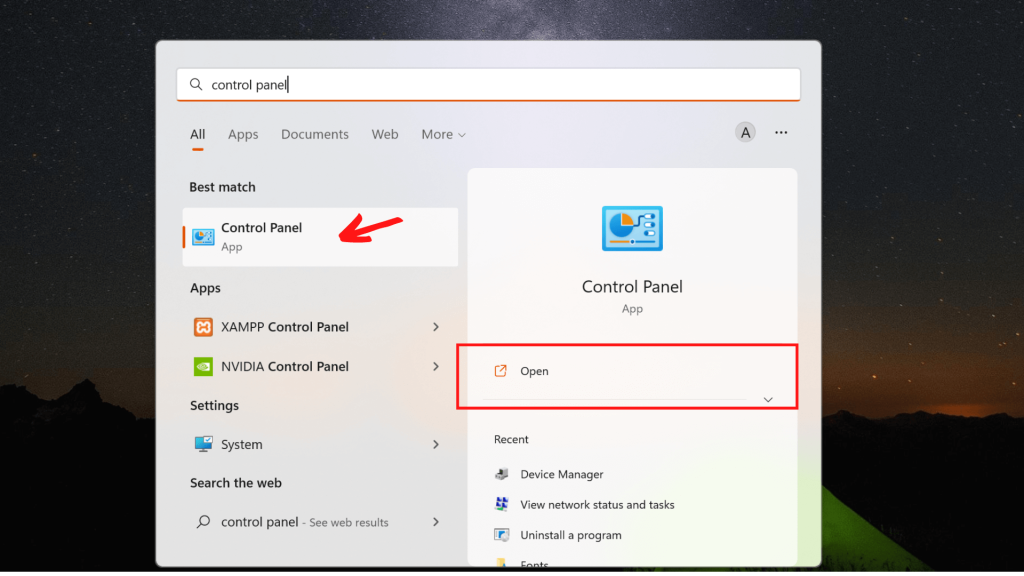
Step 2: Secondly, open the control panel from the search list.
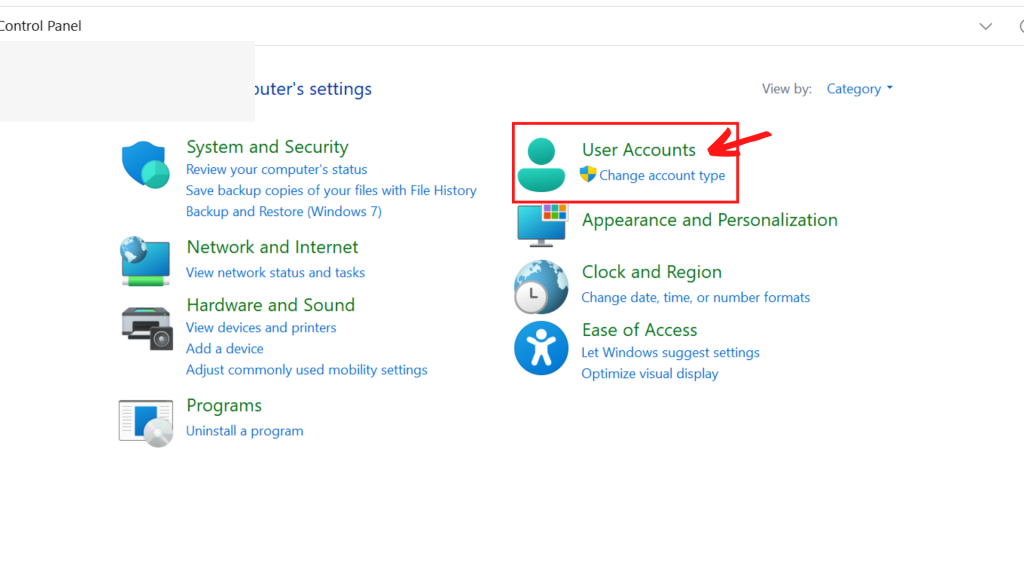
Step 3: After this, choose Change account type.
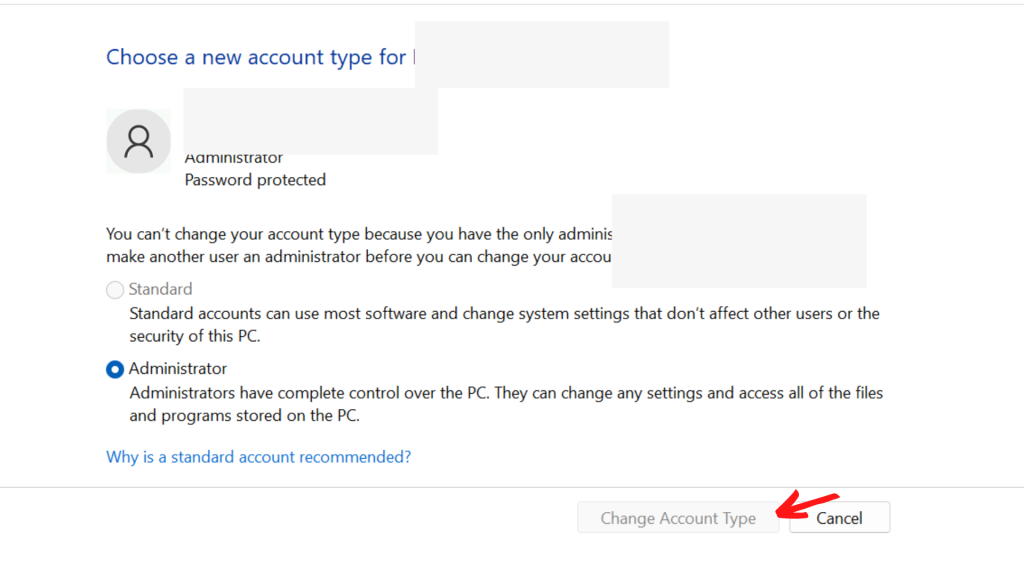
Step 4: Now, Select the account you wish to modify.
Step 5: Choose Change the account type next.
Step 6: Finally, select Administrator and click Change account type to confirm the changes.
If you are having a problem finding a control panel, here is a guide to Open Control Panel in Windows 11.
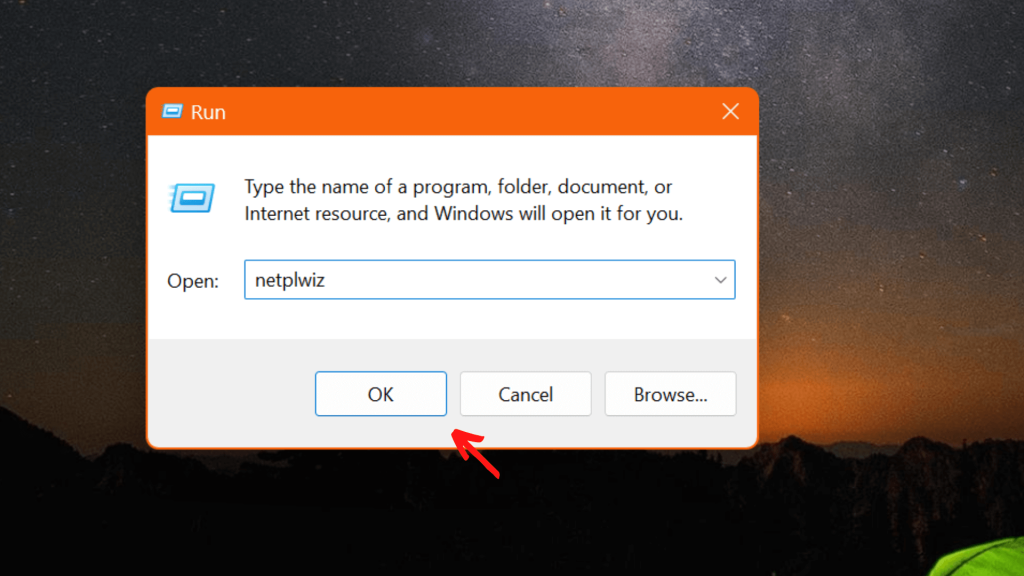
Method 3: Using the netplwiz command
The netplwiz command is a unique code that redirects you to the User Accounts option. You can use Window’s Run Feature to utilize the netplwiz command.
Step 1: Firstly, open the run using Windows Key + R.
Step 2: Secondly, type the “netplwiz” and press OK.
Step 3: You should double-click the account you wish to modify.
Step 4: Go to the Group Membership tab by navigating.
Step 5: Select Administrator now, then click Apply and OK.
Method 4: Change Windows 11 Administrator Using Command Prompt
The last method involves the use of a Command Prompt.
Step 1: Firstly, press the Windows key + X and choose the Windows Terminal (Admin).
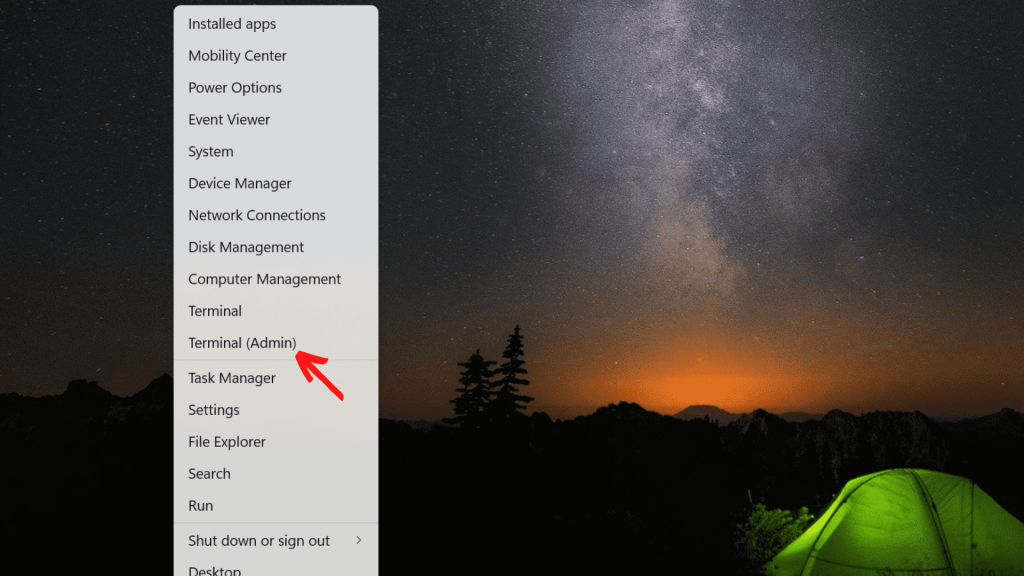
Step 2: Secondly, select the command prompt, which will be under the drop-down menu.
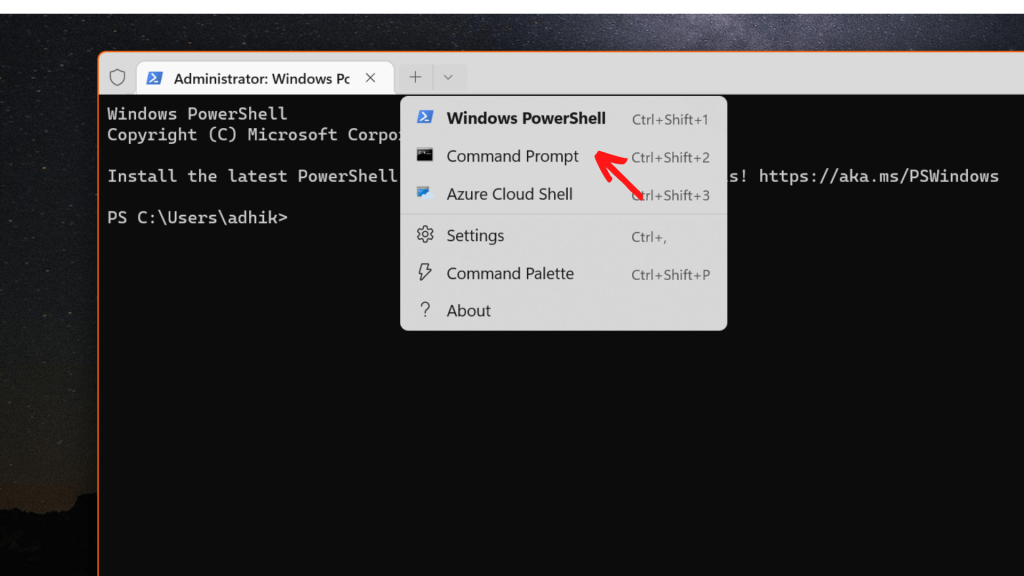
Step 3: Finally, you will be redirected to the command prompt window. Enter the following code.
net localgroup Administrators "your_user_name" /addNote: Use this command to remove a user account from the Administrators group:
net localgroup Administrators "your_user_name" /deleteFrequently Asked Questions
From the search bar, search and click on “Computer Management.” After this, you will see the Local Users and Groups option. Click on the arrow to expand it. Finally, use your mouse to right-click on the Administrator and choose “Rename.”
Yes, the local administrator account can be removed.
If you wish to delete a local account you are currently signed into; you must log out and log back in with a different account. You must log in as the Administrator to delete a user account.
Final Thoughts
The above methods can quickly help you Change Administrator on Windows 11. The access to Administrator privilege will provide full access to your computer’s data and the ability to install any necessary applications.
Administrators can access system files completely unfettered. However, there are several security issues with this. If malware were to enter your PC, it would be able to propagate nearly without limitations and carry out whatever tasks it pleased if it infected a user with full access privileges.


