Do you want to remove your Microsoft Account from Windows 11? Many curious users wonder if removing their Microsoft Account on Windows 11 is possible. This article will answer all your questions.
Windows 11 is an amazing operating system; using Microsoft accounts provides interesting new features. It helps to sync your other smart devices and enjoy real-time data exchange and other features.
However, some users also want to delete Microsoft accounts from PC and enjoy a private user experience. This might be for privacy concerns or other reasons.
So, without wasting time, let’s get straight into methods to delete Microsoft accounts in Windows 11.
Methods to Remove Microsoft Account from Windows 11
Although many methods are available on the internet, we have listed the most accessible and easy techniques every user can follow and execute.
Here is another big reason for Removing my Microsoft Account. If you are reselling your laptop or giving it to someone, it should be your priority to do this.
Method 1: Install Windows 11 without Adding your Account
For the user who got their first Windows 11 computer, it will ask you to create or enter your Microsoft account. We will skip it and continue without the account.
Here is an easy method to this, you can trick Windows 11 by setting it up so it will take your local account as the default account. Most importantly, you can do this without any internet connection. Here are the steps you need to follow:
1. Firstly, at the setup windows. Then, connect to the internet and enable check updates.
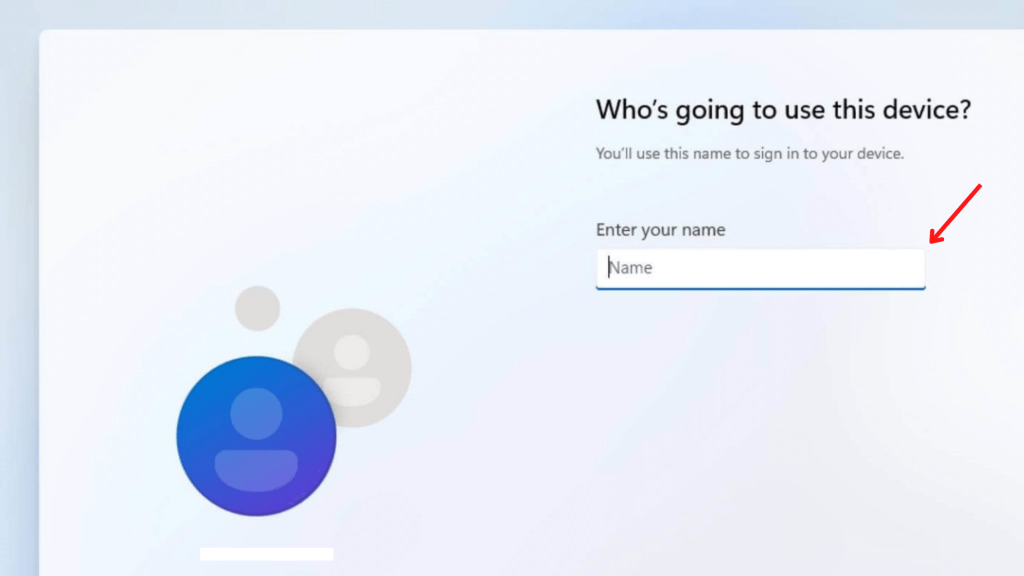
2. Secondly, disconnect your wifi or take out your Ethernet cable.
3. After you disconnect the internet, you can continue the setup without Microsoft Accounts and internet.
If you try this process on Windows 11 Pro or other versions, you can continue without the internet or click Sign-in options >> Offline account.
Method 2: Remove Microsoft Account from Windows 11 using Settings
This method applies to the user currently using Windows 11 and who has finished all the setup processes.
You can use this procedure to delete a Microsoft account from a laptop and switch to a local account. Here are the steps you need to follow:
1. First, Open Settings from the Start menu. You can also use Win + I as a shortcut.
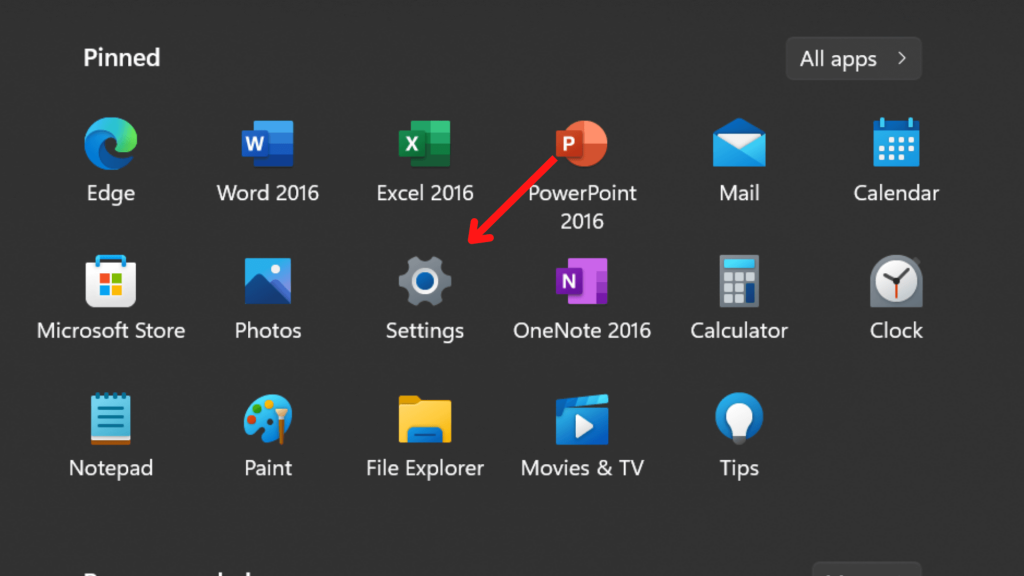
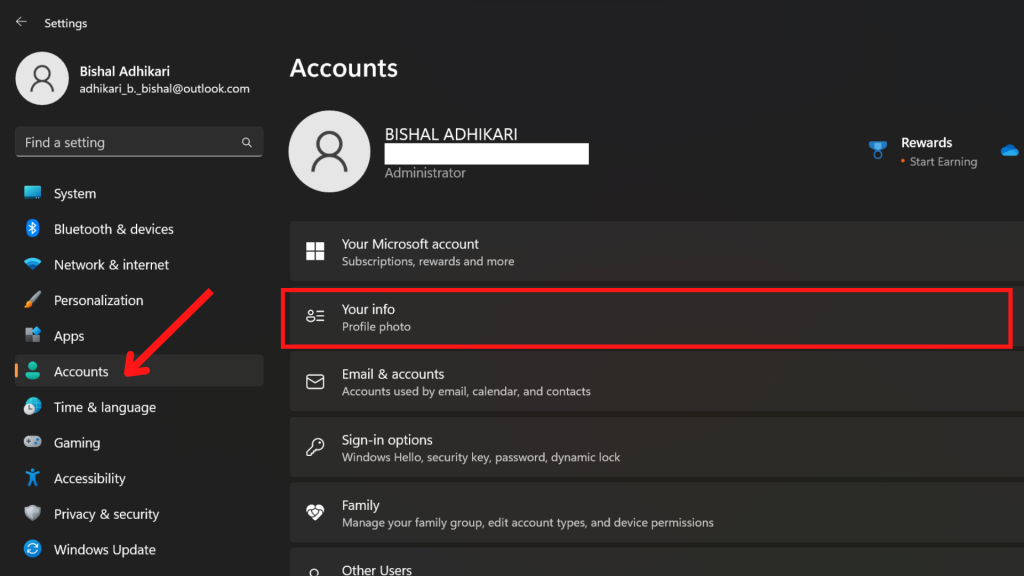
2. Secondly, select Accounts from the sidebar.
3. Click on Your info.
4. Select Sign in with a local account instead, under Account Settings.
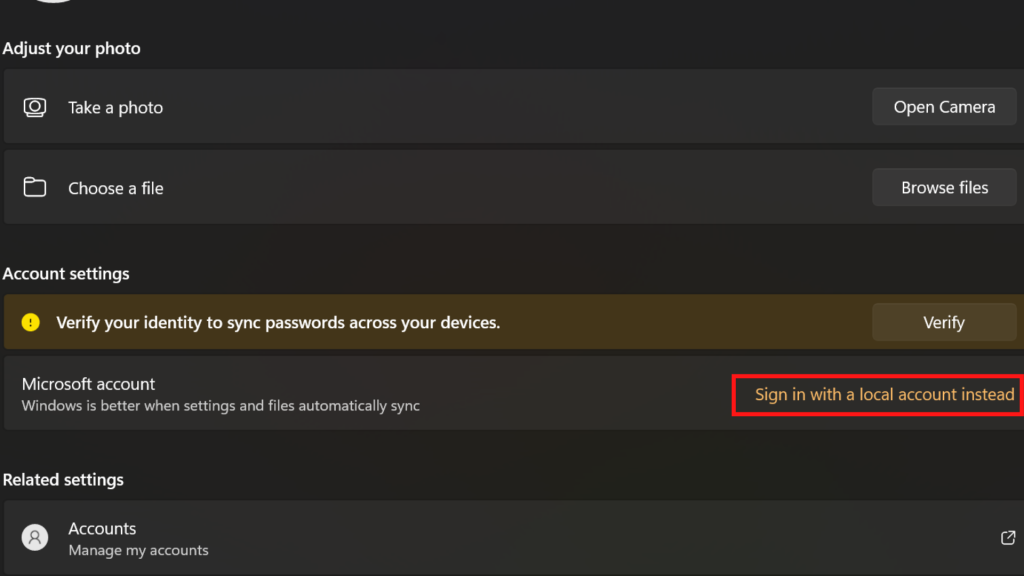
5. Confirm to sign out from your Microsoft Account.
6. Set up your local account with a username and password.
7. You must follow the screen’s instructions for removing work accounts.
If you have followed the above steps precisely, you should succeed in Removing your Microsoft Account. Then, you can normally use your PC without any disturbance.
Method 3: Delete your Microsoft Account using Control Panel
The third method on our list requires using Control Panel. You can easily remove a Microsoft account from an administrator.
This method is divided into three sections: creating a local account, setting up a local account as administrator, and deleting the Microsoft account.
Here are the steps you need to follow:
Step 1: You need to create a Local Account.
- Firstly, Open Settings from the Start menu. You can also use Win + I as a shortcut.

- From the sidebar, go to Accounts, then Family & Other Users.
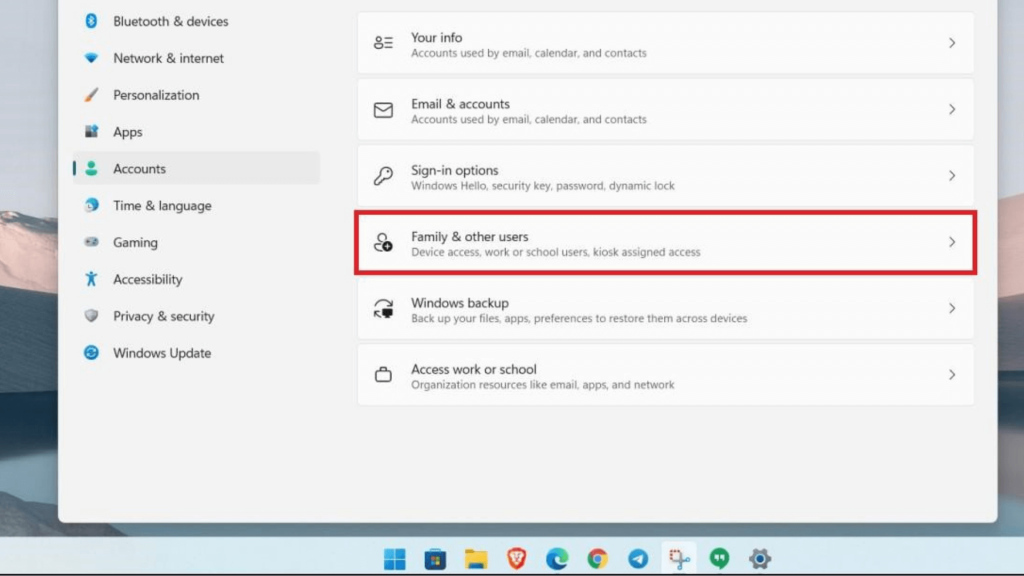
- Select Add account.
- If you have internet access, choose “I don’t have this person’s sign-in information.” (If you’re offline, it’ll lead you to the local account creation screen.)
- Next, select Add a user without a Microsoft account.
- Now, set a username and a password.
- Finally, click Next to complete the process of creating a local account.
Step 2: You now need to Set the Local Account as Administrator.
- Firstly, Open your Control Panel.
- Secondly, Click on User Accounts.
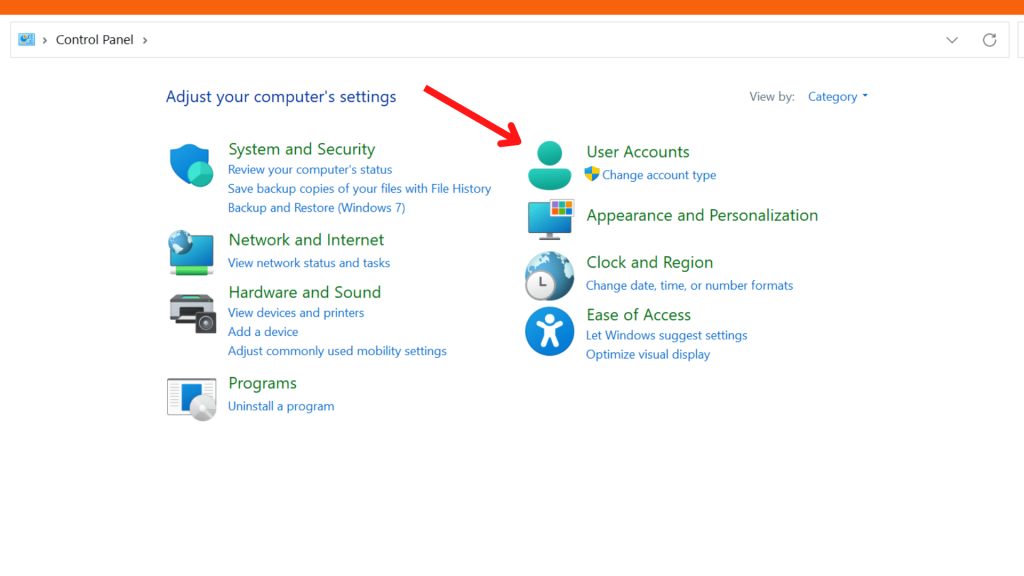
- On the next screen, You will find an option to Remove user accounts. Click on it.
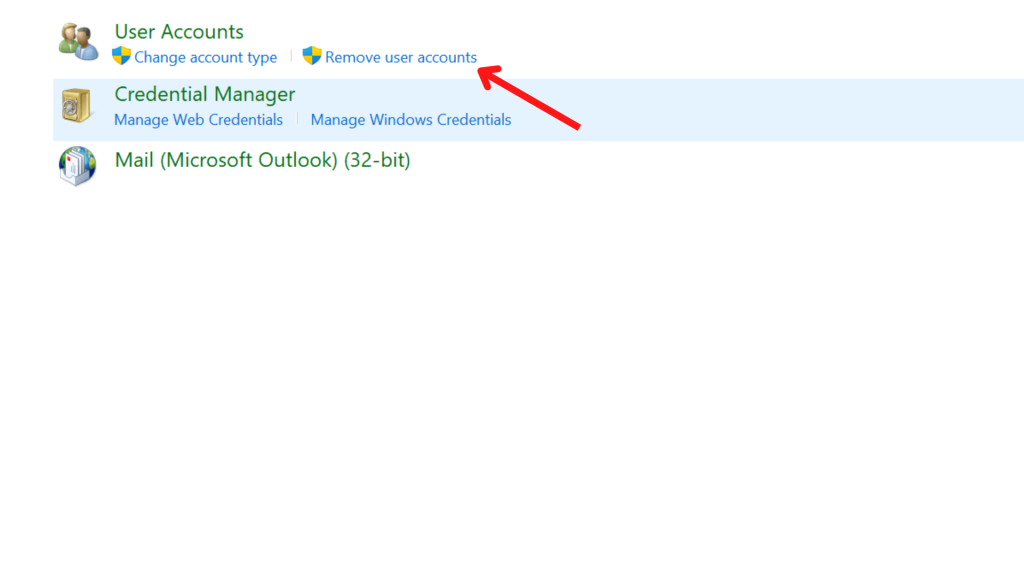
- Here tap on the local account you created before.
- Now, select a Change account type.
- After this, set it as Administrator.
- Finally, Save it.
Step 3: Now Delete the Microsoft Account
- Navigate to the User Accounts menu in the control panel.
- Here, tap on the Microsoft account you wish to remove.
- Next, Select Delete the account.
- On the next screen, you can choose between Delete Files or Keep Files.
Finally, you should succeed in Deleting your Microsoft Account using the control panel.
Method 4: Remove Microsoft Account From User Accounts Settings
The last method on our list applies to the users who tried all three methods above and still cannot solve the issue.
In the fourth method, we will use User Accounts Settings, and here are the easy steps you need to follow:
1. Open Run by using Win + R.
1. Next, type netplwiz and click Enter.
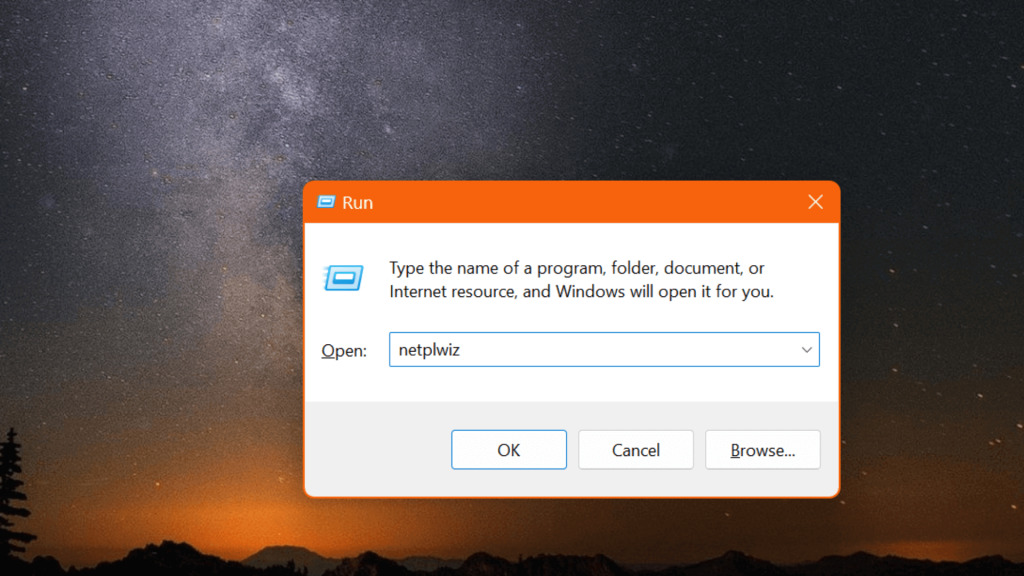
3. On the next screen, you can select the account you wish to remove.
4. Select the Microsoft Account and click remove.
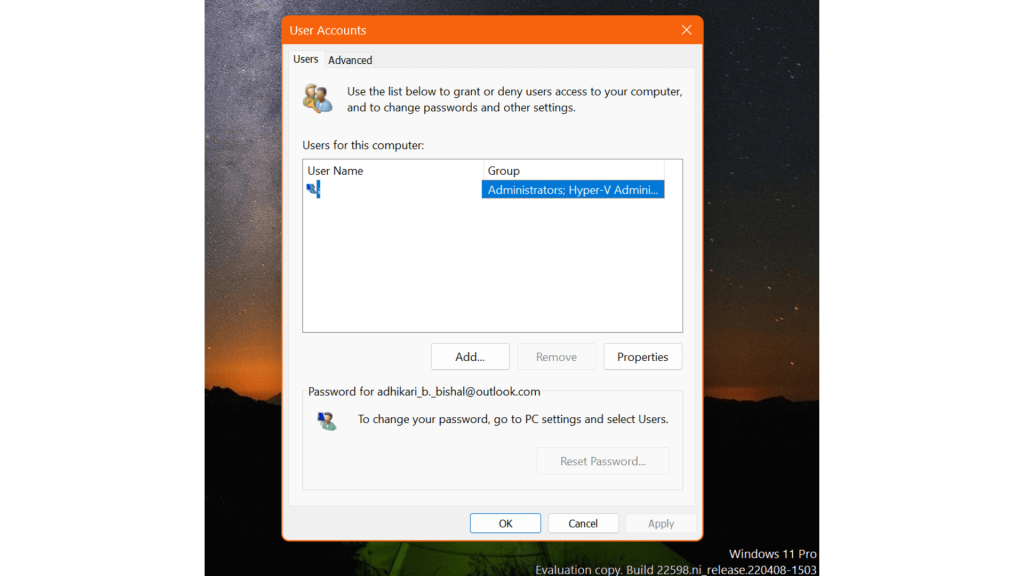
5. Confirm your decision by pressing “Yes.”
6. Finally, click Apply and Ok to save the changes.
This brings us to the end of the last method. We hope this process helped delete a Microsoft account from a laptop.
Final thoughts
Thus, this is the end of the article. We have filtered out the best working methods from the internet that can help you Remove your Microsoft Account from Windows 11. You can use all four methods, and they must work for everyone.
We hope this article on Removing Microsoft Accounts was helpful. If you want to know How To Turn Off Active Status On Facebook And Appear Offline, do check the dedicated articles on this.


